

This Article Shows the Detail Steps to Crop an Image in Final Cut Pro with Screenshots
This Article Shows the Detail Steps to Crop an Image in Final Cut Pro with Screenshots
Final Cut Pro X: How to Crop an Image

Benjamin Arango
Mar 27, 2024• Proven solutions
Cropping an image means to remove a portion of the image, either to hide something you don’t want the audience to see or emphasize different elements within the image. Just as Photoshop allows us to crop still images, Final Cut Pro X allows us to crop moving video clips, as you’ll learn in this article.
This is a basic tutorial about Apple Final Cut Pro X, professional video editing software. However, if video editing is new to you, consider Wondershare Filmora for Mac . This is a powerful but easy-to-use tool for users just starting out. Download the free trial version below.
 Download Mac Version ](https://tools.techidaily.com/wondershare/filmora/download/ )
How to Crop an Image in Final Cut Pro X
However, before I show how this is done, I need to explain one really important fact about video: all video uses what’s called “fixed resolution.” Fixed resolution means that high-definition video is always displayed at one of two sizes:
You May Also Like: How to Crop GIF Images >>
- 1920 x 1080 pixels
- 1920 x 1080 pixels
Unlike still images which can be thousands of pixels on a side, video clips are locked into one of these two sizes. This means that if you crop a video clip, to remove something you don’t like, the remaining pixels are often enlarged to fill the frame. Crop too much and your video clip will look blurry, blocky, and edges will look stair-stepped.
I’ll show you two ways to crop a video clip in this article, one that maintains a high image quality but reduces the size of the frame (called “trimming”) and the other that fills the frame with the image but reduces image quality (called “cropping”). You get to pick which one works the best for you.
TRIMMING
Trimming is the process of removing portions of a video clip without changing the size of the clip. This retains the highest amount of image quality.

For instance, here an image - courtesy of Pond5 (<www.pond5.com>). Let’s say that we want to emphasize the barn and not the sky.

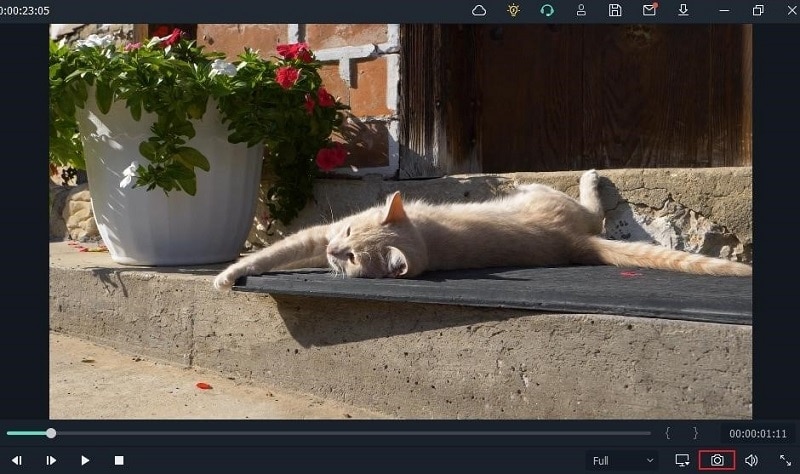
The easiest way to do this is to click the icon in the lower left corner of the Viewer and choose “Crop.”

This displays the cropping tools in the Viewer.

Click the Trim button to turn on Trim mode. (This article discusses Trim and Crop. I’ll cover the Ken Burns effect in a future article.)

Grab one of the blue dots and drag to hide portions of the frame. I generally grab a corner, but any blue dot will do.
NOTE: Press and hold the Option key while dragging to drag opposite edges or corners. Press and hold the Shift key to constrain the trim to the same aspect ratio as the frame.

Drag other corners or edges to further trim the image.

When you have trimmed the image the way you want, click the “Done” button in the top right corner to exit trimming mode.

If no other clip is below the trimmed clip, the background will be black.

But, it actually isn’t black, it’s transparent. If you put another clip below it, you’ll see the lower clip underneath the trimmed image.
Trimming allows us to hide portions of a video clip, without changing the image quality of the clip that remains. However, trimming always creates transparent sections within an image.
CROPPING
Cropping allows us to select just a portion of a video clip, without creating any transparent sections, BUT, it degrades image quality.
There are several ways we can choose to crop an image:

- Click the Crop icon, as we illustrated above

- Right-mouse click (or Control-click) inside the Viewer and choose
- Type Shift+C

* In the Inspector > Video tab > Crop (this option provides the most precision, but is the least intuitive to use)

If you selected any option except the Inspector, click the Crop button in the Viewer.

Now, drag a blue button in one of the corners. Because cropping, unlike trimming, fills the frame with the portion of the image we select, we can only move corners and the image is always sized to match the aspect ratio of our sequence.
Final Cut displays numbers at the top of the Viewer indicating how much the image has been cropped.

Reposition the frame by grabbing inside the rectangle and dragging.

When you are happy with the results, click the Done button in the top right corner.

Notice that the selected portion of the image now fills the frame. Even though there is a clip below our cropped clip, we don’t see it.
And, if you look closely, you’ll see that the cropped image is softer (blurrier) than the original and edges are more likely to be stair-stepped.
RESET

To reset a cropped image back to its default settings, open the Inspector and click the small curved arrow to the right of the word “Crop.”
SUMMARY
Trimming is used to hide portions of an image and superimpose it over another image.
Cropping is used to reframe an image, say from a medium shot to a close-up, but runs the risk of overly softening an image. The general rule is that cropping a little is OK, but don’t crop too much.
I use both these techniques frequently in my own editing.
Benjamin Arango
Benjamin Arango is a writer and a lover of all things video.
Follow @Benjamin Arango
Benjamin Arango
Mar 27, 2024• Proven solutions
Cropping an image means to remove a portion of the image, either to hide something you don’t want the audience to see or emphasize different elements within the image. Just as Photoshop allows us to crop still images, Final Cut Pro X allows us to crop moving video clips, as you’ll learn in this article.
This is a basic tutorial about Apple Final Cut Pro X, professional video editing software. However, if video editing is new to you, consider Wondershare Filmora for Mac . This is a powerful but easy-to-use tool for users just starting out. Download the free trial version below.
Download Mac Version ](https://tools.techidaily.com/wondershare/filmora/download/ )
How to Crop an Image in Final Cut Pro X
However, before I show how this is done, I need to explain one really important fact about video: all video uses what’s called “fixed resolution.” Fixed resolution means that high-definition video is always displayed at one of two sizes:
You May Also Like: How to Crop GIF Images >>
- 1920 x 1080 pixels
- 1920 x 1080 pixels
Unlike still images which can be thousands of pixels on a side, video clips are locked into one of these two sizes. This means that if you crop a video clip, to remove something you don’t like, the remaining pixels are often enlarged to fill the frame. Crop too much and your video clip will look blurry, blocky, and edges will look stair-stepped.
I’ll show you two ways to crop a video clip in this article, one that maintains a high image quality but reduces the size of the frame (called “trimming”) and the other that fills the frame with the image but reduces image quality (called “cropping”). You get to pick which one works the best for you.
TRIMMING
Trimming is the process of removing portions of a video clip without changing the size of the clip. This retains the highest amount of image quality.
For instance, here an image - courtesy of Pond5 (<www.pond5.com>). Let’s say that we want to emphasize the barn and not the sky.
The easiest way to do this is to click the icon in the lower left corner of the Viewer and choose “Crop.”
This displays the cropping tools in the Viewer.
Click the Trim button to turn on Trim mode. (This article discusses Trim and Crop. I’ll cover the Ken Burns effect in a future article.)
Grab one of the blue dots and drag to hide portions of the frame. I generally grab a corner, but any blue dot will do.
NOTE: Press and hold the Option key while dragging to drag opposite edges or corners. Press and hold the Shift key to constrain the trim to the same aspect ratio as the frame.
Drag other corners or edges to further trim the image.
When you have trimmed the image the way you want, click the “Done” button in the top right corner to exit trimming mode.
If no other clip is below the trimmed clip, the background will be black.
But, it actually isn’t black, it’s transparent. If you put another clip below it, you’ll see the lower clip underneath the trimmed image.
Trimming allows us to hide portions of a video clip, without changing the image quality of the clip that remains. However, trimming always creates transparent sections within an image.
CROPPING
Cropping allows us to select just a portion of a video clip, without creating any transparent sections, BUT, it degrades image quality.
There are several ways we can choose to crop an image:
- Click the Crop icon, as we illustrated above
- Right-mouse click (or Control-click) inside the Viewer and choose
- Type Shift+C
* In the Inspector > Video tab > Crop (this option provides the most precision, but is the least intuitive to use)
If you selected any option except the Inspector, click the Crop button in the Viewer.
Now, drag a blue button in one of the corners. Because cropping, unlike trimming, fills the frame with the portion of the image we select, we can only move corners and the image is always sized to match the aspect ratio of our sequence.
Final Cut displays numbers at the top of the Viewer indicating how much the image has been cropped.
Reposition the frame by grabbing inside the rectangle and dragging.
When you are happy with the results, click the Done button in the top right corner.
Notice that the selected portion of the image now fills the frame. Even though there is a clip below our cropped clip, we don’t see it.
And, if you look closely, you’ll see that the cropped image is softer (blurrier) than the original and edges are more likely to be stair-stepped.
RESET
To reset a cropped image back to its default settings, open the Inspector and click the small curved arrow to the right of the word “Crop.”
SUMMARY
Trimming is used to hide portions of an image and superimpose it over another image.
Cropping is used to reframe an image, say from a medium shot to a close-up, but runs the risk of overly softening an image. The general rule is that cropping a little is OK, but don’t crop too much.
I use both these techniques frequently in my own editing.
Benjamin Arango
Benjamin Arango is a writer and a lover of all things video.
Follow @Benjamin Arango
Elevate Your Video Production on Mac with Adobe Premiere Pro
Adobe Premiere Pro for Mac: The Video Editor for Professionals

Liza Brown
Mar 27, 2024• Proven solutions
Adobe Premiere Pro for Mac is the most probable picked video editing application for pro-level videographers. This application is well-known among Mac users for social sharing, TV, and filmmaking tasks. Combined with other Adobe-based initiatives, Premiere Pro for Mac works as a powerful solution to video-related tasks including video compression, special effects, and much more for Mac users. What’s more, you can make and renew your video editing tasks from any MacBook system with a common Adobe ID.
- Part1: Premiere Pro for Mac Review - Best Professional Video Editor
- Part2: Adobe Premiere Pro for Mac Alternatives
- Part3: FAQs of Adobe Premiere Pro for Mac
Part1: Premiere Pro for Mac Review - Best Professional Video Editor
Premiere Pro for Mac gives excellent editing of 4K and higher, with the 32-bit tone, both in RGB and YUV shading space. This pro-level video editor gives you the control to reshape the excellence of videos. With the assistance of Premiere Pro 2021’s editing features, editors can now undoubtedly convert the formats of videos, set the frame rate, eliminate any undesirable clips and add special effects with full ease. Also, with the wonderful illustrations and text effects, you can make your intros and outros more compelling than ever. Let’s look deeper into some of its advanced features lists.

Main Features:
- A professional program for professional non-linear video editing
- Supports plenty of special effects with After Effects CC compatibility.
- Got countless video editing tools for achieving anything in editing
- Enables editors to edit footage in any format, from 8K to virtual reality
Pros:
- Many organizational tools and features
- Responsive speed especially for fast rendering
- The rich ecosystem of video production apps
Cons:
- Intimidating interface for nonprofessionals
- Some techniques require additional applications
- No sound effect samples included
Target Users: Professional Editors
Part2: Adobe Premiere Pro for Mac Alternatives
1. For Beginners: Wondershare Filmora for Mac
If you’re a beginner and you feel exhausted due to the complexity of video editing on Mac systems, then Filmora is probably the best choice for you. This video editor by Wondershare now accompanies some powerful and easy to embed features you can utilize without a prior video editing experience. Being a novice video editor of the era, Filmora offers a plethora of quality features including keyframes, animations, intros and outros editing, special templates for titles, and much more. From basic to advanced-level video editing tasks, Filmora is here to accompany you while performing your desired ones.

Like Premiere Pro, Filmora has its target audience as professionals as well as beginners. Due to its intuitive interface, it’s termed as the best pick as a Premiere Pro alternative because it has the user-friendly approach to perform vital video editing tasks which requires a pro-level experience if you’re performing it with some other applications available for Mac. That’s why Filmora has huge demand in the video editing industry as it embeds face detection, motion tracking, precise editing as well as suitable formats for every platform.
Pros:
- Easy to use on Mac
- Supports all popular export options and input formats
- Add filters and the overlays easily
- Cloud-based effect library
- Built-in sound and music effects
- Affordable price
Cons:
- Watermark is available in the free version
2. For Professionals: Final Cut Pro
Apple’s Final Cut Pro is now among the top-notch video editing applications you can utilize to maximize the creativity of your video editing journey. It incorporates efficient video editing features from basic to pro-level especially for the professional movie makers that increase its popularity among the beginners as well. As compared to Adobe Premiere Pro, this application has a pretty intuitive interface as well as fast processing of 4K and higher quality video projects. Hence, we can say that Final Cut Pro is one of the best Premiere Pro alternatives for professionals.

Pros
- Smooth video editing experience
- 2D/3D titles
- Various effects and filters
- Provide built-in audio editor feature.
Cons
- Only available for Mac
- Expensive compared to other software
- Customer support is not good enough.
- Not easy for beginners.
Part3: FAQs of Adobe Premiere Pro for Mac
1. Can Adobe Premiere Pro run natively on M1 Macs?
Yes! Adobe Premiere Pro for Mac now runs natively on the M1 kind. Furthermore, Adobe Premiere Pro runs 80% quicker on M1.
2. Can a MacBook Air run Adobe Premiere Pro?
Of course, Yes! MacBook Air has indeed experienced swift running of Premiere Pro unless you try to extend it with the 4K editing. For 4k and above rendering, MacBook Air runs down, and sometimes it gets exhausted dealing with the longer time frames for the rendering process.
Final Words
Adobe Premiere Pro for Mac is the widely-used video editor among professional video content creators. Even though it is powerful enough to make your videos look like what you can imagine, it is not easy to master it even for professionals, not mention beginners and intermediates. So we highly recommend normal users to get Wondershare Filmora for Mac to edit video easily. And Filmora is powerful enough to make your videos attractive. Download it now to start your video editing journey.
Liza Brown
Liza Brown is a writer and a lover of all things video.
Follow @Liza Brown
Liza Brown
Mar 27, 2024• Proven solutions
Adobe Premiere Pro for Mac is the most probable picked video editing application for pro-level videographers. This application is well-known among Mac users for social sharing, TV, and filmmaking tasks. Combined with other Adobe-based initiatives, Premiere Pro for Mac works as a powerful solution to video-related tasks including video compression, special effects, and much more for Mac users. What’s more, you can make and renew your video editing tasks from any MacBook system with a common Adobe ID.
- Part1: Premiere Pro for Mac Review - Best Professional Video Editor
- Part2: Adobe Premiere Pro for Mac Alternatives
- Part3: FAQs of Adobe Premiere Pro for Mac
Part1: Premiere Pro for Mac Review - Best Professional Video Editor
Premiere Pro for Mac gives excellent editing of 4K and higher, with the 32-bit tone, both in RGB and YUV shading space. This pro-level video editor gives you the control to reshape the excellence of videos. With the assistance of Premiere Pro 2021’s editing features, editors can now undoubtedly convert the formats of videos, set the frame rate, eliminate any undesirable clips and add special effects with full ease. Also, with the wonderful illustrations and text effects, you can make your intros and outros more compelling than ever. Let’s look deeper into some of its advanced features lists.
Main Features:
- A professional program for professional non-linear video editing
- Supports plenty of special effects with After Effects CC compatibility.
- Got countless video editing tools for achieving anything in editing
- Enables editors to edit footage in any format, from 8K to virtual reality
Pros:
- Many organizational tools and features
- Responsive speed especially for fast rendering
- The rich ecosystem of video production apps
Cons:
- Intimidating interface for nonprofessionals
- Some techniques require additional applications
- No sound effect samples included
Target Users: Professional Editors
Part2: Adobe Premiere Pro for Mac Alternatives
1. For Beginners: Wondershare Filmora for Mac
If you’re a beginner and you feel exhausted due to the complexity of video editing on Mac systems, then Filmora is probably the best choice for you. This video editor by Wondershare now accompanies some powerful and easy to embed features you can utilize without a prior video editing experience. Being a novice video editor of the era, Filmora offers a plethora of quality features including keyframes, animations, intros and outros editing, special templates for titles, and much more. From basic to advanced-level video editing tasks, Filmora is here to accompany you while performing your desired ones.
Like Premiere Pro, Filmora has its target audience as professionals as well as beginners. Due to its intuitive interface, it’s termed as the best pick as a Premiere Pro alternative because it has the user-friendly approach to perform vital video editing tasks which requires a pro-level experience if you’re performing it with some other applications available for Mac. That’s why Filmora has huge demand in the video editing industry as it embeds face detection, motion tracking, precise editing as well as suitable formats for every platform.
Pros:
- Easy to use on Mac
- Supports all popular export options and input formats
- Add filters and the overlays easily
- Cloud-based effect library
- Built-in sound and music effects
- Affordable price
Cons:
- Watermark is available in the free version
2. For Professionals: Final Cut Pro
Apple’s Final Cut Pro is now among the top-notch video editing applications you can utilize to maximize the creativity of your video editing journey. It incorporates efficient video editing features from basic to pro-level especially for the professional movie makers that increase its popularity among the beginners as well. As compared to Adobe Premiere Pro, this application has a pretty intuitive interface as well as fast processing of 4K and higher quality video projects. Hence, we can say that Final Cut Pro is one of the best Premiere Pro alternatives for professionals.
Pros
- Smooth video editing experience
- 2D/3D titles
- Various effects and filters
- Provide built-in audio editor feature.
Cons
- Only available for Mac
- Expensive compared to other software
- Customer support is not good enough.
- Not easy for beginners.
Part3: FAQs of Adobe Premiere Pro for Mac
1. Can Adobe Premiere Pro run natively on M1 Macs?
Yes! Adobe Premiere Pro for Mac now runs natively on the M1 kind. Furthermore, Adobe Premiere Pro runs 80% quicker on M1.
2. Can a MacBook Air run Adobe Premiere Pro?
Of course, Yes! MacBook Air has indeed experienced swift running of Premiere Pro unless you try to extend it with the 4K editing. For 4k and above rendering, MacBook Air runs down, and sometimes it gets exhausted dealing with the longer time frames for the rendering process.
Final Words
Adobe Premiere Pro for Mac is the widely-used video editor among professional video content creators. Even though it is powerful enough to make your videos look like what you can imagine, it is not easy to master it even for professionals, not mention beginners and intermediates. So we highly recommend normal users to get Wondershare Filmora for Mac to edit video easily. And Filmora is powerful enough to make your videos attractive. Download it now to start your video editing journey.
Liza Brown
Liza Brown is a writer and a lover of all things video.
Follow @Liza Brown
Get Animated: 28 Best Video to GIF Converters
GIF pictures are becoming more popular among users due to their ability to communicate many data. GIFs are a good option when you can’t fit large movies into your project but want to offer more precise visual information. Making GIFs is as simple as converting a video clip to GIF. If the GIF file is still too huge, cutting it is excellent.
After a careful review, we picked together the best tools to convert video to GIFs to help you produce GIFs with ease. They’re gif video creators that work on both Windows and Mac.
- Filmora
- Movavi
- Gifski
- Freemore
- GIF Brewery by Gfycat
- Any GIF Animator
- KickMyGraphics
- Instagiffer
- Microsoft GIF Animator
- VideoSolo Video to GIF Converter
- Movie to GIF
- 12 Best Video To GIF Converter Online
- Media.io
- Ezgif-F
- Adobe
- Cloudconvert
- Vistacreate
- Online Converter
- GIPHY
- IMG2GO
- MakeAGIF
- Convertio
- HNET
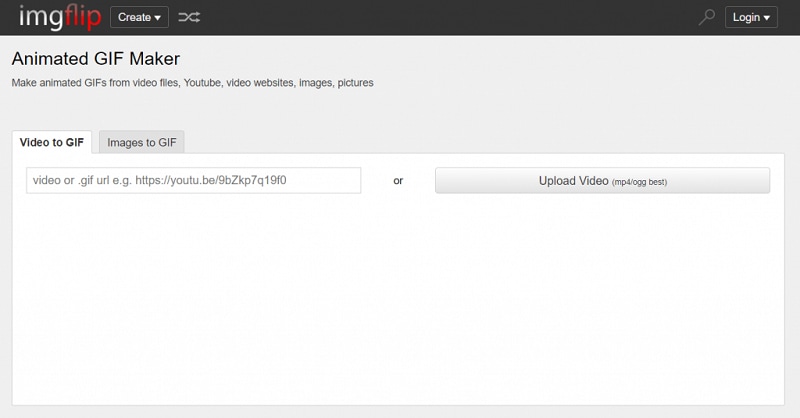
- ImgFlip
- 5 Best Video To GIF Converter for iPhone/iPad/Android Phone
What’s the Difference Between a Video and a GIF?
GIFs are very popular among digital marketers (and anybody who uses the internet). These little bursts of repeating material may breathe new life into otherwise dull blog posts, emails, web pages, infographics, and other documents. Isn’t it thrilling?
While GIFs and videos may seem identical, the two forms of media are highly distinct, and the differences begin when the file types are first gathered.
GIFs are basically soundless picture collections that have been modified to resemble a video. On the other hand, videos are gathered as a kind of rich media that includes both motion and sound. What’s more, the viewing experiences for these two file kinds are somewhat different.
But why would someone want to convert a video to a GIF, to begin with? There are several explanations for this
GIFs are inexpensive
When converting a video to a GIF, you’re repurposing existing material to create something new. Why not get the most out of your video marketing strategy?
GIFs are simple to create
You don’t need to be a video expert in producing a GIF. Creating a GIF using one of the video-to-GIF converters listed below may take a few minutes.
GIFs are simple to use
GIFs offer motion and excitement to digital information without needing the viewer to devote a significant amount of time and attention - a significant advantage given the typical human attention span of roughly 8 seconds.
GIFs are effective
When Dell executed a GIF-centric marketing campaign, it experienced a 109 percent boost in sales, indicating that consumers appreciate (and react to) this basic but fascinating medium. Check out these video-to-GIF converters below to pick the best one for you.
14 Best Video Splitter for Windows/Mac
1. Filmora
You may quickly create a classic GIF picture as an output using Wondershare Filmora’s interactive platform. All common video file types, such as MKV, WMV, AVI, and MP4, are supported. The greatest thing is that Filmora does not impose any file size restrictions during conversion so that users may convert HD films to GIF graphics.
It’s a powerful image editor with many appealing features that allow you to personalize your picture completely. To create original GIFs, feel free to use complex components, animations, text, overlays, and so on.
In addition, Filmora enables you to extract still photos from videos of the same resolution. The retrieved PNG pictures may be combined and edited to create an intriguing GIF.
Platform: Windows/Mac
Price: Free Trial
Features
- 4k editing support enables users to edit and export videos at a resolution of up to 4k.
- scene detection
- audio equalizer
- GIF stabilization
Pros
- Easy to use, very intuitive interface.
- Plenty of effects and presets. Useful for less experienced people.
- Very many online resources, tutorials, preset packs, effects, etc.
- Outstanding and responsive support. In live chats always polite and professional.
- It is constantly updated.
Cons
- 4K editing sucks sometines
2. Movavi
Movavi Video Editor is a pioneer in the video editing industry due to its simplicity of use and dependable video editing capabilities. This software, available for both Windows and Mac OS, has quickly become a popular favorite. It is one of the best MP4-to-GIF converters because of its speed and reliability. It will let you produce GIFs from your movies in no time.
This program’s ability to batch export files is one of its best features, making producing and converting many GIFs simpler. Therefore, it is the most practical for frequent GIF makers, whether for personal or professional usage.
Though you may need to buy Movavi to get all of these excellent features, a free trial version is available for those who want to check it out before buying. The trial version is also ideal for individuals who need to convert movies to GIFs once.
Platform: Windows/Mac
Price: $49.95/year for 1PC
Features
- Fast processing of 4K videos.
- Timeline markers.
- Keyframe animation.
- Built-in media pack.
- Automatic video creation.
Pros
- Has editing options
- Clear interface
- Supports many formats
Cons
- Only a trial version with limited period is free.
- It’s very basic
- No copy pasting options
3. Gifski
You can convert videos to GIFs using Gifski . Drop a file into the Gifski window or use the Open button to search your Mac for a video. The segment of the video you wish to transform into a GIF will be readily selected.
You may choose the size of your GIF, the frame rate, graphic quality, and how many times it loops using this Mac GIF creator. You can have it repeat indefinitely, and you can also make it bounce (this is where it plays to the end, then plays backward, then forward again, and so on).

Platform: Mac
**Price:**Free
Features
- High-quality GIFs
- Command-based conversion
Pros
- Ihe software is safe to use.
- It support is good
Cons
- It doesn’t work offline
- Some users complain about the search function
4. Freemore
Freemore Video to GIF Converter is software that converts videos into animated GIFs, enabling you to pick the precise frames to include in the GIF and change the frame’s width and height if you have a unique use case.
This program is completely free and supports all of the most common video formats, including MP4, MPEG, MOV, FLV, etc. While this tool is free, it wasn’t necessarily created to be attractive; if you download Freemore, anticipate a more practical design that, while very functional, isn’t particularly pleasing to the eye.
Freemore Video to GIF Converter is only accessible for download on Windows, unfortunate for Mac users.
Platform: Windows/Mac
**Price:**Free
Features
- Convert video files to animated GIFs;
- Make GIFs for a website, mobile phone screensaver, signature, etc.
- Clip video to create GIF;
- Adjust the width and height to suit your needs;
- Support all key video formats.
Pros
- Support multi-core CPU
- Less burden on your system
- Abundant guide content & online support
- Free, safe & no restrictions
Cons
- The maximum input video size is 10 MB
- It might be unstable on a new OS like Windows 10
5. GIF Brewery by Gfycat
Look no farther than GIF Brewery by Gfycat for Mac users searching for a simple video to GIF converter tool.
You may begin by importing a movie, producing a screen recording, or recording straight from your camera using GIF Brewery. You may then customize your GIF by scaling the video, changing the frame rate, and adding filters and overlays to give it a unique style.
Finally, save your GIF to your computer or send it to someone else using iMessage or Mail. The app gets excellent reviews in the app store and is free to download.
**Platform:**Mac
**Price:**Free
Features
- It gives everyone the power to create stunning GIFs from video files.
- It’s simple yet powerful.
Pros
- The GIF Brewery design is good.
- The performance of GIF Brewery is good.
- he GIF Brewery is compatible with lots of devices.
- The support of GIF Brewery is excellent and useful.
- The price of GIF Brewery is free or perhaps freemium.
Cons
- GIF Brewery 3 by Gfycat Reduce battery consumption
- Loads very slowly
6. Any GIF Animator
Any GIF converter app’s simple and powerful design can instantly convert your favorite movies into interactive GIFs. It can play a variety of file types, including WEBM, ASF, MPG, FLV, and AVI. The greatest aspect is that this program also enables users to import media files from optical storage devices such as DVDs and even analyze camera-captured displays. Users may easily select frame rate start and finish time markers, and complex text overlays, loops, and resolution effects are available for customization.
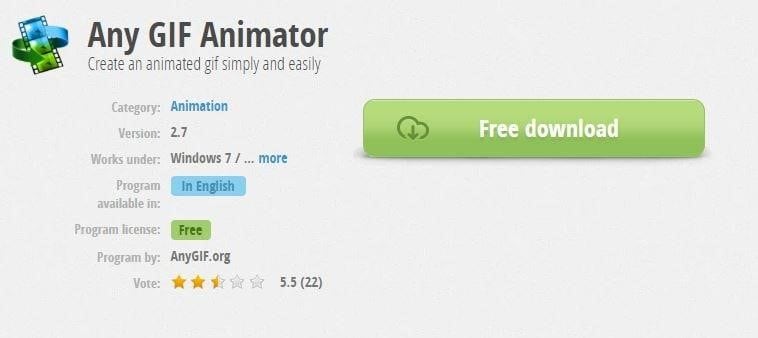
**Platform:**Windows/Mac
**Price:**free with ads
Features
- Its simple and intuitive layout allows you to operate it without consulting the user manual.
- It’s straightforward and hassle-free.
- With the aid of an animation wizard, you can polish your GIF animation. It’s a simple and fast approach to customizing and enhancing your GIF animation.
- You receive a built-in picture editor with a full collection of editing capabilities.
- On Any GIF Animator, you may convert video to gif in various visual formats. PNG, JPEG, TIFF, BMP, GIF, ICO, PSD, PCX, RLE, PIC, DIB, AVI, PCD, WMF, and more formats are included.
Pros
- Easy to install
- Neat interface
- Clips can be edited
- Accepts any video file
Cons
- Sometimes crashes
- Cannot animate photos
- Upload time takes long
- Converting takes long
7. KickMyGraphics
Here’s a simple yet effective GIF converter that can record, generate, and manipulate GIF pictures to deliver high-quality customized output. Users may effortlessly upload animated clips in common file formats such as PNG, BMP, JPG, ordinary GIF, and animated GIF to this site. Users may simply change the output file format, size, and quality parameters. Rotate, trim, stretch, loopback, scale, and many more options are available in the advanced editor.
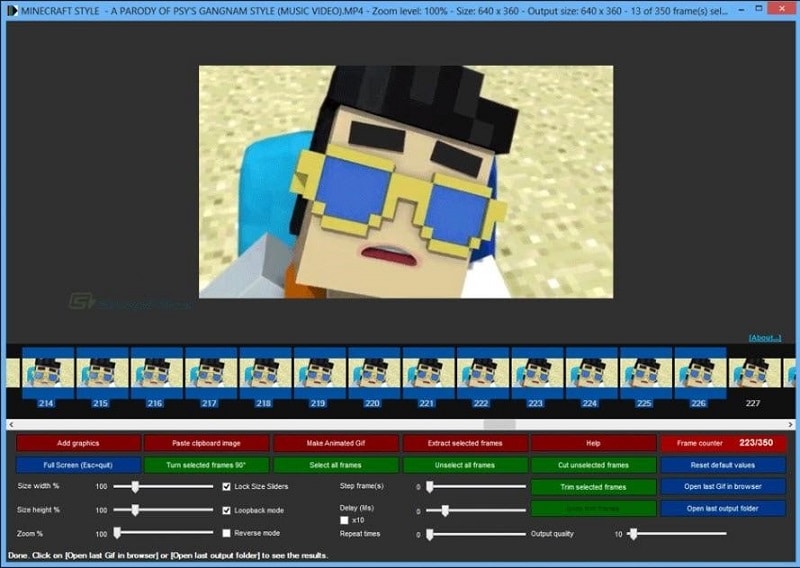
**Platform:**Windows/Mac
**Price:**Free
Features
- It’s a little piece of shareware that converts video to gif.
- You may also import video files in MPG, AVI, MP4, ASF, etc. Animated Gif, Jpg, Bmp, and Png
- files may all be imported.
- Animated GIF pictures may be recorded directly.
- Loop, stretch, pan, reverse, and many more editing options are available.
Pros
- Offers 90 degree image rotation facility.
- Comes with professional level settings.
- Allows users to create an animated GIF from local images.
Cons
- It is complicated for beginners.
- Support limited file formats.
- Has limited functions.
8. Instagiffer
Instagiffer allows users to quickly grab memorable stills from their screens and then process them interactively to create GIFs. Instagiffer can let you import any of your chosen moments for making GIFs, whether they are from your favorite YouTube video, a cute Vine start, or anything amusing from Netflix. This fast professional picture editing application’s loops, filters, and text capabilities are extensive. It is completely free, and there are no viruses, malware, or irritating advertisements on our platform.
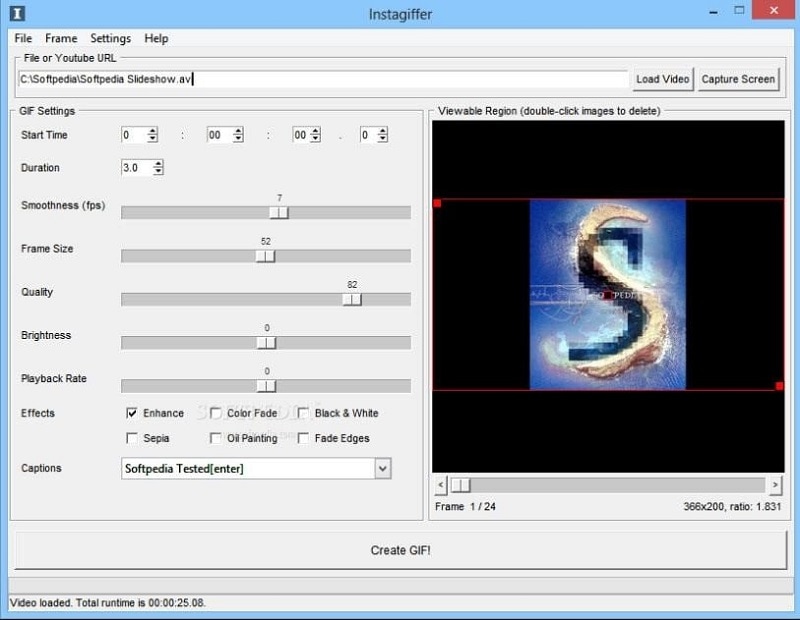
**Platform:**Windows/Mac
**Price:**Free
Features
- You can immediately record the most GIF-worthy moments on your screen.
- Text, filters, loops, and more may be added.
- Completely free video to gif conversion.
- Text and unique logos may be added quickly and easily.
- There will be no watermarks on your gifs if you use Instagriffer.
Pros
- Can make 3D GIFs
- Has a portable version
- The Instagiffer software is safe to use
Cons
- On the Instagriffer website, finding a suitable software installation is tough.
- The program may seem difficult to a novice.
- Its interface is outdated.
9. Microsoft GIF Animator
It is a prominent Microsoft product . This is a free version that you can get from the Microsoft shop. It may be used with Windows 10. You must first sign in with your Microsoft account to download this program. It offers a straightforward user interface with clear controls. You must upload the necessary amount of photographs in file types such as.JPEG,.bmp,.bpg,.png, etc. Set the settings for frame delay, frame count, and so forth. Finally, use the ‘Create’ button to create your GIF animation. Following your selected GIF animation preview, you may download the file.
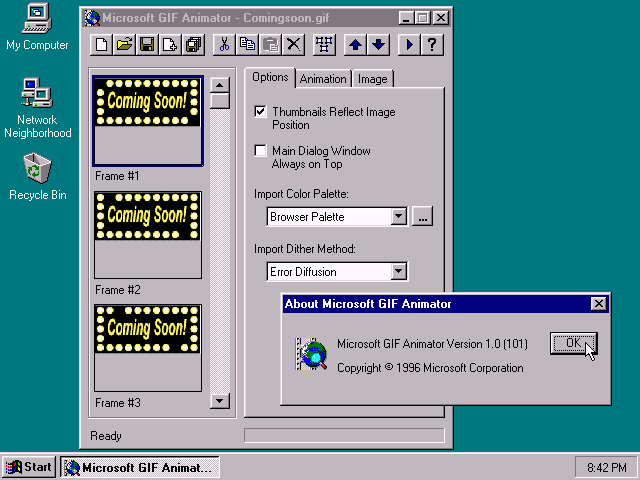
**Platform:**Windows
Price:$60.00 one-time payment
FeaturesFree
- Upload numerous photos into the GIF list box quickly.
- The photographs are quickly assembled into GIF frames as animation with a single click of the ‘Create’ button.
- Set the frame interval to suit your requirements.
Pros
- The free version is enough for creating high-quality GIF animations.
- The findings are simple to utilize on social networking platforms.
- Cost-effective.
Cons
- There are just a few choices for customizing GIF pictures.
- Only suitable for beginners.
- Internet speed can affect how the GIF is played.
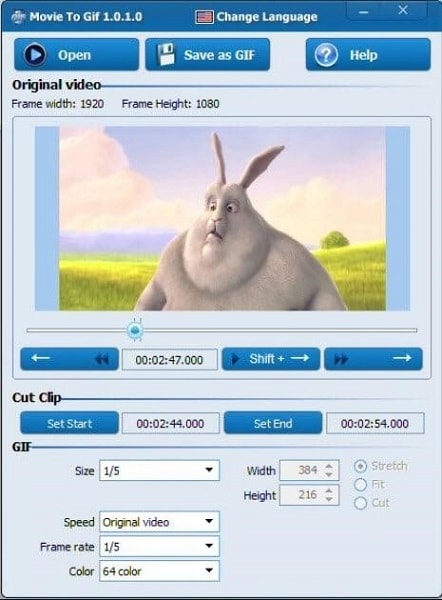
10. VideoSolo Video to GIF Converter
When producing animations, VideoSolo video-to-GIF converter program offers several possibilities. It contains features for trimming videos, selecting certain portions of films, and joining bits of several videos to create a GIF file. It contains an integrated video editor that allows you to make changes to your final result. To make your GIF more appealing, you may trim, modify contrast and saturation, and change the video color, among other things. This movie-to-GIF program comes with the bonus of allowing you to add a photo overlay or text to your GIF to make it even more enjoyable. If you’re unhappy with the picture quality or frame rate, you may change them to suit your needs.
**Platform:**Windows/Mac
**Price:**Free
Features
- Make professional-looking GIFs with no technical knowledge.
- Supports almost all video formats going.
- Create cool avatars for games.
Pros
- Several editing options
- Not very resource-intensive
- Supports multiple video formats
Cons
- Some aspects may be difficult to locate.
- The Mac version receives fewer updates than the Windows version.
- You need to download it on your computer.
11. Movie to GIF
**Platform:**Windows
**Price:**Free/Premium($49.99/mo)
Features
- Convert video to GIF with ease.
- GIF files may be used to play video snippets.
- Increase the frame rate to make the output GIF look like the source video.
- The GIF’s width and height may be changed. An easy-to-use UI.
Pros
- Easy to use.
- Convert videos in batch code.
- Multilingual interface including English, Japanese, Spanish, etc.
- Fast conversion rate.
- HD output quality.
Cons
- Windows version only
- It’s time consuming
- The premium version is very expensive
12 Best Video To GIF Converter Online
2. Ezgif-F
This application is a free GIF animator that may be used in an online mode without any registration. Windows and web browsers are both supported. Choose the ‘GIF Maker’ option on the official website and upload the photographs by hitting the ‘Choose files’ button. You may effortlessly upload many photographs in any format. To produce a high-quality GIF animation, hit the ‘Upload and Create a GIF’ option once you’ve finished uploading.
**Price:**Free
Features
- Up to 2000 picture files may be uploaded.
- GIF, PNG, JPEG, APNG, MNG, WebP, and other image file types are all supported.
- Allows you to submit a zip file of photos.
- You have complete control over frame speed.
Pros
- Multiple picture files may be uploaded at once.
- Automate settings to reduce the size of all images in the picture list to the shortest dimension.
- There is no need to pay a subscription fee.
Cons
- When there are a large number of photos in the list, this program takes a long time to make GIF animation.
- Advertisements sometimes disrupt the operation.
3. Adobe
Adobe is a world leading video to GIF converter and other marketing solutions. Everyone – from young artists to big companies – can use our creative, marketing, and document solutions to bring digital ideas to life and deliver comprehensive, compelling GIFs to the right spot at the right time for the best outcomes.
**Price:**Free
Features
- Offers support for raster graphics
- Rich text
- Audio-video embedding
Pros
- The adaptability of what Adobe Animate can do makes it so helpful.
- Utilizing Adobe Animate recordings on sites is typical, so individuals are accustomed to seeing it and have the essential modules introduced.
- The GIFs are little, and is extremely smooth.
Cons
- Cumbersome interface
- Outdated technology
- Limited capabilities
4. Cloudconvert
Online cloudconvert converts your mp4 media files to GIF. Cloudconvert supports a wide range of music, video, document, ebook, archive, image, spreadsheet, and presentation formats, including mp4, webm, and AVI. The video resolution, quality, and file size can all be customized. No software needs to be downloaded or installed.
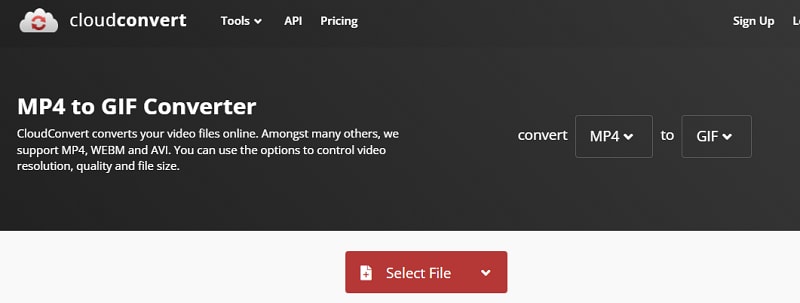
**Price:**Free
Features
- It can adapt 256 colors and uses a lossless compression technique to contain images.
- It can also contain texts.
- It can contain low sized image animation. So it is frequently used in web publishing.
Pros
- One can set preset properties for the file conversion
- Saves you time and can convert files into the format you are looking for
- Very good price
Cons
- It is confusing in the beginning for the interface and knowing which button to press
- Limits you to your bandwidth, so it is complicated to convert big files because sometimes it throws a timeout error.
5. Vistacreate
When you need to convert video files into elevated animated GIFs, VistaCreate is the tool to use. You can trim the video file, specify the desired GIF size (Original, 800px), choose a video processing method, and GIF length dependent on the frame rate you choose, much like with Ezgif. Even though the maximum file size is limited to 50MB, MP4, WebM, AVI, MPEG, FLV, MOV, and 3GP are all acceptable formats.
If you have a transparent video, don’t worry; the transparency will be preserved in the final animated GIF. Keep in mind that the converted GIF must be downloaded as soon as possible before it is erased from the server.
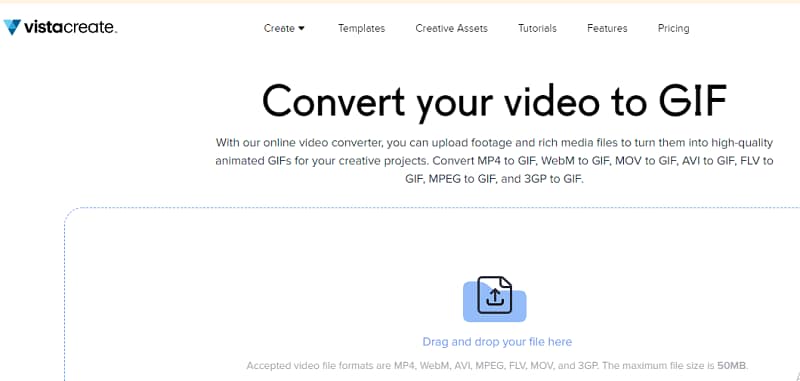
**Price:**Free
Features
- Video splitter and joiner
Pros
- It allows you to convert videos into GIFs for use on social media, web design, marketing, or blogging.
- It presents a GIF editor tool to help you refine the GIF further.
- It allows you to create both long and short GIFs.
- It boasts flexibility in look, conversion speed, and quality of the output GIF.
Cons
- The templates, icons, animations and stock imagery that come with Crello are impressive.
- They create an impact and attract a lot of comments and engagement when posted.
- The quality and range of posts and videos I can create using their templates have improved my engagement and really stand out.
6. Online Converter
Create animated GIFs from movies and photos using thisfree online tool . It can convert photos to GIFs in addition to being a video converter. It can play a variety of video and picture formats, including mp4, .m4b,.m4v, and.mkv. The converter, however, does not handle picture files that are protected and/or encrypted.
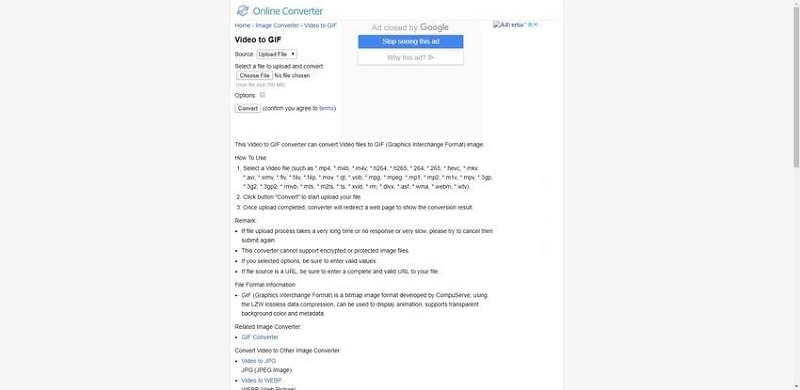
**Price:**Free
Features
- It can convert PDF files to GIF images.
- Converting RAW picture files to GIF is supported.
Pros
- Conveys messages better.
- Small file size.
- Conveys messages better.
Cons
- Internet connection matters.
- Editing is not possible.
- Limited color pattern.
7. GIPHY
Giphy is the most popular online GIF site, with millions of people visiting it every day. It is well-liked since it is simple to use. Before selecting “create,” you enter your video URL into the window’s appropriate area. Simple tools, such as drag-and-drop options for importing films and photographs from your local storage, are also available on this site.
This site, unlike several others, enables you to add sound clips to GIFs, making them more intriguing than their muted equivalents. You can also use tags and descriptions to make your GIFs more appealing.
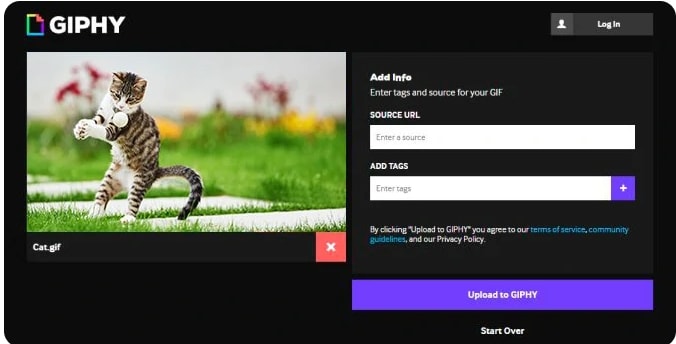
**Price:**Free
Features
- Intuitive web interface
- Add sound to GIF
- Create 3d GIFs
Pros
- Supports sounds
- Easy to use
Cons
- It is not available offline.
- Some people are unhappy with the search feature.
8. IMG2GO
This online file converter provides comprehensive options for altering the quality and look of animated GIFs. This free online program allows you to make animated GIFS from any video clip, including MP4, AVI, and WEBM. Additional functions include resizing, picture reduction, photo editing, and more.
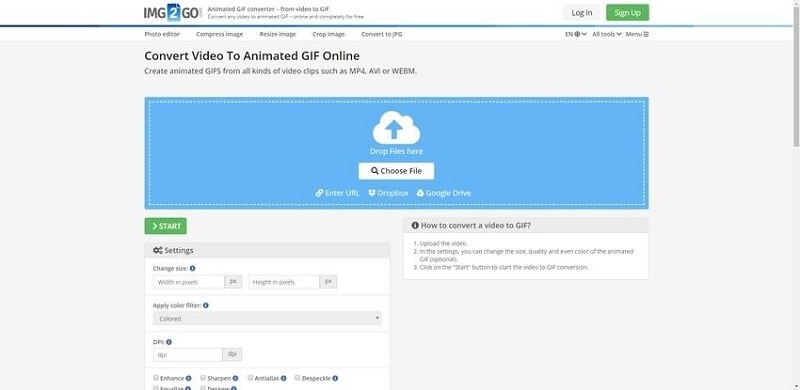
**Price:**Free
Features
- SSL encryption protects files and servers. As a result, emailing your data is completely secure.
- It can play 3GP, AVI, FLV, MOV, MP4, WebM, and WMV files.
- It allows you to apply filter changes, pixel scaling, and DPI.
Pros
- Modern interface
- Quick video and image to GIF conversion
- No loss in quality
Cons
- Loaded with tons of ads
- Not many flexible options
- Adds unnecessary black border to the GIFs
9. MakeAGIF
MakeAGIF isn’t simply a video to GIF converter; it can convert almost anything to GIF. You may upload a video, record a video, paste a video link, or even submit a collection of photographs to create your own GIF on this simple website.
Then you may customize the output by adding stickers and captions, changing the GIF’s pace, and choosing a start and end time. The one drawback to this video to GIF converter is that each GIF has a MakeAGIF watermark; to remove the company’s branding from your clip, you’ll need to pay to the premium version, which costs $11.95 per month.
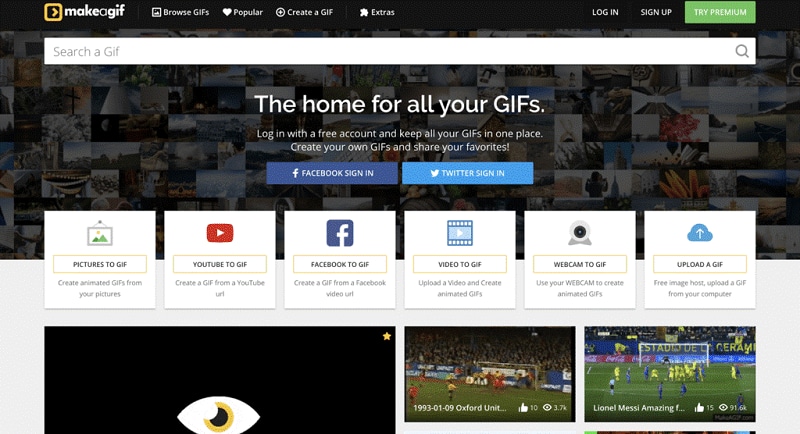
Price:$11.95/mo
Features
- Powerful GIF editing features like speed, framerate, and resolution
Pros
- Easy to use
- You can customize output to your liking
Cons
- Free version has watermarks
- It does not give the best quality output
10.Convertio
One of the easiest programs on our list isConvertio . To convert a video to a GIF, just drag it onto the tool or upload it from your Google Drive or Dropbox account, then click “convert” to finish the process.
Use this tool just if you don’t care about details. Convertio is simple to use, however you can’t set the start and finish of your GIF or the frame rate.
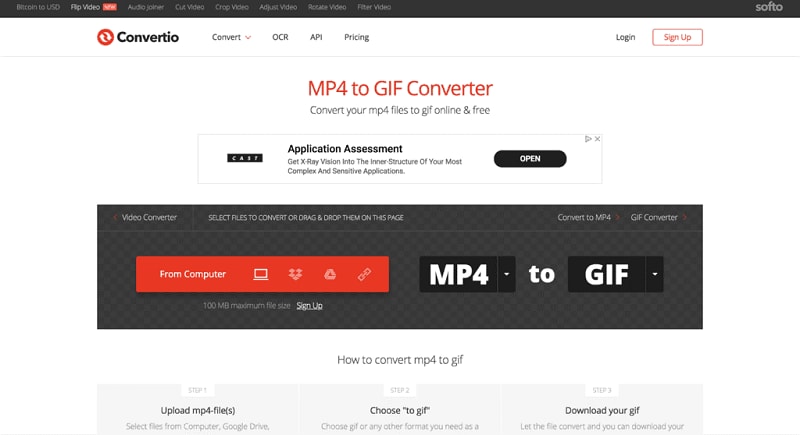
**Price:**Free
Features
- Share files to Drive, DropBox
- Edit FPS
Pros
- Ability to pick source footage from hard disk, Dropbox, Google Drive, or URL.
- Integrates Google Drive and Dropbox services
- Supports batch processing
- Offers an API to app developers
- Safe and secure online tool
- Fast and easy to use
Cons
- Converts a file of only up to 100 MB (for unregistered free users).
11. HNET
Virtually any video (mp4, flv, mpeg, webm, mov, avi, 3gp, etc.) may be converted to animated GIF format withthis online tool . Your video to gif conversion takes place in the cloud, so it won’t take up any of your computer or phone’s resources. This implies it runs on all major operating systems. After one hour, all of the files you submitted and converted will be permanently erased from the server. Your files are private; no one else may see or download them except you.
You may post your GIF picture on imgur, Pinterest, Reddit, Tumblr, 4chan, Deviantart, Flickr, and other popular image sharing sites once your video clip has been converted to GIF format.
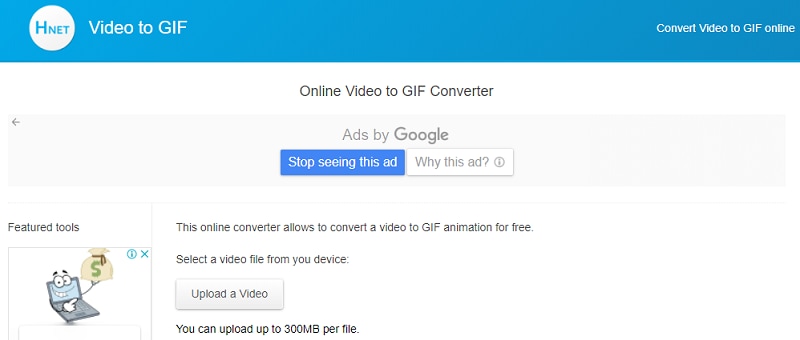
**Price:**Free
Features
- Supports all OS
- File sharing after conversion
- Support many file formats
Pros
- Very easy to use
- Free version comes with handy features
Cons
- It has a file size limit
- Your will be deleted after an hour in case you want to retrieve it.
12. ImgFlip
Imgflip GIF Maker is a simple, fast video to GIF converter that converts mp4 files into animated GIFs. You can turn your clip into a GIF using the Imgflip editor and tinker with parameters like frame rate, size, and more. Because of its sharing features, Imgflip truly shines. You may share your GIF on Facebook, Pinterest, Twitter, Tumblr, and other social media sites by downloading the file, copying the file link, or using the HTML5 image format code. Imgflip is a great alternative to consider if you need to get your GIFs out there quickly.
**Price:**Free
Features
- Video editor
- File sharing
- Parameter control
Pros
- Simple and lightweight
- Fast and accurate conversion
Cons
- I glitches when the file size is big
5 Best Video To GIF Converter for iPhone/iPad/Android Phone
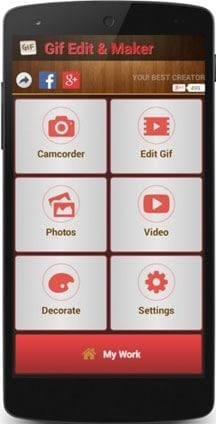
1. GIF Maker - Video to GIF, GIF Editor
The comprehensive GIF generator for your Android smartphone is the final app on our list. It’s a great tool for editing all sorts of GIF pictures on your phone, as the name suggests. Although it lacks preset settings like filters and music, it gives everything needed to edit films to their full potential. Any picture or video may be converted and edited.
Platform: Android
**Price:**Free
Features
- Add filters and effects to GIFs
Pros
- The UI is simple to use.
- Editing capabilities are extensive.
Cons
- There are no filters available.
- There are no options for adding music or text to your GIF pictures.
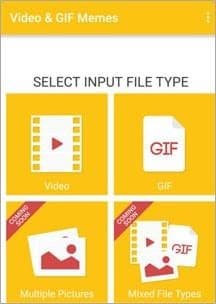
2. Videos & GIF maker
This software provides everything you need to make humorous memes and animated GIFs on your iPhone phone. As the tool’s name suggests, you may easily add captions to your photos. You may also choose the output format for the GIF picture and the movie and the start and finish lengths.
**Platform:**iPhone
**Price:**free
Features
- Select the output format of your GIF
Pros
- The most user-friendly UI.
- The GIF graphics and memes are simple to make.
- Even on older devices, it does not crash and runs well.
- Instagram has many options for creating and sharing square photographs.
Cons
- There are no editing options for GIF pictures.
- There were some issues with posting images to social networking sites.
3. Gif Maker
You should install this application if you want an all-in-one freeGIF maker for your Android phone. In the programs, many attractive effects can be applied with a single click and modify the entire appearance of your images. Additionally, you may utilize the application’s camera to capture movies directly from the app. The nicest thing about this program is that it supports many languages and allows you to generate GIF images with 50 photographs.

**Platform:**Android
**Price:**Free
Features
- Concert up to 50 photos
- Convert real-time videos from the camera
Pros
- Free applications with a lot of functionality.
- It is available in many languages.
- Have a variety of picture effects to use.
Cons
- On certain devices, the app slows and crashes.
- Problems with sharing and uploading photographs with others.
4. Live GIF
This program converts live photos to GIF images on your iPhone. There are no difficult settings to worry about; all you have to do is upload the photographs to the app and make minor adjustments. The finished photographs may be downloaded or shared on social media sites like Facebook and Twitter.

**Platform:**iPhone
**Price:**Free
Features
- Share your GIFs on social media
Pros
- An easy-to-use UI.
- The iPhone 6S and 6S Plus have full 3D Touch capability.
- Sharing images on Twitter and Facebook is simple.
- There are no advertisements in the application.
Cons
- The price is a bit more than the features it offers.
- GIF pictures have no options for changing their resolution.
- There are no possibilities for adding text or music to GIF pictures.
5. Gift
Gift is another iPhone software that effortlessly converts photographs and movies to GIF images. Although this program does not convert Live Images, it is a solid alternative for converting regular photos and movies on older iPhone versions. According to the makers, the program is free to use and has several packages to add different effects and text to your photographs; however, most of the effects are only available in the premium version, which costs money. You may also share GIF pictures from the app on social media sites like Facebook, Twitter, Instagram, and Tumblr.
**Platform:**iPhone
**Price:**Free Version
Features
- Add text to GIFs
- Several effects available
Pros
- Basic editing is free to use.
- It is simple to use and does not need an internet connection.
- Over 70 effects to personalize your images and videos.
- The GIF picture may be saved to your iPhone.
Cons
- The finished GIF picture has a watermark.
- There are no video editing options available.
- Too expensive for the things it offers.
How to Convert a Video to GIF by Using Filmora
Step1Download, Launch and Import Media File to Filmora
To enter the interface, click New Project and then Import Media Files Here. Then drag and drop or add it straight to the window. You may also take a screenshot of the video and extract the shots or frames from it. The recovered photographs will appear in the media library, where you may add numerous video clips.

Step2Edit Video Based on Your Preference and Add Pictures (Optional)
To begin, drag & drop your video clip into the Timeline. Before choosing Export, you may trim, apply an effect, add a subtitle, and other features to the video. To convert the movie to GIF, click the Export option once everything is in order.

Step3Save and Export GIF
After hitting the Export option, a new window will appear where you may choose your export format. Choose GIF as your preferred format. When you’re through editing, click the Export option to save your work as a.gif file.
Note: A Setting button underneath the Resolution allows you to change the file resolution, frame rate, and bit rate.

Notice and Tips When Converting Video to GIF
Choosing software to save a video as a GIF
All operating systems have a way to convert video to GIF, as you can see in this article. All you have to do now is choose the right one. In a nutshell, here’s how you choose the right platform for your GIFs:
**Usability:**The video to GIF platform you use should be simple to use. You want a high-performance converter that’s also simple to use.
Tools: The platform should have all of the tools you’ll need to make an intriguing GIF, such as speed modification, filters, subtitles, and more.
Quality: To avoid pixelation, your platform must be able to make GIFs with a high resolution.
**Speed:**Because you don’t want to waste time waiting for your file to save, the speed at which the video converts to GIF is also significant.
Bottom Line
GIF files are efficient when played in browsers and provide good visual quality. GIFs are now often used to show How-To instructions and post memes on social media sites such as Facebook.
However, a quality video to GIF converter is a must-have tool. You can obtain more control over the source material and the created outputs using professional software rather than free web services. Download Wondershare Filmora today to enjoy the handy video to GIF conversion features that will give you the best experience.
- Media.io
- Ezgif-F
- Adobe
- Cloudconvert
- Vistacreate
- Online Converter
- GIPHY
- IMG2GO
- MakeAGIF
- Convertio
- HNET
- ImgFlip
- 5 Best Video To GIF Converter for iPhone/iPad/Android Phone
What’s the Difference Between a Video and a GIF?
GIFs are very popular among digital marketers (and anybody who uses the internet). These little bursts of repeating material may breathe new life into otherwise dull blog posts, emails, web pages, infographics, and other documents. Isn’t it thrilling?
While GIFs and videos may seem identical, the two forms of media are highly distinct, and the differences begin when the file types are first gathered.
GIFs are basically soundless picture collections that have been modified to resemble a video. On the other hand, videos are gathered as a kind of rich media that includes both motion and sound. What’s more, the viewing experiences for these two file kinds are somewhat different.
But why would someone want to convert a video to a GIF, to begin with? There are several explanations for this
GIFs are inexpensive
When converting a video to a GIF, you’re repurposing existing material to create something new. Why not get the most out of your video marketing strategy?
GIFs are simple to create
You don’t need to be a video expert in producing a GIF. Creating a GIF using one of the video-to-GIF converters listed below may take a few minutes.
GIFs are simple to use
GIFs offer motion and excitement to digital information without needing the viewer to devote a significant amount of time and attention - a significant advantage given the typical human attention span of roughly 8 seconds.
GIFs are effective
When Dell executed a GIF-centric marketing campaign, it experienced a 109 percent boost in sales, indicating that consumers appreciate (and react to) this basic but fascinating medium. Check out these video-to-GIF converters below to pick the best one for you.
14 Best Video Splitter for Windows/Mac
1. Filmora
You may quickly create a classic GIF picture as an output using Wondershare Filmora’s interactive platform. All common video file types, such as MKV, WMV, AVI, and MP4, are supported. The greatest thing is that Filmora does not impose any file size restrictions during conversion so that users may convert HD films to GIF graphics.
It’s a powerful image editor with many appealing features that allow you to personalize your picture completely. To create original GIFs, feel free to use complex components, animations, text, overlays, and so on.
In addition, Filmora enables you to extract still photos from videos of the same resolution. The retrieved PNG pictures may be combined and edited to create an intriguing GIF.
Platform: Windows/Mac
Price: Free Trial
Features
- 4k editing support enables users to edit and export videos at a resolution of up to 4k.
- scene detection
- audio equalizer
- GIF stabilization
Pros
- Easy to use, very intuitive interface.
- Plenty of effects and presets. Useful for less experienced people.
- Very many online resources, tutorials, preset packs, effects, etc.
- Outstanding and responsive support. In live chats always polite and professional.
- It is constantly updated.
Cons
- 4K editing sucks sometines
2. Movavi
Movavi Video Editor is a pioneer in the video editing industry due to its simplicity of use and dependable video editing capabilities. This software, available for both Windows and Mac OS, has quickly become a popular favorite. It is one of the best MP4-to-GIF converters because of its speed and reliability. It will let you produce GIFs from your movies in no time.
This program’s ability to batch export files is one of its best features, making producing and converting many GIFs simpler. Therefore, it is the most practical for frequent GIF makers, whether for personal or professional usage.
Though you may need to buy Movavi to get all of these excellent features, a free trial version is available for those who want to check it out before buying. The trial version is also ideal for individuals who need to convert movies to GIFs once.
Platform: Windows/Mac
Price: $49.95/year for 1PC
Features
- Fast processing of 4K videos.
- Timeline markers.
- Keyframe animation.
- Built-in media pack.
- Automatic video creation.
Pros
- Has editing options
- Clear interface
- Supports many formats
Cons
- Only a trial version with limited period is free.
- It’s very basic
- No copy pasting options
3. Gifski
You can convert videos to GIFs using Gifski . Drop a file into the Gifski window or use the Open button to search your Mac for a video. The segment of the video you wish to transform into a GIF will be readily selected.
You may choose the size of your GIF, the frame rate, graphic quality, and how many times it loops using this Mac GIF creator. You can have it repeat indefinitely, and you can also make it bounce (this is where it plays to the end, then plays backward, then forward again, and so on).
Platform: Mac
**Price:**Free
Features
- High-quality GIFs
- Command-based conversion
Pros
- Ihe software is safe to use.
- It support is good
Cons
- It doesn’t work offline
- Some users complain about the search function
4. Freemore
Freemore Video to GIF Converter is software that converts videos into animated GIFs, enabling you to pick the precise frames to include in the GIF and change the frame’s width and height if you have a unique use case.
This program is completely free and supports all of the most common video formats, including MP4, MPEG, MOV, FLV, etc. While this tool is free, it wasn’t necessarily created to be attractive; if you download Freemore, anticipate a more practical design that, while very functional, isn’t particularly pleasing to the eye.
Freemore Video to GIF Converter is only accessible for download on Windows, unfortunate for Mac users.
Platform: Windows/Mac
**Price:**Free
Features
- Convert video files to animated GIFs;
- Make GIFs for a website, mobile phone screensaver, signature, etc.
- Clip video to create GIF;
- Adjust the width and height to suit your needs;
- Support all key video formats.
Pros
- Support multi-core CPU
- Less burden on your system
- Abundant guide content & online support
- Free, safe & no restrictions
Cons
- The maximum input video size is 10 MB
- It might be unstable on a new OS like Windows 10
5. GIF Brewery by Gfycat
Look no farther than GIF Brewery by Gfycat for Mac users searching for a simple video to GIF converter tool.
You may begin by importing a movie, producing a screen recording, or recording straight from your camera using GIF Brewery. You may then customize your GIF by scaling the video, changing the frame rate, and adding filters and overlays to give it a unique style.
Finally, save your GIF to your computer or send it to someone else using iMessage or Mail. The app gets excellent reviews in the app store and is free to download.
**Platform:**Mac
**Price:**Free
Features
- It gives everyone the power to create stunning GIFs from video files.
- It’s simple yet powerful.
Pros
- The GIF Brewery design is good.
- The performance of GIF Brewery is good.
- he GIF Brewery is compatible with lots of devices.
- The support of GIF Brewery is excellent and useful.
- The price of GIF Brewery is free or perhaps freemium.
Cons
- GIF Brewery 3 by Gfycat Reduce battery consumption
- Loads very slowly
6. Any GIF Animator
Any GIF converter app’s simple and powerful design can instantly convert your favorite movies into interactive GIFs. It can play a variety of file types, including WEBM, ASF, MPG, FLV, and AVI. The greatest aspect is that this program also enables users to import media files from optical storage devices such as DVDs and even analyze camera-captured displays. Users may easily select frame rate start and finish time markers, and complex text overlays, loops, and resolution effects are available for customization.
**Platform:**Windows/Mac
**Price:**free with ads
Features
- Its simple and intuitive layout allows you to operate it without consulting the user manual.
- It’s straightforward and hassle-free.
- With the aid of an animation wizard, you can polish your GIF animation. It’s a simple and fast approach to customizing and enhancing your GIF animation.
- You receive a built-in picture editor with a full collection of editing capabilities.
- On Any GIF Animator, you may convert video to gif in various visual formats. PNG, JPEG, TIFF, BMP, GIF, ICO, PSD, PCX, RLE, PIC, DIB, AVI, PCD, WMF, and more formats are included.
Pros
- Easy to install
- Neat interface
- Clips can be edited
- Accepts any video file
Cons
- Sometimes crashes
- Cannot animate photos
- Upload time takes long
- Converting takes long
7. KickMyGraphics
Here’s a simple yet effective GIF converter that can record, generate, and manipulate GIF pictures to deliver high-quality customized output. Users may effortlessly upload animated clips in common file formats such as PNG, BMP, JPG, ordinary GIF, and animated GIF to this site. Users may simply change the output file format, size, and quality parameters. Rotate, trim, stretch, loopback, scale, and many more options are available in the advanced editor.
**Platform:**Windows/Mac
**Price:**Free
Features
- It’s a little piece of shareware that converts video to gif.
- You may also import video files in MPG, AVI, MP4, ASF, etc. Animated Gif, Jpg, Bmp, and Png
- files may all be imported.
- Animated GIF pictures may be recorded directly.
- Loop, stretch, pan, reverse, and many more editing options are available.
Pros
- Offers 90 degree image rotation facility.
- Comes with professional level settings.
- Allows users to create an animated GIF from local images.
Cons
- It is complicated for beginners.
- Support limited file formats.
- Has limited functions.
8. Instagiffer
Instagiffer allows users to quickly grab memorable stills from their screens and then process them interactively to create GIFs. Instagiffer can let you import any of your chosen moments for making GIFs, whether they are from your favorite YouTube video, a cute Vine start, or anything amusing from Netflix. This fast professional picture editing application’s loops, filters, and text capabilities are extensive. It is completely free, and there are no viruses, malware, or irritating advertisements on our platform.
**Platform:**Windows/Mac
**Price:**Free
Features
- You can immediately record the most GIF-worthy moments on your screen.
- Text, filters, loops, and more may be added.
- Completely free video to gif conversion.
- Text and unique logos may be added quickly and easily.
- There will be no watermarks on your gifs if you use Instagriffer.
Pros
- Can make 3D GIFs
- Has a portable version
- The Instagiffer software is safe to use
Cons
- On the Instagriffer website, finding a suitable software installation is tough.
- The program may seem difficult to a novice.
- Its interface is outdated.
9. Microsoft GIF Animator
It is a prominent Microsoft product . This is a free version that you can get from the Microsoft shop. It may be used with Windows 10. You must first sign in with your Microsoft account to download this program. It offers a straightforward user interface with clear controls. You must upload the necessary amount of photographs in file types such as.JPEG,.bmp,.bpg,.png, etc. Set the settings for frame delay, frame count, and so forth. Finally, use the ‘Create’ button to create your GIF animation. Following your selected GIF animation preview, you may download the file.
**Platform:**Windows
Price:$60.00 one-time payment
FeaturesFree
- Upload numerous photos into the GIF list box quickly.
- The photographs are quickly assembled into GIF frames as animation with a single click of the ‘Create’ button.
- Set the frame interval to suit your requirements.
Pros
- The free version is enough for creating high-quality GIF animations.
- The findings are simple to utilize on social networking platforms.
- Cost-effective.
Cons
- There are just a few choices for customizing GIF pictures.
- Only suitable for beginners.
- Internet speed can affect how the GIF is played.
10. VideoSolo Video to GIF Converter
When producing animations, VideoSolo video-to-GIF converter program offers several possibilities. It contains features for trimming videos, selecting certain portions of films, and joining bits of several videos to create a GIF file. It contains an integrated video editor that allows you to make changes to your final result. To make your GIF more appealing, you may trim, modify contrast and saturation, and change the video color, among other things. This movie-to-GIF program comes with the bonus of allowing you to add a photo overlay or text to your GIF to make it even more enjoyable. If you’re unhappy with the picture quality or frame rate, you may change them to suit your needs.
**Platform:**Windows/Mac
**Price:**Free
Features
- Make professional-looking GIFs with no technical knowledge.
- Supports almost all video formats going.
- Create cool avatars for games.
Pros
- Several editing options
- Not very resource-intensive
- Supports multiple video formats
Cons
- Some aspects may be difficult to locate.
- The Mac version receives fewer updates than the Windows version.
- You need to download it on your computer.
11. Movie to GIF
**Platform:**Windows
**Price:**Free/Premium($49.99/mo)
Features
- Convert video to GIF with ease.
- GIF files may be used to play video snippets.
- Increase the frame rate to make the output GIF look like the source video.
- The GIF’s width and height may be changed. An easy-to-use UI.
Pros
- Easy to use.
- Convert videos in batch code.
- Multilingual interface including English, Japanese, Spanish, etc.
- Fast conversion rate.
- HD output quality.
Cons
- Windows version only
- It’s time consuming
- The premium version is very expensive
12 Best Video To GIF Converter Online
2. Ezgif-F
This application is a free GIF animator that may be used in an online mode without any registration. Windows and web browsers are both supported. Choose the ‘GIF Maker’ option on the official website and upload the photographs by hitting the ‘Choose files’ button. You may effortlessly upload many photographs in any format. To produce a high-quality GIF animation, hit the ‘Upload and Create a GIF’ option once you’ve finished uploading.
**Price:**Free
Features
- Up to 2000 picture files may be uploaded.
- GIF, PNG, JPEG, APNG, MNG, WebP, and other image file types are all supported.
- Allows you to submit a zip file of photos.
- You have complete control over frame speed.
Pros
- Multiple picture files may be uploaded at once.
- Automate settings to reduce the size of all images in the picture list to the shortest dimension.
- There is no need to pay a subscription fee.
Cons
- When there are a large number of photos in the list, this program takes a long time to make GIF animation.
- Advertisements sometimes disrupt the operation.
3. Adobe
Adobe is a world leading video to GIF converter and other marketing solutions. Everyone – from young artists to big companies – can use our creative, marketing, and document solutions to bring digital ideas to life and deliver comprehensive, compelling GIFs to the right spot at the right time for the best outcomes.
**Price:**Free
Features
- Offers support for raster graphics
- Rich text
- Audio-video embedding
Pros
- The adaptability of what Adobe Animate can do makes it so helpful.
- Utilizing Adobe Animate recordings on sites is typical, so individuals are accustomed to seeing it and have the essential modules introduced.
- The GIFs are little, and is extremely smooth.
Cons
- Cumbersome interface
- Outdated technology
- Limited capabilities
4. Cloudconvert
Online cloudconvert converts your mp4 media files to GIF. Cloudconvert supports a wide range of music, video, document, ebook, archive, image, spreadsheet, and presentation formats, including mp4, webm, and AVI. The video resolution, quality, and file size can all be customized. No software needs to be downloaded or installed.
**Price:**Free
Features
- It can adapt 256 colors and uses a lossless compression technique to contain images.
- It can also contain texts.
- It can contain low sized image animation. So it is frequently used in web publishing.
Pros
- One can set preset properties for the file conversion
- Saves you time and can convert files into the format you are looking for
- Very good price
Cons
- It is confusing in the beginning for the interface and knowing which button to press
- Limits you to your bandwidth, so it is complicated to convert big files because sometimes it throws a timeout error.
5. Vistacreate
When you need to convert video files into elevated animated GIFs, VistaCreate is the tool to use. You can trim the video file, specify the desired GIF size (Original, 800px), choose a video processing method, and GIF length dependent on the frame rate you choose, much like with Ezgif. Even though the maximum file size is limited to 50MB, MP4, WebM, AVI, MPEG, FLV, MOV, and 3GP are all acceptable formats.
If you have a transparent video, don’t worry; the transparency will be preserved in the final animated GIF. Keep in mind that the converted GIF must be downloaded as soon as possible before it is erased from the server.
**Price:**Free
Features
- Video splitter and joiner
Pros
- It allows you to convert videos into GIFs for use on social media, web design, marketing, or blogging.
- It presents a GIF editor tool to help you refine the GIF further.
- It allows you to create both long and short GIFs.
- It boasts flexibility in look, conversion speed, and quality of the output GIF.
Cons
- The templates, icons, animations and stock imagery that come with Crello are impressive.
- They create an impact and attract a lot of comments and engagement when posted.
- The quality and range of posts and videos I can create using their templates have improved my engagement and really stand out.
6. Online Converter
Create animated GIFs from movies and photos using thisfree online tool . It can convert photos to GIFs in addition to being a video converter. It can play a variety of video and picture formats, including mp4, .m4b,.m4v, and.mkv. The converter, however, does not handle picture files that are protected and/or encrypted.
**Price:**Free
Features
- It can convert PDF files to GIF images.
- Converting RAW picture files to GIF is supported.
Pros
- Conveys messages better.
- Small file size.
- Conveys messages better.
Cons
- Internet connection matters.
- Editing is not possible.
- Limited color pattern.
7. GIPHY
Giphy is the most popular online GIF site, with millions of people visiting it every day. It is well-liked since it is simple to use. Before selecting “create,” you enter your video URL into the window’s appropriate area. Simple tools, such as drag-and-drop options for importing films and photographs from your local storage, are also available on this site.
This site, unlike several others, enables you to add sound clips to GIFs, making them more intriguing than their muted equivalents. You can also use tags and descriptions to make your GIFs more appealing.
**Price:**Free
Features
- Intuitive web interface
- Add sound to GIF
- Create 3d GIFs
Pros
- Supports sounds
- Easy to use
Cons
- It is not available offline.
- Some people are unhappy with the search feature.
8. IMG2GO
This online file converter provides comprehensive options for altering the quality and look of animated GIFs. This free online program allows you to make animated GIFS from any video clip, including MP4, AVI, and WEBM. Additional functions include resizing, picture reduction, photo editing, and more.
**Price:**Free
Features
- SSL encryption protects files and servers. As a result, emailing your data is completely secure.
- It can play 3GP, AVI, FLV, MOV, MP4, WebM, and WMV files.
- It allows you to apply filter changes, pixel scaling, and DPI.
Pros
- Modern interface
- Quick video and image to GIF conversion
- No loss in quality
Cons
- Loaded with tons of ads
- Not many flexible options
- Adds unnecessary black border to the GIFs
9. MakeAGIF
MakeAGIF isn’t simply a video to GIF converter; it can convert almost anything to GIF. You may upload a video, record a video, paste a video link, or even submit a collection of photographs to create your own GIF on this simple website.
Then you may customize the output by adding stickers and captions, changing the GIF’s pace, and choosing a start and end time. The one drawback to this video to GIF converter is that each GIF has a MakeAGIF watermark; to remove the company’s branding from your clip, you’ll need to pay to the premium version, which costs $11.95 per month.
Price:$11.95/mo
Features
- Powerful GIF editing features like speed, framerate, and resolution
Pros
- Easy to use
- You can customize output to your liking
Cons
- Free version has watermarks
- It does not give the best quality output
10.Convertio
One of the easiest programs on our list isConvertio . To convert a video to a GIF, just drag it onto the tool or upload it from your Google Drive or Dropbox account, then click “convert” to finish the process.
Use this tool just if you don’t care about details. Convertio is simple to use, however you can’t set the start and finish of your GIF or the frame rate.
**Price:**Free
Features
- Share files to Drive, DropBox
- Edit FPS
Pros
- Ability to pick source footage from hard disk, Dropbox, Google Drive, or URL.
- Integrates Google Drive and Dropbox services
- Supports batch processing
- Offers an API to app developers
- Safe and secure online tool
- Fast and easy to use
Cons
- Converts a file of only up to 100 MB (for unregistered free users).
11. HNET
Virtually any video (mp4, flv, mpeg, webm, mov, avi, 3gp, etc.) may be converted to animated GIF format withthis online tool . Your video to gif conversion takes place in the cloud, so it won’t take up any of your computer or phone’s resources. This implies it runs on all major operating systems. After one hour, all of the files you submitted and converted will be permanently erased from the server. Your files are private; no one else may see or download them except you.
You may post your GIF picture on imgur, Pinterest, Reddit, Tumblr, 4chan, Deviantart, Flickr, and other popular image sharing sites once your video clip has been converted to GIF format.
**Price:**Free
Features
- Supports all OS
- File sharing after conversion
- Support many file formats
Pros
- Very easy to use
- Free version comes with handy features
Cons
- It has a file size limit
- Your will be deleted after an hour in case you want to retrieve it.
12. ImgFlip
Imgflip GIF Maker is a simple, fast video to GIF converter that converts mp4 files into animated GIFs. You can turn your clip into a GIF using the Imgflip editor and tinker with parameters like frame rate, size, and more. Because of its sharing features, Imgflip truly shines. You may share your GIF on Facebook, Pinterest, Twitter, Tumblr, and other social media sites by downloading the file, copying the file link, or using the HTML5 image format code. Imgflip is a great alternative to consider if you need to get your GIFs out there quickly.
**Price:**Free
Features
- Video editor
- File sharing
- Parameter control
Pros
- Simple and lightweight
- Fast and accurate conversion
Cons
- I glitches when the file size is big
5 Best Video To GIF Converter for iPhone/iPad/Android Phone
1. GIF Maker - Video to GIF, GIF Editor
The comprehensive GIF generator for your Android smartphone is the final app on our list. It’s a great tool for editing all sorts of GIF pictures on your phone, as the name suggests. Although it lacks preset settings like filters and music, it gives everything needed to edit films to their full potential. Any picture or video may be converted and edited.
Platform: Android
**Price:**Free
Features
- Add filters and effects to GIFs
Pros
- The UI is simple to use.
- Editing capabilities are extensive.
Cons
- There are no filters available.
- There are no options for adding music or text to your GIF pictures.
2. Videos & GIF maker
This software provides everything you need to make humorous memes and animated GIFs on your iPhone phone. As the tool’s name suggests, you may easily add captions to your photos. You may also choose the output format for the GIF picture and the movie and the start and finish lengths.
**Platform:**iPhone
**Price:**free
Features
- Select the output format of your GIF
Pros
- The most user-friendly UI.
- The GIF graphics and memes are simple to make.
- Even on older devices, it does not crash and runs well.
- Instagram has many options for creating and sharing square photographs.
Cons
- There are no editing options for GIF pictures.
- There were some issues with posting images to social networking sites.
3. Gif Maker
You should install this application if you want an all-in-one freeGIF maker for your Android phone. In the programs, many attractive effects can be applied with a single click and modify the entire appearance of your images. Additionally, you may utilize the application’s camera to capture movies directly from the app. The nicest thing about this program is that it supports many languages and allows you to generate GIF images with 50 photographs.
**Platform:**Android
**Price:**Free
Features
- Concert up to 50 photos
- Convert real-time videos from the camera
Pros
- Free applications with a lot of functionality.
- It is available in many languages.
- Have a variety of picture effects to use.
Cons
- On certain devices, the app slows and crashes.
- Problems with sharing and uploading photographs with others.
4. Live GIF
This program converts live photos to GIF images on your iPhone. There are no difficult settings to worry about; all you have to do is upload the photographs to the app and make minor adjustments. The finished photographs may be downloaded or shared on social media sites like Facebook and Twitter.
**Platform:**iPhone
**Price:**Free
Features
- Share your GIFs on social media
Pros
- An easy-to-use UI.
- The iPhone 6S and 6S Plus have full 3D Touch capability.
- Sharing images on Twitter and Facebook is simple.
- There are no advertisements in the application.
Cons
- The price is a bit more than the features it offers.
- GIF pictures have no options for changing their resolution.
- There are no possibilities for adding text or music to GIF pictures.
5. Gift
Gift is another iPhone software that effortlessly converts photographs and movies to GIF images. Although this program does not convert Live Images, it is a solid alternative for converting regular photos and movies on older iPhone versions. According to the makers, the program is free to use and has several packages to add different effects and text to your photographs; however, most of the effects are only available in the premium version, which costs money. You may also share GIF pictures from the app on social media sites like Facebook, Twitter, Instagram, and Tumblr.
**Platform:**iPhone
**Price:**Free Version
Features
- Add text to GIFs
- Several effects available
Pros
- Basic editing is free to use.
- It is simple to use and does not need an internet connection.
- Over 70 effects to personalize your images and videos.
- The GIF picture may be saved to your iPhone.
Cons
- The finished GIF picture has a watermark.
- There are no video editing options available.
- Too expensive for the things it offers.
How to Convert a Video to GIF by Using Filmora
Step1Download, Launch and Import Media File to Filmora
To enter the interface, click New Project and then Import Media Files Here. Then drag and drop or add it straight to the window. You may also take a screenshot of the video and extract the shots or frames from it. The recovered photographs will appear in the media library, where you may add numerous video clips.

Step2Edit Video Based on Your Preference and Add Pictures (Optional)
To begin, drag & drop your video clip into the Timeline. Before choosing Export, you may trim, apply an effect, add a subtitle, and other features to the video. To convert the movie to GIF, click the Export option once everything is in order.

Step3Save and Export GIF
After hitting the Export option, a new window will appear where you may choose your export format. Choose GIF as your preferred format. When you’re through editing, click the Export option to save your work as a.gif file.
Note: A Setting button underneath the Resolution allows you to change the file resolution, frame rate, and bit rate.

Notice and Tips When Converting Video to GIF
Choosing software to save a video as a GIF
All operating systems have a way to convert video to GIF, as you can see in this article. All you have to do now is choose the right one. In a nutshell, here’s how you choose the right platform for your GIFs:
**Usability:**The video to GIF platform you use should be simple to use. You want a high-performance converter that’s also simple to use.
Tools: The platform should have all of the tools you’ll need to make an intriguing GIF, such as speed modification, filters, subtitles, and more.
Quality: To avoid pixelation, your platform must be able to make GIFs with a high resolution.
**Speed:**Because you don’t want to waste time waiting for your file to save, the speed at which the video converts to GIF is also significant.
Bottom Line
GIF files are efficient when played in browsers and provide good visual quality. GIFs are now often used to show How-To instructions and post memes on social media sites such as Facebook.
However, a quality video to GIF converter is a must-have tool. You can obtain more control over the source material and the created outputs using professional software rather than free web services. Download Wondershare Filmora today to enjoy the handy video to GIF conversion features that will give you the best experience.
Mac Users: Install Lumafusion or Discover Its Top Competitors
Lumafusion for Mac: Install It or Get Alternatives

Max Wales
Mar 27, 2024• Proven solutions
LumaFusion is one of those applications that cannot go unmentioned in the list of best video editors for touch screen users. And for a reason: LumaFusion incorporates all that is expected from a good video editing software.
Scroll down to find more about LumaFusion Mac, how to install LumaFusion on M1-based Mac and iOS devices, and its alternatives!
- Part 1: What is Lumafusion
- Part 2: Lumafusion Can Run on M1-Based Mac
- Part 3: Lumafusion Alternatives on Mac
Part 1: What is Lumafusion?
LumaFusion is a powerful multitrack video editor that provides you with limitless options to edit a video to the finest quality, especially on touch screens. Recommended for journalists, filmmakers, and professional video producers, LumaFusion is the best application if you are looking to edit videos on the go!

Key Features:
- Employ up to six layers of video and audio tracks simultaneously
- Use preset transition options or create one yourself
- Display the edited video on another monitor in real-time while editing on the other
- Fine-tune and keyframe audio levels to perfect mixes
- Use multilayer titles with the desired shapes and sizes
- Work in frame rates from 18fps to 240fps and more!
Part 2: Lumafusion can Run on M1-Based Mac
While LumaFusion does not have a Mac version yet, it made clear that M1-based Mac supports the LumaFusion to run on a macOS environment. Yes, it might get inconvenient if you are not used to mouse navigation. Still, all features remain the same, and you can edit the videos to the same level. Plus, given the recent upgrades, LumaFusion has enabled users to change the touch option to mouse and keyboard, so you can customize the options accordingly and even use keyboard shortcuts to work seamlessly.
How to install Lumafusion
Here’s how to install LumaFusion on M1-based Mac:
- Open the App Store.
- Type in LumaFusion in the Search menu.
- Navigate to the right pane and find the LumaFusion application from the list.
- And select Get to install the LumaFusion application on M1-based Mac.
Once LumaFusion is installed on the Mac, you can work around the software like on iOS devices. All you have to do is go to Touch Alternatives options to change the customizing options.
Part 3: LumaFusion Alternatives on Mac
Although mighty and powerful, LumaFusion can be an annoyance to some based on personal preference. So, we are listing the two best alternatives of LumaFusion that includes almost all the features and enables you to edit the video to the same level.
1. Wondershare Filmora for Mac[for beginner and intermediate]
Filmora for Mac is suitable for all i.e., beginners, intermediate, and advanced video editors who want to utilize all the professional options yet need a simple interface. And given this smooth shift from beginners to experts — we recommend Filmora to the beginners and intermediate users who want to make a career or follow their passion for video-editing for years to come.
Coming to the features, Filmora includes all that is needed to enhance the video clips’ quality and give it unique and personalized effects.
Here are the key features of Filmora:
- Intuitive and simple interface, allowing even the least video-editor literates to personalize their videos to the full extent
- Pre-created filters and color pallets to color-correct the videos or you can utilize the professional color wheel and automated color-correction features to allow users to balance the color themselves
- Create simple animations with one-click preset options or take animation into your hands and personalize every aspect of the video manually, including position, size, opacity, and volume
- Includes a library of royalty-free music to incorporate tunes to the videos or you can utilize customizable options to bring consistency to your sound
- Large effects library with numerous customizing options and built-in filters, effects, overlays, and transitions to apply them with one-click
You may also interested in: How to edit video with Filmora
2. Final Cut Pro [for professionals]

Apple’s native Final Cut Pro X is another perfect alternative that has managed to make the top list when it comes to the best video editing software for the Mac since its release in 2011. And although it’s a pricey option, Final Cut Pro X offers a 90-day trial period to judge the application for yourself. Of course, the trial version excludes some additional content like extra sound effects, presets, the space designer plugin, and advanced video formats. Still, it should be enough to review the application.
Coming to the features, Final Cut Pro X takes things to a different level and offers you the best-in-trade functions to edit the videos to perfection. Including superior organization tools, libraries, ratings, tagging, auto analysis for faces, scenes — the interface of Final Cut Pro X speaks of the effort the designers have put into the software. Moreover, the multi-cam support, multiple later editing, audio effects, and the recent upgrade of smoothing 360-degree footage and HDR modes have shown that Apple will leave no stone unturned when it comes to perfecting its native professional video-editing tool, i.e., Final Cut Pro X.
However, there is a learning curve if you are new to Final Cut Pro X (regardless of whether you are an expert or not), as it incorporates a unique magnetic, trackless timeline that is not common to the video-editing software. But that initial learning time is worth it because once you start utilizing Final Cut Pro X, you will not see (or like) any other software in the industry — given the regular and timely updates to the application.
Can’t choose between Final Cut Pro and Lumafusion for professional video editing? This article may help you: Final Cut Pro vs. Lumafusion, Which Suits You Better
Conclusion
While LumaFusion can be installed on the new M1-Based Macs, it is not that great to work on it (especially, if you are used to the touch version). And that is why this guide list the two-best alternatives to LumaFusion, i.e., Filmora and Final Cut Pro.And we highly recommend Filmora to all non-professional users.
Max Wales
Max Wales is a writer and a lover of all things video.
Follow @Max Wales
Max Wales
Mar 27, 2024• Proven solutions
LumaFusion is one of those applications that cannot go unmentioned in the list of best video editors for touch screen users. And for a reason: LumaFusion incorporates all that is expected from a good video editing software.
Scroll down to find more about LumaFusion Mac, how to install LumaFusion on M1-based Mac and iOS devices, and its alternatives!
- Part 1: What is Lumafusion
- Part 2: Lumafusion Can Run on M1-Based Mac
- Part 3: Lumafusion Alternatives on Mac
Part 1: What is Lumafusion?
LumaFusion is a powerful multitrack video editor that provides you with limitless options to edit a video to the finest quality, especially on touch screens. Recommended for journalists, filmmakers, and professional video producers, LumaFusion is the best application if you are looking to edit videos on the go!
Key Features:
- Employ up to six layers of video and audio tracks simultaneously
- Use preset transition options or create one yourself
- Display the edited video on another monitor in real-time while editing on the other
- Fine-tune and keyframe audio levels to perfect mixes
- Use multilayer titles with the desired shapes and sizes
- Work in frame rates from 18fps to 240fps and more!
Part 2: Lumafusion can Run on M1-Based Mac
While LumaFusion does not have a Mac version yet, it made clear that M1-based Mac supports the LumaFusion to run on a macOS environment. Yes, it might get inconvenient if you are not used to mouse navigation. Still, all features remain the same, and you can edit the videos to the same level. Plus, given the recent upgrades, LumaFusion has enabled users to change the touch option to mouse and keyboard, so you can customize the options accordingly and even use keyboard shortcuts to work seamlessly.
How to install Lumafusion
Here’s how to install LumaFusion on M1-based Mac:
- Open the App Store.
- Type in LumaFusion in the Search menu.
- Navigate to the right pane and find the LumaFusion application from the list.
- And select Get to install the LumaFusion application on M1-based Mac.
Once LumaFusion is installed on the Mac, you can work around the software like on iOS devices. All you have to do is go to Touch Alternatives options to change the customizing options.
Part 3: LumaFusion Alternatives on Mac
Although mighty and powerful, LumaFusion can be an annoyance to some based on personal preference. So, we are listing the two best alternatives of LumaFusion that includes almost all the features and enables you to edit the video to the same level.
1. Wondershare Filmora for Mac[for beginner and intermediate]
Filmora for Mac is suitable for all i.e., beginners, intermediate, and advanced video editors who want to utilize all the professional options yet need a simple interface. And given this smooth shift from beginners to experts — we recommend Filmora to the beginners and intermediate users who want to make a career or follow their passion for video-editing for years to come.
Coming to the features, Filmora includes all that is needed to enhance the video clips’ quality and give it unique and personalized effects.
Here are the key features of Filmora:
- Intuitive and simple interface, allowing even the least video-editor literates to personalize their videos to the full extent
- Pre-created filters and color pallets to color-correct the videos or you can utilize the professional color wheel and automated color-correction features to allow users to balance the color themselves
- Create simple animations with one-click preset options or take animation into your hands and personalize every aspect of the video manually, including position, size, opacity, and volume
- Includes a library of royalty-free music to incorporate tunes to the videos or you can utilize customizable options to bring consistency to your sound
- Large effects library with numerous customizing options and built-in filters, effects, overlays, and transitions to apply them with one-click
You may also interested in: How to edit video with Filmora
2. Final Cut Pro [for professionals]
Apple’s native Final Cut Pro X is another perfect alternative that has managed to make the top list when it comes to the best video editing software for the Mac since its release in 2011. And although it’s a pricey option, Final Cut Pro X offers a 90-day trial period to judge the application for yourself. Of course, the trial version excludes some additional content like extra sound effects, presets, the space designer plugin, and advanced video formats. Still, it should be enough to review the application.
Coming to the features, Final Cut Pro X takes things to a different level and offers you the best-in-trade functions to edit the videos to perfection. Including superior organization tools, libraries, ratings, tagging, auto analysis for faces, scenes — the interface of Final Cut Pro X speaks of the effort the designers have put into the software. Moreover, the multi-cam support, multiple later editing, audio effects, and the recent upgrade of smoothing 360-degree footage and HDR modes have shown that Apple will leave no stone unturned when it comes to perfecting its native professional video-editing tool, i.e., Final Cut Pro X.
However, there is a learning curve if you are new to Final Cut Pro X (regardless of whether you are an expert or not), as it incorporates a unique magnetic, trackless timeline that is not common to the video-editing software. But that initial learning time is worth it because once you start utilizing Final Cut Pro X, you will not see (or like) any other software in the industry — given the regular and timely updates to the application.
Can’t choose between Final Cut Pro and Lumafusion for professional video editing? This article may help you: Final Cut Pro vs. Lumafusion, Which Suits You Better
Conclusion
While LumaFusion can be installed on the new M1-Based Macs, it is not that great to work on it (especially, if you are used to the touch version). And that is why this guide list the two-best alternatives to LumaFusion, i.e., Filmora and Final Cut Pro.And we highly recommend Filmora to all non-professional users.
Max Wales
Max Wales is a writer and a lover of all things video.
Follow @Max Wales
Also read:
- New Do You Love Making and Uploading Status on WhatsApp for Your Friends and Family? It Has Certainly Become a Trend Nowadays. Continue Reading to Learn About the Best WhatsApp Status Maker Apps
- Create Stunning Videos Add Slow Motion Effects at No Cost with Filmora for 2024
- Cracking the Code Twitter Video Aspect Ratio Requirements for 2024
- 2024 Approved Top 14 Free Video Editing Software without Watermark
- 10 Industry-Leading Audio Editing Programs for Exceptional Results for 2024
- 2024 Approved From Mouth to Manuscript Speech-to-Text Conversion Tips
- 2024 Approved MP4 Video Tag Editors Are Used to Alter or Add General Information to a Video. To Help You Find the Best Video Tag Editor, Weve Compiled a List of the Top 10 Best MP4 Tag Editors for Windows and Mac
- Updated 10 Best Video Editing Apps for Creating Mind-Bending Glitch Art on Mobile
- In 2024, Adobe Premiere Pro vs After Effects A Side-by-Side Comparison
- Youtube to MP3 Converter Review; Choose Best Converter Tool to Extract Audio From Your Favorite Youtube Videos
- Unleash the Glitch Top Video Editing Software for Creatives
- In 2024, Most Essential Guide Towards Picking Best Aiff Converter
- 2024 Approved Break Free From Adobe 10 Innovative Premiere Elements Alternatives
- New From Zero to Hero Top Free Video Editing Software
- New Blur Brilliance The Ultimate Guide to Bokeh Effects Apps
- New Free Video Blurring A Step-by-Step Guide
- The Ultimate Guide to Cutting AVI Videos Top Tools for Windows, MAC, and Android
- 2024 Approved Premiere Pro Transition Essentials Top 10 Plugins You Need
- How to Restore Deleted Sony Xperia 5 V Pictures An Easy Method Explained.
- Bypassing Google Account With vnROM Bypass For OnePlus 11 5G
- In 2024, 6 Methods to Share Apple iPhone 13 Pro Screen with PC | Dr.fone
- In 2024, How Can I Use a Fake GPS Without Mock Location On Honor X9a? | Dr.fone
- In 2024, Universal Unlock Pattern for Poco C65
- Fixing Foneazy MockGo Not Working On Itel A70 | Dr.fone
- In 2024, Three Ways to Sim Unlock Nokia C110
- Quick Fixes for Why Is My Oppo Find N3 Black and White | Dr.fone
- Updated In 2024, Top 10 Text-to-Video AI Generators to Create Engaging and Captivating Videos
- In 2024, How to Transfer Contacts from Poco F5 Pro 5G to iPhone XS/11 | Dr.fone
- Ultimate guide to get the meltan box pokemon go For Tecno Spark 10 4G | Dr.fone
- In 2024, Top 5 HTC U23 Pro Bypass FRP Tools for PC That Actually Work
- Title: This Article Shows the Detail Steps to Crop an Image in Final Cut Pro with Screenshots
- Author: Giselle
- Created at : 2024-06-08 09:47:54
- Updated at : 2024-06-09 09:47:54
- Link: https://ai-vdieo-software.techidaily.com/this-article-shows-the-detail-steps-to-crop-an-image-in-final-cut-pro-with-screenshots/
- License: This work is licensed under CC BY-NC-SA 4.0.
