
:max_bytes(150000):strip_icc():format(webp)/tablets-vs-laptops-832333-93961eb085ff44d99d3836a0d0fa486a.png)
New Gaming Galore Top Websites to Download Games
Gaming Galore: Top Websites to Download Games
Top 10+ Websites to Download Games

Ollie Mattison
Mar 27, 2024• Proven solutions


Gaming has been an exciting and addictive way to relax and have fun since forever. It has been an essential part of every culture, and many countries have their national games as well. Gaming enhances not only our physical capabilities but also our mental capabilities since we have to use our imagination and brain to choose every next move. Games are a form of social bonding; our games have evolved with the rest of things as time has passed. The gaming world for humans started with “Knucklebones” and dice games, and now we have reached the era of video games with various types like action games, car games, arcade games, etc. You can get games from CDs, Apple App Stores, or GooglePlay, or you can download them from various websites. In this article, I’ll share with you the best websites to download games on a PC or Mac computer as well as game download sites for Android devices.
- Part 1: Best PC Game Download Sites
- Part 2: Top Android Game Download Sites
- Part 3: FAQs About Game Download Sites
You may also like:
- 8 Best Free Video Game Sound Effects You Need to Know
- Difference and Debate Between Roguelite and Roguelike Games
- Best TV for Your PS5 in 2021
Bonus: Best Gaming Video Editing Software
For those who are interested in sharing the gameplay experience on YouTube or other video sharing platforms, editing the gameplay video with a reliable video editing software is one of the most important things. Besides the normally trimming and cutting, you may also need some cool visual effects, filters, overlays, and titles as well. Here, we recommend you to try Wondershare Filmora to edit your videos . Remember to join in the Wondershare Video Community to watch more inspirational videos.
Part 1: Best PC Game Download Sites [2024 Updates]
Here is a list of top 8 websites to download games on your PC.
1 Steam
This website for downloading games is developed by Valve Corporations and has been functioning for the past thirteen years. Steam is considered to be the largest digital distribution platform for video games up to date. They have over a thousand games, from indie games to action games, they have everything available for their players. Furthermore, Steam operates in 28 languages.

Single Player and Multiplayer
Games at Steam allow single-player gaming as well as multiplayer gaming. You can have fun with friends by challenging them over a game and have fun while relaxing at the same time. You can challenge a local multiplayer as well as challenge someone online.
Video streaming
This gaming platform allows the players to stream videos of games in the form of movies, demos, tutorials, or episodes. The categories include anime, comedy, drama, horror, action, and sci-fi.
Social Networking
The platform offers the players to connect socially, meet millions of new people, form clans, and chat during the game through their community.
Availability
Steam is available on Windows, Linux, and Mac. This gives the players the freedom to buy a game once and play anywhere and at any time.
Create and Share
This digital platform allows you to create new games through the ‘Steam Workshop’. It allows animation and modeling of the game, sound production, photo editing, game development, and various other features. You can also give gifts to your friends and trade items as well.
Pros:
- It has a variety of games and allows early access to some games for a limited time.
- You can play with an automated player, with your friend or with a stranger online, which enhances the fun.
- It is available in 28 languages due to its built-in translator, so it is easier to use and understand by people all over the world.
- It is easily accessible and easy to download.
Cons:
- Some of the games are rather pricey.
- The games available for free lack variety and have very few features to incite excitement in a player.
![]()
A cross-platform for making videos anywhere for all creators

Why your video editing isn’t good enough? How about some creative inspo?
- 100 Million+ Users
- 150+ Countries and Regions
- 4 Million+ Social Media Followers
- 5 Million+ Stock Media for Use
* Secure Download

2 GOG
GOG.com is operated by GOG Limited. It was formerly known as Good Old Games. GOG.com is a Cypriot digital platform for video games and movies. These movies and games can be downloaded and purchased online.

Install and auto-update
You can install the game with just one click, and you do not have to install a special client to run games or download. The game will always be updated with new features automatically, but if you do not want to update your game, then you can choose to stop the automatic updates.
Cloud Saving
You will never lose your game progress because the game will be saved in the cloud automatically and will stay synced with all of your devices.
Offline Mode
The games installed from this platform do not need an internet connection to run. You can even play offline, and the game will still be backed up.
Rollback the updates
If you do not like the new game update, then you can choose to restore your prior update.
Pros:
- It is easy to use, download, and access.
- The games are not pricey, and GOG.com also puts many games up for occasional sales and accepts gift cards as well.
- It has a large variety of games with excellent features.
- It is compatible with Mac, Windows, and Linux.
Cons:
- The games are old, and not many new games are introduced.
- It does not have multiplayer gaming features.
3 G2A

G2A.com is considered to be the fastest-growing global digital marketplace. It has over 12 million customers and 2 million sellers all over the world. G2A.com acts as an intermediary and connects the buyer and the seller. It does not sell or purchase games itself but only delivers different platforms for others to sell and buy digital products.
Variety in platforms
G2A provides all sorts of platforms to its customers like Xbox, Steam, PSN, Origin, Apple, Gameforge, Battlenet, Uplay, GOG, etc.
Variety in genres
This digital marketplace contains various genres like action, arcade, games for children, puzzle, simulation, song games, racing, sport, etc.
Gift cards
Gift cards for different platforms are also sold here.
G2A 3D+
This feature allows the customer to choose their favorite hero or a legendary weapon from their favorite game, and then G2A will print it, color it and ship it to your doorstep.
G2A Goldmine
This feature allows you to earn real money for promoting G2A.com products to other gamers worldwide. No registration fee or investment is required, and you can do this from your home.
Pros:
- G2A.com offers a home-based job with a competitive salary so gamers can earn and play side by side.
- A lot of new projects are introduced, so the excitement never dies.
- The site can be accessed in more than 20 languages.
Cons:
- The site is not very well protected and is exposed to scams.
4 Origin

Origin is a digital distribution software that promotes online gaming. It has been developed by Electronic Arts, a company behind many globally successful games. You can purchases games on your PC as well as on your mobile.
Social Features
Origin provides its users with many social features like profile management, networking with friends through chatting and video streaming via TwitchTV. You can also share your game library and community integration through social media and networking sites like Facebook, Xbox Live, PlayStation Network, and Nintendo Network.
Variety in games
It provides a large variety in games from PC games to Fifa, and even classic games like Plant Vs. Zombies are also available.
Deals
It offers the best and cheapest deals and also puts up a few games for sale occasionally.
Pros:
- It provides great game streaming features.
- It is developed by a renowned and successful company so it can be trusted.
- There ‘on the house specials’ are appreciated by a lot of gamers, which allows them to play a paid game for free every now and then.
Cons:
- It has a lot of updates and takes an unreasonable amount of time to install and update the software.
- Customers have complained that they provide expired discount codes.
- Customer service needs to be improved as it is not very responsive.
5 PC games

PC games is an online gaming site. You can purchase and download various games from this site. It is operated by EA games.
Categories
PC games contain various genres like action, arcade, games for children, puzzle, simulation, song games, racing, sport, etc.
Origin
It allows you to buy the games from origin.com, which is also operated under EA games.
Community forum
It has a community forum that is available to answer your questions 24/7.
Pros:
- It is easy to access and download.
- It contains one of the most interesting and addictive games.
Cons:
- The quantity of games available is very less, so there is not a lot of variety of games.
- Sometimes the site crashes, and the games have to be downloaded from the start.
6 Ocean of Games
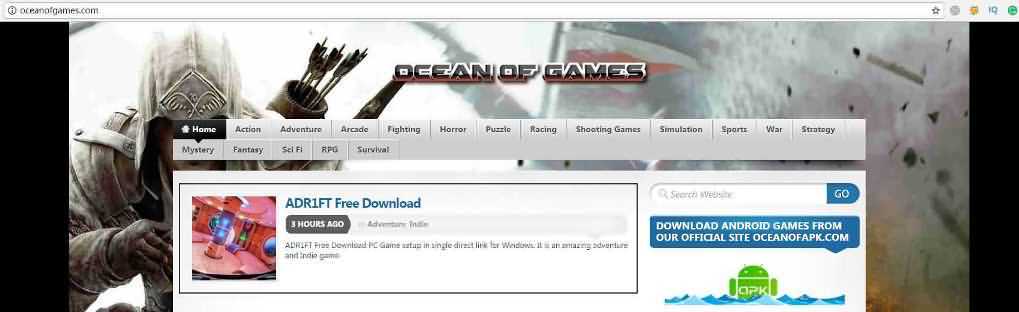
It is developed by a British software company Ocean software.
- It has a large variety of games like action games, song games, arcade games, RPG, survival and fantasy games, etc.
- It provides networking features through its community forum where all the players can meet new people and chat even during gaming.
- It allows both single-player and multiplayer gaming.
Pros:
- The player can challenge an automated player, with your friend or with a stranger online, which enhances the fun.
- It provides great game streaming features.
- It is compatible with Mac, Windows, and Linux.
Cons:
- It is not very well protected and hence exposed to scams.
- The games are not updated, and old versions are still played.
- Some people use the community forum to harass other players, and no action is taken regarding it.
7 Softpedia

Softpedia is an online gaming site that provides the customers the facility to purchase and download games at a very reasonable price.
- Softpedia contains a large library of games of various categories like action games, song games, arcade games, RPG, survival and fantasy games, etc.
- It offers free game cheats and demos to the players.
- Its game application finder feature allows you to find the exact game that you are looking for.
- The games are available for Windows, Mac, Linux, Android, and Drivers as well.
Pros:
- The games are not pricey and are available at a very low price.
Cons:
- The community forum is barely used.
- The website is not updated, so there are no new games available.
- The games are not automatically updated.
8 Skidrow reloaded
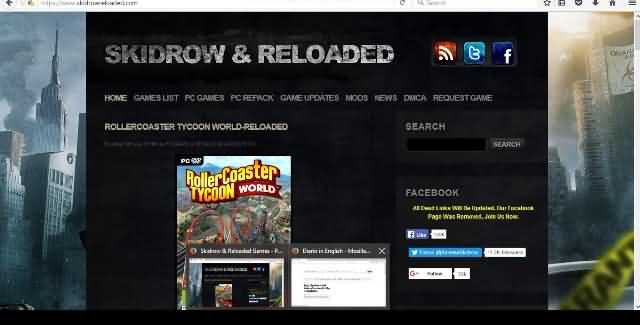
Skidrow reloaded is an online gaming site from where you can purchase and download games.
- Softpedia contains a large library of games of various categories like action games, song games, arcade games, RPG, survival and fantasy games, etc.
- The website is not updated very well, so this site does not provide its user with enough features.
- The games can be downloaded through torrent, Multilink, KatFile, GO4UP, Hitfile, Turbobit, Jheberg, DownAce, and various other links.
- It provides its customers to request any games to which they need links for downloading.
Pros:
- It allows users to request games.
- It provides a lot of links to download a game.
Cons:
- The website is not properly maintained.
- There is no community forum.
- There is no such variety of games.
- The games are not of high quality.
If you’re looking for some websites to download games for free, you can check our free game download sites list.
Part 2: Top Android Game Download Sites
Android is the fastest growing software and is preferred by the majority. Besides the above websites that we picked for downloading games on PC or Mac computer, we’ve done some research and figured out some best sites to download games on android are as follows:
1 Google play

Google play is operated by Google for the Android operating system, and it has been functioning for the past three years. It was formerly known as the android market. Google play contains millions of apps of various categories, so there is something for everyone. Google Play provides a large range of categories of games.
- Every game is easily downloadable, but it depends merely upon your internet connection.
- The purchasing methods are through credit cards, and the procedure is very easy.
- The platform allows everyone and anyone to sell their games.
- Sign up through your Google account is necessary to get access to these features.
Pros:
- It is easy to access.
- It is preinstalled in all android supported devices.
- It contains a huge collection of unique games.
Cons:
- Since everyone and anyone can access it without paying any registration fee, it is exposed to scams and harassment.
- A few games do not function and keep crashing.
2 Android Games Room

It has thousands of free and paid games.
- It has thousands of games in various categories.
- The games are very easily downloaded.
- The games can be even downloaded on your android mobile.
- You can access this site on your mobile by just scanning a QR code.
Pros:
- The site is easily accessible.
- The games are cheap and easily downloadable.
Cons:
- The site does not have a community forum.
- The customer service is not responsive.
- The downloading process is slow.
- No multiplayer gaming.
3 Android Apps

It is an online gaming site where games are handpicked every day, either for free or for a reasonable price.
- It contains a large library of games of various categories.
- You can promote your games also by using the ‘promote your app’ feature.
Pros:
- It is easily accessible and is easy to use.
- The site is updated every day, so new games are available each day.
Cons:
- Multiplayer gaming is not available.
- The customer service is not responsive.
- It has a lot of updates and takes an unreasonable amount of time to install and update the software.
Above are the top websites to download games. I hope you will get interesting games and have fun playing it. For making a great gaming video, you can also add some interesting visual effects and elements to the video.
Part 3: FAQs About Game Download Sites
1. Where can I download PC games for free?
There are plenty of free PC games available in the App Store & Microsoft stores. You can play & download free mini-games from sites like myplaycity.com & miniclip.com. Major game distributing platforms such as Steam, GOG, Uplay, Itch.io, etc. provide numerous free-to-play titles. These sites also frequently hold limited-time giveaways of paid games.
2. What is the safest website to download free games?
Downloading free games puts you at the risk of malware attacks, phishing, spoofing, viruses, and more. Therefore, we highly recommend that you don’t download games from websites without a proper security check. The safest website for downloading free PC games would be Steam. It is a cross-platform game distribution service with thousands of free-to-play games. All the games are vigorously checked and tested for security vulnerabilities. The increasing support for gaming on Linux makes it critical for Linux gamers.
3. Can we download PC games on Android?
There isn’t a straightforward answer to this question. By ‘download,’ if you mean installing or playing, you can only play specific ported titles. GTA San Andreas is one such PC game ported to Android. Some game streaming services like Stadia & Nvidia Geforce Now let you play PC games on Android. However, you can certainly download (not install or play) PC games on Android. There are a few things to keep in mind though. Android internal (& in some cases external) storage does not support single files that are over 4 GB in size. For downloading files greater than 4 GB, you will have to flash your storage in the exFAT or NTFS file system. Moreover, game distributors such as Steam do not allow downloading PC games on Android.
Ollie Mattison
Ollie Mattison is a writer and a lover of all things video.
Follow @Ollie Mattison
Ollie Mattison
Mar 27, 2024• Proven solutions
Gaming has been an exciting and addictive way to relax and have fun since forever. It has been an essential part of every culture, and many countries have their national games as well. Gaming enhances not only our physical capabilities but also our mental capabilities since we have to use our imagination and brain to choose every next move. Games are a form of social bonding; our games have evolved with the rest of things as time has passed. The gaming world for humans started with “Knucklebones” and dice games, and now we have reached the era of video games with various types like action games, car games, arcade games, etc. You can get games from CDs, Apple App Stores, or GooglePlay, or you can download them from various websites. In this article, I’ll share with you the best websites to download games on a PC or Mac computer as well as game download sites for Android devices.
- Part 1: Best PC Game Download Sites
- Part 2: Top Android Game Download Sites
- Part 3: FAQs About Game Download Sites
You may also like:
- 8 Best Free Video Game Sound Effects You Need to Know
- Difference and Debate Between Roguelite and Roguelike Games
- Best TV for Your PS5 in 2021
Bonus: Best Gaming Video Editing Software
For those who are interested in sharing the gameplay experience on YouTube or other video sharing platforms, editing the gameplay video with a reliable video editing software is one of the most important things. Besides the normally trimming and cutting, you may also need some cool visual effects, filters, overlays, and titles as well. Here, we recommend you to try Wondershare Filmora to edit your videos . Remember to join in the Wondershare Video Community to watch more inspirational videos.
Part 1: Best PC Game Download Sites [2024 Updates]
Here is a list of top 8 websites to download games on your PC.
1 Steam
This website for downloading games is developed by Valve Corporations and has been functioning for the past thirteen years. Steam is considered to be the largest digital distribution platform for video games up to date. They have over a thousand games, from indie games to action games, they have everything available for their players. Furthermore, Steam operates in 28 languages.
Single Player and Multiplayer
Games at Steam allow single-player gaming as well as multiplayer gaming. You can have fun with friends by challenging them over a game and have fun while relaxing at the same time. You can challenge a local multiplayer as well as challenge someone online.
Video streaming
This gaming platform allows the players to stream videos of games in the form of movies, demos, tutorials, or episodes. The categories include anime, comedy, drama, horror, action, and sci-fi.
Social Networking
The platform offers the players to connect socially, meet millions of new people, form clans, and chat during the game through their community.
Availability
Steam is available on Windows, Linux, and Mac. This gives the players the freedom to buy a game once and play anywhere and at any time.
Create and Share
This digital platform allows you to create new games through the ‘Steam Workshop’. It allows animation and modeling of the game, sound production, photo editing, game development, and various other features. You can also give gifts to your friends and trade items as well.
Pros:
- It has a variety of games and allows early access to some games for a limited time.
- You can play with an automated player, with your friend or with a stranger online, which enhances the fun.
- It is available in 28 languages due to its built-in translator, so it is easier to use and understand by people all over the world.
- It is easily accessible and easy to download.
Cons:
- Some of the games are rather pricey.
- The games available for free lack variety and have very few features to incite excitement in a player.
![]()
A cross-platform for making videos anywhere for all creators
Why your video editing isn’t good enough? How about some creative inspo?
- 100 Million+ Users
- 150+ Countries and Regions
- 4 Million+ Social Media Followers
- 5 Million+ Stock Media for Use
* Secure Download
2 GOG
GOG.com is operated by GOG Limited. It was formerly known as Good Old Games. GOG.com is a Cypriot digital platform for video games and movies. These movies and games can be downloaded and purchased online.
Install and auto-update
You can install the game with just one click, and you do not have to install a special client to run games or download. The game will always be updated with new features automatically, but if you do not want to update your game, then you can choose to stop the automatic updates.
Cloud Saving
You will never lose your game progress because the game will be saved in the cloud automatically and will stay synced with all of your devices.
Offline Mode
The games installed from this platform do not need an internet connection to run. You can even play offline, and the game will still be backed up.
Rollback the updates
If you do not like the new game update, then you can choose to restore your prior update.
Pros:
- It is easy to use, download, and access.
- The games are not pricey, and GOG.com also puts many games up for occasional sales and accepts gift cards as well.
- It has a large variety of games with excellent features.
- It is compatible with Mac, Windows, and Linux.
Cons:
- The games are old, and not many new games are introduced.
- It does not have multiplayer gaming features.
3 G2A
G2A.com is considered to be the fastest-growing global digital marketplace. It has over 12 million customers and 2 million sellers all over the world. G2A.com acts as an intermediary and connects the buyer and the seller. It does not sell or purchase games itself but only delivers different platforms for others to sell and buy digital products.
Variety in platforms
G2A provides all sorts of platforms to its customers like Xbox, Steam, PSN, Origin, Apple, Gameforge, Battlenet, Uplay, GOG, etc.
Variety in genres
This digital marketplace contains various genres like action, arcade, games for children, puzzle, simulation, song games, racing, sport, etc.
Gift cards
Gift cards for different platforms are also sold here.
G2A 3D+
This feature allows the customer to choose their favorite hero or a legendary weapon from their favorite game, and then G2A will print it, color it and ship it to your doorstep.
G2A Goldmine
This feature allows you to earn real money for promoting G2A.com products to other gamers worldwide. No registration fee or investment is required, and you can do this from your home.
Pros:
- G2A.com offers a home-based job with a competitive salary so gamers can earn and play side by side.
- A lot of new projects are introduced, so the excitement never dies.
- The site can be accessed in more than 20 languages.
Cons:
- The site is not very well protected and is exposed to scams.
4 Origin
Origin is a digital distribution software that promotes online gaming. It has been developed by Electronic Arts, a company behind many globally successful games. You can purchases games on your PC as well as on your mobile.
Social Features
Origin provides its users with many social features like profile management, networking with friends through chatting and video streaming via TwitchTV. You can also share your game library and community integration through social media and networking sites like Facebook, Xbox Live, PlayStation Network, and Nintendo Network.
Variety in games
It provides a large variety in games from PC games to Fifa, and even classic games like Plant Vs. Zombies are also available.
Deals
It offers the best and cheapest deals and also puts up a few games for sale occasionally.
Pros:
- It provides great game streaming features.
- It is developed by a renowned and successful company so it can be trusted.
- There ‘on the house specials’ are appreciated by a lot of gamers, which allows them to play a paid game for free every now and then.
Cons:
- It has a lot of updates and takes an unreasonable amount of time to install and update the software.
- Customers have complained that they provide expired discount codes.
- Customer service needs to be improved as it is not very responsive.
5 PC games
PC games is an online gaming site. You can purchase and download various games from this site. It is operated by EA games.
Categories
PC games contain various genres like action, arcade, games for children, puzzle, simulation, song games, racing, sport, etc.
Origin
It allows you to buy the games from origin.com, which is also operated under EA games.
Community forum
It has a community forum that is available to answer your questions 24/7.
Pros:
- It is easy to access and download.
- It contains one of the most interesting and addictive games.
Cons:
- The quantity of games available is very less, so there is not a lot of variety of games.
- Sometimes the site crashes, and the games have to be downloaded from the start.
6 Ocean of Games
It is developed by a British software company Ocean software.
- It has a large variety of games like action games, song games, arcade games, RPG, survival and fantasy games, etc.
- It provides networking features through its community forum where all the players can meet new people and chat even during gaming.
- It allows both single-player and multiplayer gaming.
Pros:
- The player can challenge an automated player, with your friend or with a stranger online, which enhances the fun.
- It provides great game streaming features.
- It is compatible with Mac, Windows, and Linux.
Cons:
- It is not very well protected and hence exposed to scams.
- The games are not updated, and old versions are still played.
- Some people use the community forum to harass other players, and no action is taken regarding it.
7 Softpedia
Softpedia is an online gaming site that provides the customers the facility to purchase and download games at a very reasonable price.
- Softpedia contains a large library of games of various categories like action games, song games, arcade games, RPG, survival and fantasy games, etc.
- It offers free game cheats and demos to the players.
- Its game application finder feature allows you to find the exact game that you are looking for.
- The games are available for Windows, Mac, Linux, Android, and Drivers as well.
Pros:
- The games are not pricey and are available at a very low price.
Cons:
- The community forum is barely used.
- The website is not updated, so there are no new games available.
- The games are not automatically updated.
8 Skidrow reloaded
Skidrow reloaded is an online gaming site from where you can purchase and download games.
- Softpedia contains a large library of games of various categories like action games, song games, arcade games, RPG, survival and fantasy games, etc.
- The website is not updated very well, so this site does not provide its user with enough features.
- The games can be downloaded through torrent, Multilink, KatFile, GO4UP, Hitfile, Turbobit, Jheberg, DownAce, and various other links.
- It provides its customers to request any games to which they need links for downloading.
Pros:
- It allows users to request games.
- It provides a lot of links to download a game.
Cons:
- The website is not properly maintained.
- There is no community forum.
- There is no such variety of games.
- The games are not of high quality.
If you’re looking for some websites to download games for free, you can check our free game download sites list.
Part 2: Top Android Game Download Sites
Android is the fastest growing software and is preferred by the majority. Besides the above websites that we picked for downloading games on PC or Mac computer, we’ve done some research and figured out some best sites to download games on android are as follows:
1 Google play
Google play is operated by Google for the Android operating system, and it has been functioning for the past three years. It was formerly known as the android market. Google play contains millions of apps of various categories, so there is something for everyone. Google Play provides a large range of categories of games.
- Every game is easily downloadable, but it depends merely upon your internet connection.
- The purchasing methods are through credit cards, and the procedure is very easy.
- The platform allows everyone and anyone to sell their games.
- Sign up through your Google account is necessary to get access to these features.
Pros:
- It is easy to access.
- It is preinstalled in all android supported devices.
- It contains a huge collection of unique games.
Cons:
- Since everyone and anyone can access it without paying any registration fee, it is exposed to scams and harassment.
- A few games do not function and keep crashing.
2 Android Games Room
It has thousands of free and paid games.
- It has thousands of games in various categories.
- The games are very easily downloaded.
- The games can be even downloaded on your android mobile.
- You can access this site on your mobile by just scanning a QR code.
Pros:
- The site is easily accessible.
- The games are cheap and easily downloadable.
Cons:
- The site does not have a community forum.
- The customer service is not responsive.
- The downloading process is slow.
- No multiplayer gaming.
3 Android Apps
It is an online gaming site where games are handpicked every day, either for free or for a reasonable price.
- It contains a large library of games of various categories.
- You can promote your games also by using the ‘promote your app’ feature.
Pros:
- It is easily accessible and is easy to use.
- The site is updated every day, so new games are available each day.
Cons:
- Multiplayer gaming is not available.
- The customer service is not responsive.
- It has a lot of updates and takes an unreasonable amount of time to install and update the software.
Above are the top websites to download games. I hope you will get interesting games and have fun playing it. For making a great gaming video, you can also add some interesting visual effects and elements to the video.
Part 3: FAQs About Game Download Sites
1. Where can I download PC games for free?
There are plenty of free PC games available in the App Store & Microsoft stores. You can play & download free mini-games from sites like myplaycity.com & miniclip.com. Major game distributing platforms such as Steam, GOG, Uplay, Itch.io, etc. provide numerous free-to-play titles. These sites also frequently hold limited-time giveaways of paid games.
2. What is the safest website to download free games?
Downloading free games puts you at the risk of malware attacks, phishing, spoofing, viruses, and more. Therefore, we highly recommend that you don’t download games from websites without a proper security check. The safest website for downloading free PC games would be Steam. It is a cross-platform game distribution service with thousands of free-to-play games. All the games are vigorously checked and tested for security vulnerabilities. The increasing support for gaming on Linux makes it critical for Linux gamers.
3. Can we download PC games on Android?
There isn’t a straightforward answer to this question. By ‘download,’ if you mean installing or playing, you can only play specific ported titles. GTA San Andreas is one such PC game ported to Android. Some game streaming services like Stadia & Nvidia Geforce Now let you play PC games on Android. However, you can certainly download (not install or play) PC games on Android. There are a few things to keep in mind though. Android internal (& in some cases external) storage does not support single files that are over 4 GB in size. For downloading files greater than 4 GB, you will have to flash your storage in the exFAT or NTFS file system. Moreover, game distributors such as Steam do not allow downloading PC games on Android.
Ollie Mattison
Ollie Mattison is a writer and a lover of all things video.
Follow @Ollie Mattison
Final Cut Pro Tutorial: Building a Stunning Video Slideshow
Complete Guide on How to Create a Video Slideshow with Final Cut Pro

Liza Brown
Mar 27, 2024• Proven solutions
A video slideshow is video footage produced by presenting a series of still images in a prearranged sequence. In the context of computer-based visualization, the term slideshow refers to turning existing images into upbeat, attention-grabbing videos.
Final Cut Pro is advanced video-editing software used by professional video editors and filmmakers to create impressive videos and animations. Its high-tech features allow users to add various kinds of effects to their videos to make them look worth watching. You can also create video slideshows with FCP and give your still images a new look.
Read this article section to learn how to make video slideshows with FCP and Wondershare Filmora.
- Part 1: How to Create a Video Slideshow in Final Cut Pro?
- Part 2: Where to Find FCP Video Slideshow Templates for Free?
- Part 3: How to Adopt Templates in Final Cut Pro?
- Part 4: How to Add Music and Text in a Video Slideshow with Final Cut Pro?
- Part 5: How to Make a Slideshow in an Easier yet Better Way?
- Part 6: How to make a simple Slideshow Free & Online?
Part 1: How to Create a Video Slideshow in Final Cut Pro?
Final Cut Pro is an amazing software that makes slideshow creation as simple as ABC. You need not use any template; instead, you can sequence images on the timeline and add a few transitions and audio effects to create a video slideshow. Here’s how you can do this:
- Open Final Cut Pro, go to File, and click on New Project;
- Now, it’s time to import the still images you want to use to Final Cut Pro. For this purpose, tap File > Import > Files and select all photos from your computer, and click Import. Keep selecting until all images have been imported.
- Go to the Browser pane and drag your photos to the Timeline of Final Cut Pro. Make sure you follow the order in which you want these images to appear in the slideshow. You can also drag each image individually and drop it to your desired place before or after other images. The video slideshow will display images in the order they are placed in the Timeline.
- To add various transitions between your images, take the cursor to the target location in the timeline, go to the Menu and click Effects and Video Transitions. Now select the type of transition you want to add such as Wipe or Fade. You can also open other transitions from the submenu. This way, your desired effect will appear at your selected location in the Timeline.
- You can also add audio effects to your video slideshow. For this purpose, click File > Import > Files. Now, select your favorite audio file from the FCP’s library or your computer and click Once the audio file has been imported to the Browser pan of FCP, drag that file to the Timeline.
- To add opening or closing credits, click Effects > Video Generators. Now, double-click Text and Text From the newly opened window, click Controls and type your desired text to be displayed in your video slideshow. Now, click Video and drag the video box into the Timeline to your desired location where it should appear.
- To export your video slideshow, click File > Export > QuickTime Movie. Based on your requirement, select your desired video quality and click OK.
Part 2: Where to Find Video Slideshow Templates for Free?
Templates make it easier for you to design unique slideshow videos with Final Cut Pro. Both premium and free templates are available online with different styles such as product showcases, wedding albums, social media promos, and corporate events, etc.
Given below are some websites where you can find some of the best slideshow templates and create amazing video slideshows without effort.
Motion Array
Motion array is famous for providing both free and paid templates and plugins for FCPX. Get all the things you need for your FCPX here.

As a resource library built for Filmora, FilmStock provides tons of media and effects for you to choose from. You can adopt different styles in one video, or make a video collection with a consistent tone by applying packages in FilmStock.

Design Shack
Download thousands of free and premium FCP slideshow templates for product showcases, corporate events, weddings, and much more.

For more slideshow templates please refer to this article: 10 Best Sites to Download Free Slideshow Templates .
Part 3: How to Adopt Templates in Final Cut Pro?
Adopting templates to create amazing video slideshows with Final Cut Pro is very easy. Follow these steps to download and use templates with FCP:
- Download your favorite template online. Once downloaded, go to the folder containing the folder, unzip it, and locate the installable file.

- Copy and paste the folder where FCP can find it. If you don’t have Apple Motion, right-click on the FCP icon and select Show Package Contents from the dropdown menu. Now, navigate to the Titles or Generators folder.
- Open FCP and go to Titles and Generators sidebar.
- Search for the Title or Generator you installed under each label.
- Or use the search bar to find your installed Title or Generator.
- Drag the template to the FCP timeline.
- Use the Published Parameters panel to edit the template. Check all parameters to see editing options available.


Part 4: How to Add Music and Text in a Video Slideshow with Final Cut Pro?
You can add your favorite music or audio effects and text to your video slideshow with FCP. A variety of jingles and sound effects are available in Final Cut Pro that can be used in your video slideshow for free. If the build-in sound effects do not seem interesting, record your own audio and create your audio effects. FCP also allows users to import music files from their computers and add them to video slideshows.
To add music, click File > Import > Files. Now, either select the music file to be added from the FCP library or your computer and click Import. Finally, drag the imported file to the Timeline. It will be added to your video slideshow.
To add text, go to the Browser window, select Effects, click Video Generators, and double-click Text and Text again. Now, click Controls and enter the text you want to add to your video slideshow. Finally, click Video and drag your video box with the text into the desired location in the Final Cut Pro Timeline.
Click here to learn more about how to make a slideshow with music.
Part 5: How to Make a Slideshow in an Easier yet Better Way?
Do you want to create an amazing video slideshow conveniently? Try Wondershare Filmora X, a user-friendly and high-performance video-editing software that allows you to create unique video slideshows without advanced skills. Simply choose your favorite music, adjust photos’ duration, and add transitions and effects.
Follow these steps to make a slideshow with Wondershare Filmora X:
- Open Wondershare Filmora, add multiple photos into the applications. Adding multiple folders would make it easy for you to sort the images.
- Adjust the duration for each photo to your desired length.
- Add background music and royalty-free sound. For enhanced user experience, use the media library.
- Drag and drop all images you want to add to the timeline and set their hue, aspect ratio, saturation, contrast, and brightness.
- Add transitions between images.
- Use filters and overlays to improve your slideshow’s appearance. Since this is a core step, make sure you spend ample time on it.
- Export your video slideshow to your desired format and quality.


Don’t worry if you are a beginner and don’t have the advanced skills to create a video slideshow. There are multiple websites like Canva where you build amazing slideshows for free and impress your family and friends. Given below are simple steps to create video slideshows online.
Part 6: How to make a simple Slideshow Free & Online?
- First of all, log in to your Canva account using Gmail or Facebook and open a new page. Search for your desired Slideshow design.
- Find your favorite template by using the search tool. Select a template you want to add to your video slideshow and move to the next step.
- Go to the Canva’s library where you can find a variety of charts, images, photos, icons, and illustrations. To add any of these graphics to your page, use the Drag and Drop tool. For clear images, use the photo effects tool.
- Now, select all the images and illustrations you want and customize your slideshow using background, sound effects, font style, animations, color scheme, and animated sticker GIFs.
- Once you have finished the customization, preview your slideshow and make sure everything looks perfect. If you are happy with the result, download the slideshow in MP4, PPT JPEG, PDF, PNG, or any other format as per your requirement. For live telecast, press the Present button or share the link on your Facebook or Instagram account.
Conclusion
If you want to impress your family and friends with your video-editing skills, there’s no better option than creating an impressive video slideshow. You can give a pleasant surprise to your siblings or astonish your loved ones by making a video slideshow of their memorable images.
Several video-editing tools are available where you can design, edit, and recreate innovative video slideshows. The two best software are Final Cut Pro and Wondershare Filmora X, both of which are user-friendly and offer amazing features. You just have to simply import all images, arrange them in proper order, choose your favorite theme or template, and add transitions and audio effects, and download the slideshow in your desired format.
You can also use online tools like Canva to create amazing video slideshows online for free. Try Wondershare Filmora X if you are looking for quality, simplicity, and pricing flexibility.
For more slideshow-making tutorials with other editors, see this article: How to Create Amazing Showreel or Slideshow?
Liza Brown
Liza Brown is a writer and a lover of all things video.
Follow @Liza Brown
Liza Brown
Mar 27, 2024• Proven solutions
A video slideshow is video footage produced by presenting a series of still images in a prearranged sequence. In the context of computer-based visualization, the term slideshow refers to turning existing images into upbeat, attention-grabbing videos.
Final Cut Pro is advanced video-editing software used by professional video editors and filmmakers to create impressive videos and animations. Its high-tech features allow users to add various kinds of effects to their videos to make them look worth watching. You can also create video slideshows with FCP and give your still images a new look.
Read this article section to learn how to make video slideshows with FCP and Wondershare Filmora.
- Part 1: How to Create a Video Slideshow in Final Cut Pro?
- Part 2: Where to Find FCP Video Slideshow Templates for Free?
- Part 3: How to Adopt Templates in Final Cut Pro?
- Part 4: How to Add Music and Text in a Video Slideshow with Final Cut Pro?
- Part 5: How to Make a Slideshow in an Easier yet Better Way?
- Part 6: How to make a simple Slideshow Free & Online?
Part 1: How to Create a Video Slideshow in Final Cut Pro?
Final Cut Pro is an amazing software that makes slideshow creation as simple as ABC. You need not use any template; instead, you can sequence images on the timeline and add a few transitions and audio effects to create a video slideshow. Here’s how you can do this:
- Open Final Cut Pro, go to File, and click on New Project;
- Now, it’s time to import the still images you want to use to Final Cut Pro. For this purpose, tap File > Import > Files and select all photos from your computer, and click Import. Keep selecting until all images have been imported.
- Go to the Browser pane and drag your photos to the Timeline of Final Cut Pro. Make sure you follow the order in which you want these images to appear in the slideshow. You can also drag each image individually and drop it to your desired place before or after other images. The video slideshow will display images in the order they are placed in the Timeline.
- To add various transitions between your images, take the cursor to the target location in the timeline, go to the Menu and click Effects and Video Transitions. Now select the type of transition you want to add such as Wipe or Fade. You can also open other transitions from the submenu. This way, your desired effect will appear at your selected location in the Timeline.
- You can also add audio effects to your video slideshow. For this purpose, click File > Import > Files. Now, select your favorite audio file from the FCP’s library or your computer and click Once the audio file has been imported to the Browser pan of FCP, drag that file to the Timeline.
- To add opening or closing credits, click Effects > Video Generators. Now, double-click Text and Text From the newly opened window, click Controls and type your desired text to be displayed in your video slideshow. Now, click Video and drag the video box into the Timeline to your desired location where it should appear.
- To export your video slideshow, click File > Export > QuickTime Movie. Based on your requirement, select your desired video quality and click OK.
Part 2: Where to Find Video Slideshow Templates for Free?
Templates make it easier for you to design unique slideshow videos with Final Cut Pro. Both premium and free templates are available online with different styles such as product showcases, wedding albums, social media promos, and corporate events, etc.
Given below are some websites where you can find some of the best slideshow templates and create amazing video slideshows without effort.
Motion Array
Motion array is famous for providing both free and paid templates and plugins for FCPX. Get all the things you need for your FCPX here.
As a resource library built for Filmora, FilmStock provides tons of media and effects for you to choose from. You can adopt different styles in one video, or make a video collection with a consistent tone by applying packages in FilmStock.
Design Shack
Download thousands of free and premium FCP slideshow templates for product showcases, corporate events, weddings, and much more.
For more slideshow templates please refer to this article: 10 Best Sites to Download Free Slideshow Templates .
Part 3: How to Adopt Templates in Final Cut Pro?
Adopting templates to create amazing video slideshows with Final Cut Pro is very easy. Follow these steps to download and use templates with FCP:
- Download your favorite template online. Once downloaded, go to the folder containing the folder, unzip it, and locate the installable file.
- Copy and paste the folder where FCP can find it. If you don’t have Apple Motion, right-click on the FCP icon and select Show Package Contents from the dropdown menu. Now, navigate to the Titles or Generators folder.
- Open FCP and go to Titles and Generators sidebar.
- Search for the Title or Generator you installed under each label.
- Or use the search bar to find your installed Title or Generator.
- Drag the template to the FCP timeline.
- Use the Published Parameters panel to edit the template. Check all parameters to see editing options available.
Part 4: How to Add Music and Text in a Video Slideshow with Final Cut Pro?
You can add your favorite music or audio effects and text to your video slideshow with FCP. A variety of jingles and sound effects are available in Final Cut Pro that can be used in your video slideshow for free. If the build-in sound effects do not seem interesting, record your own audio and create your audio effects. FCP also allows users to import music files from their computers and add them to video slideshows.
To add music, click File > Import > Files. Now, either select the music file to be added from the FCP library or your computer and click Import. Finally, drag the imported file to the Timeline. It will be added to your video slideshow.
To add text, go to the Browser window, select Effects, click Video Generators, and double-click Text and Text again. Now, click Controls and enter the text you want to add to your video slideshow. Finally, click Video and drag your video box with the text into the desired location in the Final Cut Pro Timeline.
Click here to learn more about how to make a slideshow with music.
Part 5: How to Make a Slideshow in an Easier yet Better Way?
Do you want to create an amazing video slideshow conveniently? Try Wondershare Filmora X, a user-friendly and high-performance video-editing software that allows you to create unique video slideshows without advanced skills. Simply choose your favorite music, adjust photos’ duration, and add transitions and effects.
Follow these steps to make a slideshow with Wondershare Filmora X:
- Open Wondershare Filmora, add multiple photos into the applications. Adding multiple folders would make it easy for you to sort the images.
- Adjust the duration for each photo to your desired length.
- Add background music and royalty-free sound. For enhanced user experience, use the media library.
- Drag and drop all images you want to add to the timeline and set their hue, aspect ratio, saturation, contrast, and brightness.
- Add transitions between images.
- Use filters and overlays to improve your slideshow’s appearance. Since this is a core step, make sure you spend ample time on it.
- Export your video slideshow to your desired format and quality.
Don’t worry if you are a beginner and don’t have the advanced skills to create a video slideshow. There are multiple websites like Canva where you build amazing slideshows for free and impress your family and friends. Given below are simple steps to create video slideshows online.
Part 6: How to make a simple Slideshow Free & Online?
- First of all, log in to your Canva account using Gmail or Facebook and open a new page. Search for your desired Slideshow design.
- Find your favorite template by using the search tool. Select a template you want to add to your video slideshow and move to the next step.
- Go to the Canva’s library where you can find a variety of charts, images, photos, icons, and illustrations. To add any of these graphics to your page, use the Drag and Drop tool. For clear images, use the photo effects tool.
- Now, select all the images and illustrations you want and customize your slideshow using background, sound effects, font style, animations, color scheme, and animated sticker GIFs.
- Once you have finished the customization, preview your slideshow and make sure everything looks perfect. If you are happy with the result, download the slideshow in MP4, PPT JPEG, PDF, PNG, or any other format as per your requirement. For live telecast, press the Present button or share the link on your Facebook or Instagram account.
Conclusion
If you want to impress your family and friends with your video-editing skills, there’s no better option than creating an impressive video slideshow. You can give a pleasant surprise to your siblings or astonish your loved ones by making a video slideshow of their memorable images.
Several video-editing tools are available where you can design, edit, and recreate innovative video slideshows. The two best software are Final Cut Pro and Wondershare Filmora X, both of which are user-friendly and offer amazing features. You just have to simply import all images, arrange them in proper order, choose your favorite theme or template, and add transitions and audio effects, and download the slideshow in your desired format.
You can also use online tools like Canva to create amazing video slideshows online for free. Try Wondershare Filmora X if you are looking for quality, simplicity, and pricing flexibility.
For more slideshow-making tutorials with other editors, see this article: How to Create Amazing Showreel or Slideshow?
Liza Brown
Liza Brown is a writer and a lover of all things video.
Follow @Liza Brown
Steady Shots: The Best Free Video Stabilization Software
Are you having issues regarding your video quality and looking for a video stabilizer to improve it? Guess what? You can create high-quality videos through free video stabilization software, either for your professional or personal use.
It helps to remove the shakiness you get on videos recorded on handheld devices such as mobile phones. It makes your clips and home movies look more stable and standard. Why upload the same boring and shady videos all the time when you can stabilize them and look more professional? This article takes you through some of the best video stabilization software to stabilize your videos and stand out.
Top 10 Best Free Video Stabilization Software for Windows and Mac
1. iMovie
iMovie is a video editing software available exclusively for iOS and macOS users. It is a complete video editing software that enables users to make professional cinematic movies. Additionally, it allows you to smooth out the shaky footage and create high-quality videos. You also get access to a handful of themes and templates that you can use to customize your videos.
iMovie’s user-friendly interface does not require you to be tech-savvy to operate it. It allows any ordinary user to stabilize videos and yield elegant videos.
Key features:
- It enables easy sharing of movies across mobile devices.
- You can freely adjust the levels of your audio clip.
- Easy green-screen control
- It essentializes professional movie creation
Steps to stabilize shaky clips on iMovie
Step 1: Import the video you want to stabilize into the iMovie application on Mac computer;
Step 2: In the adjustment tab, click on the Stabilization button and turn on Stabilize Shaky Video tool.

Step 3: To adjust the amount of stabilization, click and drag the stabilize shaky video slider.
2. Windows movie maker
Windows Movie Maker is another video stabilizer available exclusively for Windows users. It allows you to make personalized movies and incorporate video, still images, background music, and narration. It is also beneficial for stabilizing videos, adding titles and transactions.
Key features:
- It enables you to add special effects to your videos.
- Options for extensive audio track selection.
- Timeline narration options.
If you are using Windows 7, you are lucky to use Windows Movie Maker to stabilize the shaky videos easily. Watch the video tutorial to find out how.
Steps to stabilize shaky clips on Windows Movie Maker
Step 1: Open the app and click on the Add videos and photos icon, and select the video clip you want to stabilize.
Step 2: Select the portion of the clip that you want to stabilize. You can do this by selecting the shaky video selection option on the right side of the software’s windows.
Step 3: Click on the Edit tab to access the Video stabilization feature.
Step 4: Under the video stabilization feature, you will see three options, namely Anti-shake, Anti-shake and wobble correction- low, Anti-shake and wobble correction- high. Select the most suitable option.

3. HitFilm express
The HitFilm Express is one of the best video stabilization software. It is available for both macOS and Windows. It is an all-in-one video editing software that allows you to import clips and add visual effects and audio to the videos. You can also import your 3D model and create themes like star wars or other animation themes.
Key features:-
- Advance tracking
- Lighting effects
- Muzzle flash effects
- Masking and layering technique
- Screen simulation
Steps to stabilize shaky clips on HitFilm Express
Step 1: Import the clip you want to stabilize and navigate to the control panel.
Step 2: Under the control panel menu, select the track option, and locate your tracking points.
Step 3: It will provide you with two options under the type menu, Single-point position only and double-point position scale/rotation. Select the most appropriate option.
Step 4: Under the purpose-tab, select stabilize options and hit apply.
4. FilmForth
FilmForth is a new name in the video editing industry but it allows you to create videos easily with powerful features. If you are looking for free video stabilization software, FilmForth might be one of them for you. It is compact with powerful and easy-to-apply features.
You can edit video, add filters and transitions, titles, record voiceover, or add background music to video. What’s more, it allows you to save the video without watermark.
Key features:-
- Slideshow maker with photos, videos, music, and effects;
- Change the video background or make the logo transparent;
Steps to stabilize videos using FilmForth
Step 1: Select the stabilize video option under the quick tool menu.
Step 2: Select the video file that you want to stabilize.
Step 3: Manually fill the video resolution, video quality, and frame rate settings.
Step 4: Give the file an output name, and choose the video to save the video file.
5. Video DeShake
Video DeShake is solely developed for video stabilization. You can easily download it from av2video.com. It is an effective solution for video stabilization. However, it does not provide you with fancy video editing features, but if you are looking for an instant solution for video stabilization, it is one of the best options.
Steps to stabilize videos using video Deshake:
Step 1: Download and install video Deshake software from av2video.com.
Step 2: Select the plus icon from the left-aligned menu bar.
Step 3: Select the video file that you want to stabilize.
Step 4: Select your preferred format for the output video, and click on the stabilize option present at the bottom of the interface.
6. Shotcut
Shotcut is a free video stabilizer. You don’t need to sign up or log in to begin. There is no sales funnel waiting for you once you get addicted to using it. Another reason for its popularity is beginner-focused design. It is easy to learn and use. However, it lacks advanced editing features like iMovie or HitFilm Express.
Key features:-
- It can load videos recorded in high resolution or above 60 fps.
- Single frame image extraction options.
- Video stabilization feature
- Blurring effect
Steps to stabilize videos using Shotcut:-
Step 1: Drag the video file you want to stabilize into the software interface. Select the timeline feature to select the portion of the video clip that you want to stabilize.
Step 2: Select the filter tab and follow by selecting the plus button. Under the plus icon, select the monitor option and find the stabilize option under the menu.
Step 3: Customize the stabilizations options according to your specific needs and click on analyze to monitor the stabilization. After stabilization is complete, select the file option and click on save to save the video.
7. Blender
The Blender is free and one of the best video editing software for professionals . Besides video editing, it provides you with 3D modeling, rigging animation, simulation, and motion tracking features . It allows you to perform basic actions like video cuts and splicing and complex tasks like video masking or color grading.
Key features:-
- Live preview, chroma vectorscope, and histogram displays.
- Scrubbing and waveform visualization.
- Audion mixing and syncing.
- Speed control, adjustment layers, transitions, and keyframe options.
Steps to stabilize videos using Blender
Step 1: Begin by going to the motion tracking workspace.
Step 2: Click on open and select the video file you want to stabilize.
Step 3: Select the tracking option from the toolbar and click on the movie to set tracking points.
Step 4: Set the tracking point size and press the right arrow to start tracking.
Step 5: Select the file menu and navigate the save option to save the stabilized video.
8. AVS video stabilizer
AVS video editor is suitable for both beginners and professionals. It enables you to create videos of any resolution and length. It allows you to cut, trim, join, and rotate videos. It also amazes you with the freedom of using over 300 effects. With AVS video editor, you can edit VHS videos and convert them into digital format.
Key features:-
- Audio capture
- Brand overlay
- Customizable templates
- Easy to use interface with drag and drop features
- Multimedia format support
Steps to stabilize videos using AVS video editor:
Step 1: Click on the import option under the media library tab and import the video you want to stabilize.
Step 2: Press the video stabilization button present over the timeline.
Step 3: Under the stabilization video, drag the compensation bar to adjust the degree of stabilization.
Step 4: Click on the ok button at the bottom of the stabilization menu to save the changes.
9. VSDC
VSDC is a free video stabilizer that allows you to stabilize and edit videos of any complexity. It is compact with advanced features to cut and merge video files and apply visual and audio effects to make a slideshow and add appropriate soundtracks. It also facilitates easy video conversion for playback on specific media devices.
Key features:-
- Side by side and split-screen videos
- Videos in the text effects
- Green screen removal
- Double exposure
Steps to stabilize videos using VSDC
Step 1: Open the VSDC video editor, and navigate to the video stabilization feature from the Tools tab.
Step2: Select the open file option and export the video file you want to stabilize.
Step 3: In the stabilization, tab adjust the settings that best suit your specific requirements.
Step 4: Complete the process by clicking on the export project to view the outcome.
10. Openshot
OpenShot video editor is an easy-to-use video stabilization and edition software. It is helping professionals around the world with its excellent video editing features. Another factor that makes it different from other software is its compatibility with multiple operating software. It goes with Mac, Linux and Windows and is easily downloadable from its website.
Key features:-
- Compatible with multiple operating systems (Linux, Mac, and Windows)
- It supports a handful of video audio and image formats.
- Video transition along with the real-time preview.
- Options for creating title and sub-title creation
- Titles formation with 3D animation
Steps to stabilize videos using Openshot
Step 1: Open the video you want to stabilize using the project file tab.
Step 2: Drag the video timeline tab and locate the shaky part of the video you want to stabilize.
Step 3: Select the effects tab and navigate the stabilizer feature from the menu.
Step 4: Drag the stabilizer feature to your video clip in the timeline.
Step 5: You will see the stabilizer: initialize effect window. Select the degree of percentage as per your specific requirements.
Step 6: Select the process effects option.
Bonus: Stabilize shaky videos using Filmora video editor
Filmora video editor is a powerful video stabilizing software filled with powerful editing features. Unlike other editing software, Filmora is compatible with both Windows and Mac.
Some of the above video stabilizers are complex and require expertise. On the other hand, Wondershare Filmora video editor provides you with an easy-to-use interface and easy navigation options.
Key features:
- Modern and intuitive interface.
- Video stabilization in one click.
- Powerful edition features.
- Rich effects and templates.
Steps to stabilize videos using Wondershare Filmora video editor
For Win 7 or later (64-bit)
For macOS 10.12 or later
Step 1: Drag shaky videos into the Filmora video editor timeline.
Step 2: Click on the edit option in the toolbar to access the editing panel.
Step 3: Select the stabilization option from the editing panel.
Step 4: Click the play button to preview the stabilized video clip. It also allows you to stabilize the smooth level to obtain better results.
Conclusion
Videos are the most popular types of content. They instantly convey the message and engage the consumers. However, the quality of your video is crucial from your business perspective. Video stabilizing software provides stability to videos and makes them look professional and smooth.
Even if you don’t use video stabilizers for stabilizing videos for your business purposes, they can still come in handy while stabilizing your private videos.
Steps to stabilize shaky clips on iMovie
Step 1: Import the video you want to stabilize into the iMovie application on Mac computer;
Step 2: In the adjustment tab, click on the Stabilization button and turn on Stabilize Shaky Video tool.
Step 3: To adjust the amount of stabilization, click and drag the stabilize shaky video slider.
2. Windows movie maker
Windows Movie Maker is another video stabilizer available exclusively for Windows users. It allows you to make personalized movies and incorporate video, still images, background music, and narration. It is also beneficial for stabilizing videos, adding titles and transactions.
Key features:
- It enables you to add special effects to your videos.
- Options for extensive audio track selection.
- Timeline narration options.
If you are using Windows 7, you are lucky to use Windows Movie Maker to stabilize the shaky videos easily. Watch the video tutorial to find out how.
Steps to stabilize shaky clips on Windows Movie Maker
Step 1: Open the app and click on the Add videos and photos icon, and select the video clip you want to stabilize.
Step 2: Select the portion of the clip that you want to stabilize. You can do this by selecting the shaky video selection option on the right side of the software’s windows.
Step 3: Click on the Edit tab to access the Video stabilization feature.
Step 4: Under the video stabilization feature, you will see three options, namely Anti-shake, Anti-shake and wobble correction- low, Anti-shake and wobble correction- high. Select the most suitable option.
3. HitFilm express
The HitFilm Express is one of the best video stabilization software. It is available for both macOS and Windows. It is an all-in-one video editing software that allows you to import clips and add visual effects and audio to the videos. You can also import your 3D model and create themes like star wars or other animation themes.
Key features:-
- Advance tracking
- Lighting effects
- Muzzle flash effects
- Masking and layering technique
- Screen simulation
Steps to stabilize shaky clips on HitFilm Express
Step 1: Import the clip you want to stabilize and navigate to the control panel.
Step 2: Under the control panel menu, select the track option, and locate your tracking points.
Step 3: It will provide you with two options under the type menu, Single-point position only and double-point position scale/rotation. Select the most appropriate option.
Step 4: Under the purpose-tab, select stabilize options and hit apply.
4. FilmForth
FilmForth is a new name in the video editing industry but it allows you to create videos easily with powerful features. If you are looking for free video stabilization software, FilmForth might be one of them for you. It is compact with powerful and easy-to-apply features.
You can edit video, add filters and transitions, titles, record voiceover, or add background music to video. What’s more, it allows you to save the video without watermark.
Key features:-
- Slideshow maker with photos, videos, music, and effects;
- Change the video background or make the logo transparent;
Steps to stabilize videos using FilmForth
Step 1: Select the stabilize video option under the quick tool menu.
Step 2: Select the video file that you want to stabilize.
Step 3: Manually fill the video resolution, video quality, and frame rate settings.
Step 4: Give the file an output name, and choose the video to save the video file.
5. Video DeShake
Video DeShake is solely developed for video stabilization. You can easily download it from av2video.com. It is an effective solution for video stabilization. However, it does not provide you with fancy video editing features, but if you are looking for an instant solution for video stabilization, it is one of the best options.
Steps to stabilize videos using video Deshake:
Step 1: Download and install video Deshake software from av2video.com.
Step 2: Select the plus icon from the left-aligned menu bar.
Step 3: Select the video file that you want to stabilize.
Step 4: Select your preferred format for the output video, and click on the stabilize option present at the bottom of the interface.
6. Shotcut
Shotcut is a free video stabilizer. You don’t need to sign up or log in to begin. There is no sales funnel waiting for you once you get addicted to using it. Another reason for its popularity is beginner-focused design. It is easy to learn and use. However, it lacks advanced editing features like iMovie or HitFilm Express.
Key features:-
- It can load videos recorded in high resolution or above 60 fps.
- Single frame image extraction options.
- Video stabilization feature
- Blurring effect
Steps to stabilize videos using Shotcut:-
Step 1: Drag the video file you want to stabilize into the software interface. Select the timeline feature to select the portion of the video clip that you want to stabilize.
Step 2: Select the filter tab and follow by selecting the plus button. Under the plus icon, select the monitor option and find the stabilize option under the menu.
Step 3: Customize the stabilizations options according to your specific needs and click on analyze to monitor the stabilization. After stabilization is complete, select the file option and click on save to save the video.
7. Blender
The Blender is free and one of the best video editing software for professionals . Besides video editing, it provides you with 3D modeling, rigging animation, simulation, and motion tracking features . It allows you to perform basic actions like video cuts and splicing and complex tasks like video masking or color grading.
Key features:-
- Live preview, chroma vectorscope, and histogram displays.
- Scrubbing and waveform visualization.
- Audion mixing and syncing.
- Speed control, adjustment layers, transitions, and keyframe options.
Steps to stabilize videos using Blender
Step 1: Begin by going to the motion tracking workspace.
Step 2: Click on open and select the video file you want to stabilize.
Step 3: Select the tracking option from the toolbar and click on the movie to set tracking points.
Step 4: Set the tracking point size and press the right arrow to start tracking.
Step 5: Select the file menu and navigate the save option to save the stabilized video.
8. AVS video stabilizer
AVS video editor is suitable for both beginners and professionals. It enables you to create videos of any resolution and length. It allows you to cut, trim, join, and rotate videos. It also amazes you with the freedom of using over 300 effects. With AVS video editor, you can edit VHS videos and convert them into digital format.
Key features:-
- Audio capture
- Brand overlay
- Customizable templates
- Easy to use interface with drag and drop features
- Multimedia format support
Steps to stabilize videos using AVS video editor:
Step 1: Click on the import option under the media library tab and import the video you want to stabilize.
Step 2: Press the video stabilization button present over the timeline.
Step 3: Under the stabilization video, drag the compensation bar to adjust the degree of stabilization.
Step 4: Click on the ok button at the bottom of the stabilization menu to save the changes.
9. VSDC
VSDC is a free video stabilizer that allows you to stabilize and edit videos of any complexity. It is compact with advanced features to cut and merge video files and apply visual and audio effects to make a slideshow and add appropriate soundtracks. It also facilitates easy video conversion for playback on specific media devices.
Key features:-
- Side by side and split-screen videos
- Videos in the text effects
- Green screen removal
- Double exposure
Steps to stabilize videos using VSDC
Step 1: Open the VSDC video editor, and navigate to the video stabilization feature from the Tools tab.
Step2: Select the open file option and export the video file you want to stabilize.
Step 3: In the stabilization, tab adjust the settings that best suit your specific requirements.
Step 4: Complete the process by clicking on the export project to view the outcome.
10. Openshot
OpenShot video editor is an easy-to-use video stabilization and edition software. It is helping professionals around the world with its excellent video editing features. Another factor that makes it different from other software is its compatibility with multiple operating software. It goes with Mac, Linux and Windows and is easily downloadable from its website.
Key features:-
- Compatible with multiple operating systems (Linux, Mac, and Windows)
- It supports a handful of video audio and image formats.
- Video transition along with the real-time preview.
- Options for creating title and sub-title creation
- Titles formation with 3D animation
Steps to stabilize videos using Openshot
Step 1: Open the video you want to stabilize using the project file tab.
Step 2: Drag the video timeline tab and locate the shaky part of the video you want to stabilize.
Step 3: Select the effects tab and navigate the stabilizer feature from the menu.
Step 4: Drag the stabilizer feature to your video clip in the timeline.
Step 5: You will see the stabilizer: initialize effect window. Select the degree of percentage as per your specific requirements.
Step 6: Select the process effects option.
Bonus: Stabilize shaky videos using Filmora video editor
Filmora video editor is a powerful video stabilizing software filled with powerful editing features. Unlike other editing software, Filmora is compatible with both Windows and Mac.
Some of the above video stabilizers are complex and require expertise. On the other hand, Wondershare Filmora video editor provides you with an easy-to-use interface and easy navigation options.
Key features:
- Modern and intuitive interface.
- Video stabilization in one click.
- Powerful edition features.
- Rich effects and templates.
Steps to stabilize videos using Wondershare Filmora video editor
For Win 7 or later (64-bit)
For macOS 10.12 or later
Step 1: Drag shaky videos into the Filmora video editor timeline.
Step 2: Click on the edit option in the toolbar to access the editing panel.
Step 3: Select the stabilization option from the editing panel.
Step 4: Click the play button to preview the stabilized video clip. It also allows you to stabilize the smooth level to obtain better results.
Conclusion
Videos are the most popular types of content. They instantly convey the message and engage the consumers. However, the quality of your video is crucial from your business perspective. Video stabilizing software provides stability to videos and makes them look professional and smooth.
Even if you don’t use video stabilizers for stabilizing videos for your business purposes, they can still come in handy while stabilizing your private videos.
The Art of Vertical Storytelling: Phone Aspect Ratio Best Practices
Best Practices for Creating Phone Aspect Ratio Vertical on Your Smartphone
An easy yet powerful editor
Numerous effects to choose from
Detailed tutorials provided by the official channel
When you’re taking a snapshot of someone or something and posting it to social media, you’ll need to decide if it’ll be a portrait or a landscape orientation. And that’s where the knowledge regarding the phone aspect ratio vertical comes in!

This post will dive into the rise of the phone aspect ratio vertical, including best practices on using phone ratio calculator and mobile vertical video size based on its final viewing platforms such as YouTube, Instagram, or broadcast.
In this article
01 [Why Vertical Videos Are in the Frame?](#Part 1)
02 [Different Aspect Ratios on Mobile Screens](#Part 2)
03 [Tips to Shoot a Vertical Video](#Part 3)
04 [Top 6 Practices for Creating Phone Aspect Ratio Vertical on Your Smartphone](#Part 4)
Part 1 Why Vertical Videos Are in the Frame?
Did you know that there are six aspect ratios in total for videos and photos that marketers and creators use? These aspect ratios are 9:16, 16:9, 1:1, 4:3, 3:2, 21:9. The first way to choose the right aspect ratio for your video is whether the video needs to be vertical or horizontal.
A video that’s portrait or vertical mode is taller than it is wide. The entire screen is devoted to vertical video capturing while gaining attention.
Smartphones are to be held vertically, and although you can view media always horizontally, it’s far simpler for watchers to consume media while keeping their mobile phones upright.
Vertical videos are available in different sizes, but the most standard instances come in the 9:16 aspect ratio. While the traditional format of watching videos on phones has been horizontal with an aspect ratio of 16:9, vertical videos are taller than more comprehensive, hence the reversed aspect ratio. And, this is the main reason you see vertical videos in the frame, and thus, they need to be fixed or rightly shot in terms of ideal phone aspect ratio vertical.
Part 2 Different Aspect Ratios on Mobile Screens
The aspect ratio also measures how tall or wide a display is. Still, it shouldn’t be mistaken for ‘display/screen size’ calculated by diagonally measuring throughout the screen.
The phone aspect ratio vertical is commonly written in proportions with the more petite figure on the right side and the more prominent figure on the left-hand side. It’s also sometimes called a decimal, the more prominent figure divided by, the more petite figure.
It means that a display aspect ratio of 16:9 can also be called an aspect ratio of 1.78, i.e., 16/9.
Types of Aspect ratio
● 16:9 Aspect Ratio
16:9 is one of the most common aspect ratios used on smartphones. Sometimes showcased as 1.78 or 4²:3², the aspect ratio has become typical for smartphones and other devices since 2010.
It generally means there will be 16 pixels in one direction for every 9 pixels in the other for a device with a 16:9 display.

Devices with a 16:9 aspect ratio are usually broad, and they became the standard aspect ratio for smartphones because most contents are also available in the exact format. So you would enjoy videos and gaming in full widescreen quality on a 16:9 aspect ratio device.
On the other hand, you’ll experience the “Letterboxing effect“ on devices that aren’t available in 16:9 aspect ratios and where black bars/bands appear at the bottom and the top of the content you are wandering.

● 18:9 Aspect ratio
This 18:9 aspect ratio was born out of the need to maximize the size of displays without increasing the dimensions of phone sizes.
The narrow design of 18:9 aspect ratio devices assisted for better one-hand grip, smooth multitasking, enhanced usability, and more screen real estate, etc. Yet, because contents are highly present in the 16:9 aspect ratio, there will be “black bands” at the top, bottom or to your display’s right or left.

The 18:9 aspect ratio allows for convenient usage of smartphones, provided we put the content-cropping and letterboxing aside.
● 19:9 Aspect ratio
19:9 is another smartphone aspect ratio that is becoming increasingly famous and used by top OEMs like Samsung, Huawei, ASUS, and Apple on their flagship devices.
The smartphones with a 19:9 aspect ratio are available with increased height and 19 pixels in single direction for every 9 pixels in the other. Similar to 18:9, devices with a 19:9 aspect ratio generally have pretty non-existent and slimmer bezels, but you’ll enjoy vast screen real estate with the latter.
Understanding iPhone Vertical Video Dimensions
Apple boasts a 16:9 screen for the versions of iPhone 5 onwards. Most Google/Android phones already had a 16:9 screen at that point. Thus, to export a vertical video, you would want it to be 9:16. (16:9 standing up!) and it’s the ideal size for iPhone vertical video dimensions.
The highest quality vertical video’s output is 720 Horizontal by 1280 vertical for 1080p (1080X1920).
The highest quality vertical video’s output is 576 horizontal by 1024 vertical for 720p (720X1280).
Vertical Phone Aspect Ratio for Video
Let’s now understand the mobile vertical video size! Vertical video is pretty higher than it is wide. Instead of being shown in a landscape orientation or widescreen format, the way video has traditionally intended for television and cinema and television, and the vertical video rotated by 90 degrees.

Hold your phone upright and record video in a 9:16 aspect ratio. Hence, the name vertical video is said to be!
It’s because if you horizontally hold your phone, the viewable screen area is 16:9 aspect ratio. The same standard is for most HDTV, video production, and cinema screen sizes.
Part 3 Tips to Shoot a Vertical Video
Besides using the photo ratio calculator, we’d like to enlist some tips on getting started with your phone aspect ratio vertical shooting.
1 – High production quality is not essential
Yes, the content is the king, and people or the end customers may not notice your video quality than the content. So, don’t be afraid when you start and move ahead with your DIY budget.
2 – Use the Ideal Dimensions
Whether it’s iPhone vertical video dimensions or other Android and Windows devices, you need to use the ideal dimensions already discussed above.
3 – Engage your audience better
You can incorporate little details within the video and engage your audience better. You can also add captions and burn them within the video.
4 – Optimize vertical videos
You can optimize vertical videos for viewing without sound. Try watching your videos without audio to see if they still make sense without that context. You likely won’t achieve the same excellent results made possible with good video marketing if they don’t.
5 – Capture Attention
Yes, you need to attract the audience and capture their attention within seconds. And, it’s the only or one of the best tricks t get your audience hooked for the long term. Don’t underestimate the significance of storytelling, and you can thus add them for creative looks.
Part 4 Top 6 Practices for Creating Phone Aspect Ratio Vertical on Your Smartphone
Are you looking to capture the video in the correct phone aspect ratio vertical? In this section, we will discuss a few helpful tips that will assist you in shooting a better vertical video in any condition you want to sort.
1 – Shoot in the desired or ideal aspect ratio
Any video bigger than the aspect ratio of 1:1 is vertical video.
It’s possible to create vertical videos two ways:
● By framing a camera in portrait mode.
● By rendering it vertically by scaling or cutting the video.
2 – Split the screen
You can use the tall height of the vertical frame to stack horizontal clips on top of each other creatively.
Clips can be related in appearance and content or appear to mend into one another. Various music videos have also used this technique.
You can also try merging various diagonal lines or clips for a unique look.
3 - Fill the vertical space
You can quickly fill vacant space in the frame automatically by getting closer to the subject.

When the camera is angled down and raised high, you automatically get a deep frame for filming long shots that fill space.
The above-the-head perspective provides an attractive and latest POV that serves the exact purpose.

4 - Try not to shake (or use a gimbal or a selfie stick)
While watching a video, jerking camera movements are almost always disturbing and distracting. This must be avoided quickly from side to side when creating vertical videos with minimized space on sides.
While a normal 360-degree or pan rotation is outstanding (and even crucial), cameras cannot manage the data amount they must process once they begin to move too quickly.
Slow down when in doubt!

5 - Remember to resize as per the platform
You don’t essentially have to shoot everything at eye level or arm’s length when you shoot videos vertically.
Changing your angles and shot length will assist make your videos more interactive, and you can create something compelling out of them within the video frame.
Screen recordings are usually horizontal, but they will be vertically viewed when you upload them to Instagram. They also make sure the edges did not get cut off while uploading them and the writing is still legible.
6 - Add graphics, fun text, GIFs, or stickers
Use text that complements visuals. Make sure your text isn’t highlighting your subject. Any graphics elements, such as stickers or emojis, should follow this exact approach.
Line them up where they’ll improve your video and scale them up as required.
Pro Tip: Use Wondershare Filmora Video Editor to get your desired phone aspect ratio vertical

Wondershare Filmora - Best Video Editor for Mac/Windows
5,481,435 people have downloaded it.
Build unique custom animations without breaking a sweat.
Focus on creating epic stories and leave the details to Filmora’s auto features.
Start a creative adventure with drag & drop effects and endless possibilities.
Filmora simplifies advanced features to save you time and effort.
Filmora cuts out repetition so you can move on to your next creative breakthrough.
Filmora provides various functions to resize your video, which means you can change video bitrate or directly crop your video when exporting. Despite resizing a video, you can also zoom your video to highlight the best section of your video. Here are certain features or functions of Filmora to resize a video. Download it now and have a try!
● Resize the video size and aspect ratio of video;
● Crop/trim/cut video to highlight an object within the video;
● Add multiple video effects
● Export the edited video portion to a mobile device, DVD, or YouTube;
● Supported OS: Mac OS X (above 10.10) and Windows (Windows 10 included).
Resize Video by Cropping
Step 1: Upload the video to the program
Firstly, upload your media via the “Import” tab or drag and drop it from the Windows File Explorer tab to the User’s Album.
Thereafter, drag videos from the User’s Album to the Timeline.

Step 2: Crop the video
You can aim at a specific part of the video by cropping and resizing your video display dimensions. Hit the added video on Timeline, a “Crop, and Zoom” button to cut the video. It will appear in the options menu.
Hit it to bring up the editing panel and crop videos.

Hit the Crop tab. Just hover the mouse to move and resize the marquee to decide how to crop the original video.
You have five options while video cropping at the bottom to assist you: Custom, 16:9, 4:3, 1:1, and 9:16 aspect radio.
Select Aspect Ratio of Project
After you launch Filmora, you can select the project aspect ratio. There are options among 16:9 (widescreen), 4:3 (standard), 9:16 (portrait), 1:1 (Instagram). Select the one you desire and begin by clicking the New Project.

Key Takeaways from This Episode
● Understanding phone aspect ratio vertical on both the Windows and iPhone.
● Different types of mobile vertical video sizes.
● Best six practices to shoot the video in the proper phone aspect ratio vertical.
When you’re taking a snapshot of someone or something and posting it to social media, you’ll need to decide if it’ll be a portrait or a landscape orientation. And that’s where the knowledge regarding the phone aspect ratio vertical comes in!
This post will dive into the rise of the phone aspect ratio vertical, including best practices on using phone ratio calculator and mobile vertical video size based on its final viewing platforms such as YouTube, Instagram, or broadcast.
In this article
01 [Why Vertical Videos Are in the Frame?](#Part 1)
02 [Different Aspect Ratios on Mobile Screens](#Part 2)
03 [Tips to Shoot a Vertical Video](#Part 3)
04 [Top 6 Practices for Creating Phone Aspect Ratio Vertical on Your Smartphone](#Part 4)
Part 1 Why Vertical Videos Are in the Frame?
Did you know that there are six aspect ratios in total for videos and photos that marketers and creators use? These aspect ratios are 9:16, 16:9, 1:1, 4:3, 3:2, 21:9. The first way to choose the right aspect ratio for your video is whether the video needs to be vertical or horizontal.
A video that’s portrait or vertical mode is taller than it is wide. The entire screen is devoted to vertical video capturing while gaining attention.
Smartphones are to be held vertically, and although you can view media always horizontally, it’s far simpler for watchers to consume media while keeping their mobile phones upright.
Vertical videos are available in different sizes, but the most standard instances come in the 9:16 aspect ratio. While the traditional format of watching videos on phones has been horizontal with an aspect ratio of 16:9, vertical videos are taller than more comprehensive, hence the reversed aspect ratio. And, this is the main reason you see vertical videos in the frame, and thus, they need to be fixed or rightly shot in terms of ideal phone aspect ratio vertical.
Part 2 Different Aspect Ratios on Mobile Screens
The aspect ratio also measures how tall or wide a display is. Still, it shouldn’t be mistaken for ‘display/screen size’ calculated by diagonally measuring throughout the screen.
The phone aspect ratio vertical is commonly written in proportions with the more petite figure on the right side and the more prominent figure on the left-hand side. It’s also sometimes called a decimal, the more prominent figure divided by, the more petite figure.
It means that a display aspect ratio of 16:9 can also be called an aspect ratio of 1.78, i.e., 16/9.
Types of Aspect ratio
● 16:9 Aspect Ratio
16:9 is one of the most common aspect ratios used on smartphones. Sometimes showcased as 1.78 or 4²:3², the aspect ratio has become typical for smartphones and other devices since 2010.
It generally means there will be 16 pixels in one direction for every 9 pixels in the other for a device with a 16:9 display.
Devices with a 16:9 aspect ratio are usually broad, and they became the standard aspect ratio for smartphones because most contents are also available in the exact format. So you would enjoy videos and gaming in full widescreen quality on a 16:9 aspect ratio device.
On the other hand, you’ll experience the “Letterboxing effect“ on devices that aren’t available in 16:9 aspect ratios and where black bars/bands appear at the bottom and the top of the content you are wandering.
● 18:9 Aspect ratio
This 18:9 aspect ratio was born out of the need to maximize the size of displays without increasing the dimensions of phone sizes.
The narrow design of 18:9 aspect ratio devices assisted for better one-hand grip, smooth multitasking, enhanced usability, and more screen real estate, etc. Yet, because contents are highly present in the 16:9 aspect ratio, there will be “black bands” at the top, bottom or to your display’s right or left.
The 18:9 aspect ratio allows for convenient usage of smartphones, provided we put the content-cropping and letterboxing aside.
● 19:9 Aspect ratio
19:9 is another smartphone aspect ratio that is becoming increasingly famous and used by top OEMs like Samsung, Huawei, ASUS, and Apple on their flagship devices.
The smartphones with a 19:9 aspect ratio are available with increased height and 19 pixels in single direction for every 9 pixels in the other. Similar to 18:9, devices with a 19:9 aspect ratio generally have pretty non-existent and slimmer bezels, but you’ll enjoy vast screen real estate with the latter.
Understanding iPhone Vertical Video Dimensions
Apple boasts a 16:9 screen for the versions of iPhone 5 onwards. Most Google/Android phones already had a 16:9 screen at that point. Thus, to export a vertical video, you would want it to be 9:16. (16:9 standing up!) and it’s the ideal size for iPhone vertical video dimensions.
The highest quality vertical video’s output is 720 Horizontal by 1280 vertical for 1080p (1080X1920).
The highest quality vertical video’s output is 576 horizontal by 1024 vertical for 720p (720X1280).
Vertical Phone Aspect Ratio for Video
Let’s now understand the mobile vertical video size! Vertical video is pretty higher than it is wide. Instead of being shown in a landscape orientation or widescreen format, the way video has traditionally intended for television and cinema and television, and the vertical video rotated by 90 degrees.
Hold your phone upright and record video in a 9:16 aspect ratio. Hence, the name vertical video is said to be!
It’s because if you horizontally hold your phone, the viewable screen area is 16:9 aspect ratio. The same standard is for most HDTV, video production, and cinema screen sizes.
Part 3 Tips to Shoot a Vertical Video
Besides using the photo ratio calculator, we’d like to enlist some tips on getting started with your phone aspect ratio vertical shooting.
1 – High production quality is not essential
Yes, the content is the king, and people or the end customers may not notice your video quality than the content. So, don’t be afraid when you start and move ahead with your DIY budget.
2 – Use the Ideal Dimensions
Whether it’s iPhone vertical video dimensions or other Android and Windows devices, you need to use the ideal dimensions already discussed above.
3 – Engage your audience better
You can incorporate little details within the video and engage your audience better. You can also add captions and burn them within the video.
4 – Optimize vertical videos
You can optimize vertical videos for viewing without sound. Try watching your videos without audio to see if they still make sense without that context. You likely won’t achieve the same excellent results made possible with good video marketing if they don’t.
5 – Capture Attention
Yes, you need to attract the audience and capture their attention within seconds. And, it’s the only or one of the best tricks t get your audience hooked for the long term. Don’t underestimate the significance of storytelling, and you can thus add them for creative looks.
Part 4 Top 6 Practices for Creating Phone Aspect Ratio Vertical on Your Smartphone
Are you looking to capture the video in the correct phone aspect ratio vertical? In this section, we will discuss a few helpful tips that will assist you in shooting a better vertical video in any condition you want to sort.
1 – Shoot in the desired or ideal aspect ratio
Any video bigger than the aspect ratio of 1:1 is vertical video.
It’s possible to create vertical videos two ways:
● By framing a camera in portrait mode.
● By rendering it vertically by scaling or cutting the video.
2 – Split the screen
You can use the tall height of the vertical frame to stack horizontal clips on top of each other creatively.
Clips can be related in appearance and content or appear to mend into one another. Various music videos have also used this technique.
You can also try merging various diagonal lines or clips for a unique look.
3 - Fill the vertical space
You can quickly fill vacant space in the frame automatically by getting closer to the subject.
When the camera is angled down and raised high, you automatically get a deep frame for filming long shots that fill space.
The above-the-head perspective provides an attractive and latest POV that serves the exact purpose.
4 - Try not to shake (or use a gimbal or a selfie stick)
While watching a video, jerking camera movements are almost always disturbing and distracting. This must be avoided quickly from side to side when creating vertical videos with minimized space on sides.
While a normal 360-degree or pan rotation is outstanding (and even crucial), cameras cannot manage the data amount they must process once they begin to move too quickly.
Slow down when in doubt!
5 - Remember to resize as per the platform
You don’t essentially have to shoot everything at eye level or arm’s length when you shoot videos vertically.
Changing your angles and shot length will assist make your videos more interactive, and you can create something compelling out of them within the video frame.
Screen recordings are usually horizontal, but they will be vertically viewed when you upload them to Instagram. They also make sure the edges did not get cut off while uploading them and the writing is still legible.
6 - Add graphics, fun text, GIFs, or stickers
Use text that complements visuals. Make sure your text isn’t highlighting your subject. Any graphics elements, such as stickers or emojis, should follow this exact approach.
Line them up where they’ll improve your video and scale them up as required.
Pro Tip: Use Wondershare Filmora Video Editor to get your desired phone aspect ratio vertical
Wondershare Filmora - Best Video Editor for Mac/Windows
5,481,435 people have downloaded it.
Build unique custom animations without breaking a sweat.
Focus on creating epic stories and leave the details to Filmora’s auto features.
Start a creative adventure with drag & drop effects and endless possibilities.
Filmora simplifies advanced features to save you time and effort.
Filmora cuts out repetition so you can move on to your next creative breakthrough.
Filmora provides various functions to resize your video, which means you can change video bitrate or directly crop your video when exporting. Despite resizing a video, you can also zoom your video to highlight the best section of your video. Here are certain features or functions of Filmora to resize a video. Download it now and have a try!
● Resize the video size and aspect ratio of video;
● Crop/trim/cut video to highlight an object within the video;
● Add multiple video effects
● Export the edited video portion to a mobile device, DVD, or YouTube;
● Supported OS: Mac OS X (above 10.10) and Windows (Windows 10 included).
Resize Video by Cropping
Step 1: Upload the video to the program
Firstly, upload your media via the “Import” tab or drag and drop it from the Windows File Explorer tab to the User’s Album.
Thereafter, drag videos from the User’s Album to the Timeline.
Step 2: Crop the video
You can aim at a specific part of the video by cropping and resizing your video display dimensions. Hit the added video on Timeline, a “Crop, and Zoom” button to cut the video. It will appear in the options menu.
Hit it to bring up the editing panel and crop videos.
Hit the Crop tab. Just hover the mouse to move and resize the marquee to decide how to crop the original video.
You have five options while video cropping at the bottom to assist you: Custom, 16:9, 4:3, 1:1, and 9:16 aspect radio.
Select Aspect Ratio of Project
After you launch Filmora, you can select the project aspect ratio. There are options among 16:9 (widescreen), 4:3 (standard), 9:16 (portrait), 1:1 (Instagram). Select the one you desire and begin by clicking the New Project.
Key Takeaways from This Episode
● Understanding phone aspect ratio vertical on both the Windows and iPhone.
● Different types of mobile vertical video sizes.
● Best six practices to shoot the video in the proper phone aspect ratio vertical.
Also read:
- 2024 Approved Editing GoPro Footage on PC Quik and Its Competitors
- Updated 6 Essential Tools for Creating Engaging Movie Introduction Videos
- 2024 Approved En 2022, Puede Editar Todos Los Videos Inmediatamente Después De Capturarlos, Pero Primero Debe Descubrir Una Aplicación De Edición De Vlogs Que Realmente Le Guste Usar
- Best Video Editing Apps for Children A Mix of Free and Paid Favorites
- Top Hand-Drawn Whiteboard Animation Tools to Try This Year
- Fast Track Your Videos Top 10 Free Speed Changer Apps for iPhone and Android for 2024
- Screen Recording Made Easy A Step-by-Step Guide to Using Filmora Scrn
- In 2024, VN Video Editor Pro Review Does It Live Up to the Hype?
- Edit Like a Pro A Comprehensive Tutorial on MP4 Video Editing for Mac and Windows Users
- New Best of the Web Free Video Editors for Online Use
- New Best VSDC Video Editor Alternatives for macOS Users
- Updated Ditch the Limits Installing Linux on Your Chromebook (Updated 2023)
- In 2024, Filmora Savings Hacks 4 Tips to Get You Started
- Updated Accelerate Your Videos Top Tools for Windows and Mac
- In 2024, Animated Storytelling Made Easy 10 Best Mobile Apps
- Top Mac Video Editing Software Like Pinnacle Studio
- Change Your Videos Aspect Ratio in Just a Few Clicks for 2024
- In 2024, The Ultimate Guide to Free Video Trimming on Windows 10
- Discover the Best Ways to Convert YouTube Videos to MP3 Files for 2024
- In 2024, Adobe Premiere Pro 2023 A Step-by-Step Guide to Video Import and Export
- 2024 Approved Free Video Rotator Apps for iPhone Expert Recommendations
- Speed Up Your Storytelling Mastering Time Lapses in Final Cut Pro
- New How to Edit GoPro Video on Mac
- Is Virtualdub Still Relevant? Exploring the Best Alternatives
- Android Video Editing Made Easy Top 10 iMovie Alternatives
- New Bring Your Vision to Life Top Free and Paid 3D Video Creators
- Video Editing Like a Pro Expert Techniques for Jaw-Dropping Effects
- 2024 Approved From Flat to Fabulous Converting Videos for VR with Ease
- Updated Flip Videos with Ease Best Online Editors
- Get Creative with Slow Mo Top Video Editing Software for Filmmakers
- The Fastest Way to Change Video Aspect Ratio
- 2024 Approved Your Most Essential Guide Towards Picking Best Aiff Converter
- In 2024, What Pokémon Evolve with A Dawn Stone For Vivo X100? | Dr.fone
- Android Unlock Code Sim Unlock Your Google Pixel 8 Pro Phone and Remove Locked Screen
- How to Fix Android App Not Installed Error on Realme C53 Quickly? | Dr.fone
- Home Button Not Working on Honor Magic5 Ultimate? Here Are Real Fixes | Dr.fone
- In 2024, How to Change Samsung Galaxy Z Fold 5 Location on Skout | Dr.fone
- In 2024, The Ultimate Guide to Itel P40 Pattern Lock Screen Everything You Need to Know
- Two Ways to Track My Boyfriends Xiaomi 13 Ultra without Him Knowing | Dr.fone
- How to Factory Reset Samsung Galaxy A23 5G If I Forgot Security Code or Password? | Dr.fone
- How to Come up With the Best Pokemon Team On OnePlus Ace 2? | Dr.fone
- In 2024, Top 15 Apps To Hack WiFi Password On Vivo Y100A
- How To Fake GPS On Vivo Y28 5G For Mobile Legends? | Dr.fone
- In 2024, Ways To Find Unlocking Codes For Xiaomi Redmi Note 12 4G Phones
- How Can Vivo T2 5GMirror Share to PC? | Dr.fone
- Title: New Gaming Galore Top Websites to Download Games
- Author: Giselle
- Created at : 2024-04-25 07:35:03
- Updated at : 2024-04-26 07:35:03
- Link: https://ai-vdieo-software.techidaily.com/new-gaming-galore-top-websites-to-download-games/
- License: This work is licensed under CC BY-NC-SA 4.0.
