
Download Now The Top 10 Free Game Sites for PC, Android, and More for 2024
Download Now: The Top 10 Free Game Sites for PC, Android, and More
Top 10 Best Free Game Download Sites [PC & Android][2024]

Ollie Mattison
Mar 27, 2024• Proven solutions


We all know and firmly believe that games are an integral part of our life. But the world has progressed, and we yearn to achieve real-life experiences through virtual reality instead of experiencing the actual thing. Online games are not only mentally stimulating, but they are also very addictive. Not everyone wants to pay to play games for a couple of hours, so here is a list of top free game downloading sites. You can download full versions of your favorite games for free.
Recommended Video Recorder & Editor for Gameplay: Filmora
If you want to edit a video recorded from games with more effects and templates, we recommend using Filmora . It is an easy-to-use video editor. It offers various title templates. You can also use it to record game videos. Just download it to have a try. Don’t know how to make a video? Visit the Wondershare Video Community and get some inspiration in video creation.
Part 1: Best Free PC Game Download Sites
1 Acid Play
Platforms: OS X and Windows

Key Features:
- Huge gaming library
The acid play has a gigantic collection of games of various types. The games at acid play have been categorized into action, arcade, board games, RPG, card games, puzzles, driving games, simulation, etc.
- Custom Search
The customized search helps you find the exact game you are looking for. It saves time since you cannot browse through thousands of games.
- Ratings
If you are new to this site or looking for a new game to play, you can choose only without trying every game to decide the best one. Just check the ratings provided by other players, and it will solve your problem. You can also rate a game according to your liking.
Pros:
- The games are easily downloadable and free.
- There is a large variety of games available to play.
Cons:
- The site is not updated, and no new games are introduced.
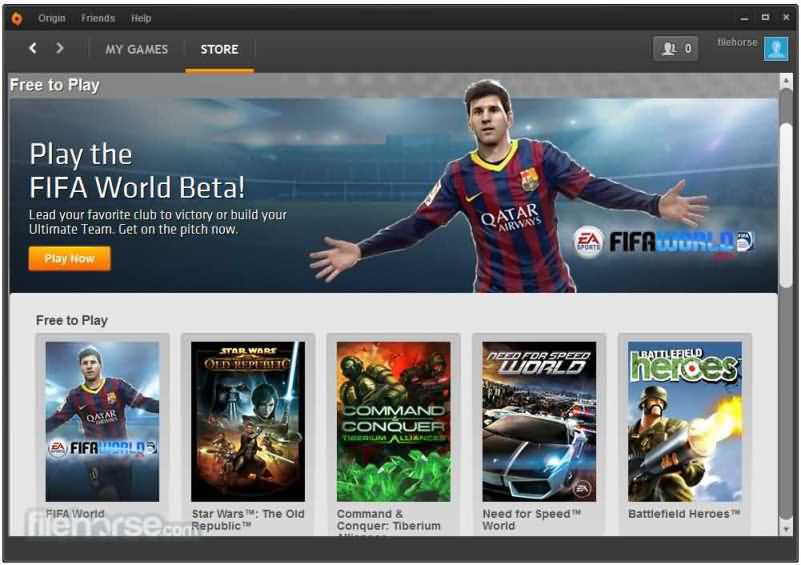
2 Origin Games
Platforms: OS X and Windows
Origin games are another best-known digital distribution platform for a free online gaming experience. It contains a fairly large library of premium games, but origin games provide links for free downloads for a limited time.
Key Features:
- Social Features
Origin provides its users with many social features like profile management, networking with friends through chatting, and video streaming via TwitchTV. You can also share your game library and community integration through social media and networking sites like Facebook, Xbox Live, PlayStation Network, and Nintendo Network.
- Variety in games
It provides various games, from PC games to Fifa and even classic games like Plant Vs. Zombies are also available.
- On-the-house games
The on-the-house features allow the customers to download a free trial of a premium game.
Pros:
- It provides great game streaming features.
- is developed by a renowned and successful company so that it can be trusted.
- The ‘on-the-house specials’ are appreciated by many gamers, allowing them to play a paid game for free now and then.
Cons:
- It has a lot of updates and takes an unreasonable amount of time to install and update the software.
- Customers have complained that they provide expired discount codes.
- Customer service needs to be improved as it is not very responsive.
3 AllGamesAtoZ
Platforms: OS X and Windows
If you want the best full version of a game for free, then AllGamesAtoZ is where you should go.
Key Features:
- The website is full of addictive games from different genres like action, arcade, shooting, role-playing, adventure, racing, simulation, etc.
- Multiple links for downloading a single game are available.
- A customized search bar is available so that you can locate the exact game you are looking for without having to browse through thousands of games.
- The games on AllGamesAtoZ are available on Windows, Linux, and Mac.
- A forum for game reviews is provided, so it is easier to decide which game you want to download without trying them all.
Pros:
- The gaming library is enormous.
- The game reviews make it easier to make a decision and save time.
- The website does not transfer viruses and is entirely safe from scams.
Cons:
- The downloading process is quite long.
- The website is not updated with new games.
4 Mega Games
Platforms: OS X and Windows
It is another highly recommended online gaming site. It not only provides PC games for free but also offers 3D PlayStation games to be downloaded on your PC without any charge.

Key Features:
- Search and download
Mega games allow a search and download option for every game published on their site.
- PlayStation games
It has provided its customers with not only PC games but also 3D PlayStation games that can be downloaded for free.
- Cheat codes
Apart from all the standard gaming features, mega games also provide free cheat codes for the games.
Pros:
- The games are easily downloaded.
- The games have variety.
Cons:
- The website stops working after a while, and the download gets interrupted
5 Caiman.us
Platforms: OS X and Windows
It is another digital distribution platform for free online gaming. After the death of the site’s developer, the site has gone offline.

Key Features:
- It has a vast collection of games and over twenty free games categories.
- 2D and 3D gaming experiences are also provided.
- A customized search is available to make it easier for players to find the game they are looking for.
Pros:
- There is a vast collection of free games to download and play.
Cons:
- The site is not well organized and confusing.
- The search bar is at the very bottom of the page, so a person might find it hard to locate.
- Since the site has gone offline, the games are not updated, so there are no new games.
Part 2: Best Android Game Download Sites to Download Free Android Games
Android is growing very fast; now, almost everyone uses it and prefers it over any other software. Here are the best websites from where you can download free android apps:
1 Google Play
Google Play is the most common website to download free android apps. It is free, it is fast, and it is efficient. You can not only use this from your android mobile but also operate it and download apps using your laptop.

Key Features:
- The apps are easily downloaded, depending upon your internet connection.
- The purchase methods are through credit cards, and the procedure is straightforward.
- The platform allows everyone and anyone to sell their games.
- Sign up through your Google account is necessary to access these features.
Pros:
- It is easily accessible.
- It is pre-installed on all android supported devices.
- It contains a massive collection of unique apps, from books to music, workout, and games of various types.
Cons:
- Since everyone and anyone can access it without paying any registration fee, it is exposed to scams and harassment.
- A few games do not function and keep crashing.
2 Android Games Room

It contains thousands of free gaming apps in different categories like action, arcade, adventure, simulation, song games, and puzzle games. The download links are readily available; you can even access this site from your mobile by scanning a QR code. This site is a pretty good platform to download free games but has certain flaws. It does not allow a multiplayer gaming experience, and no customer services are provided.
3 Android Apps
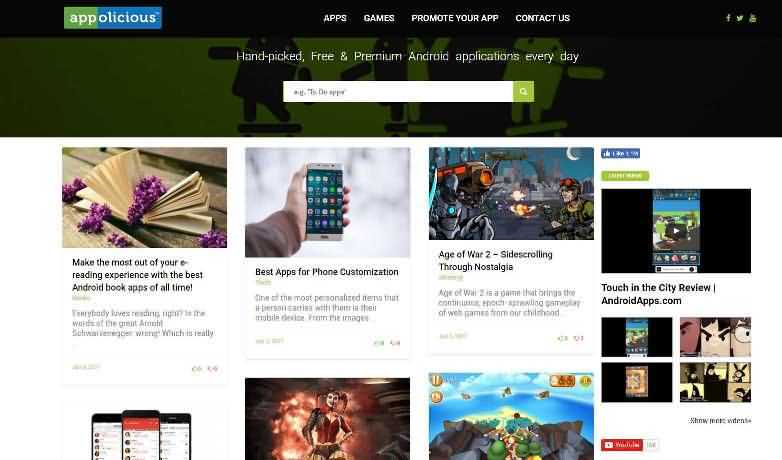
It is another platform to download android apps for free. This site is pretty good since it updates games that developers handpick almost daily. You can also promote your app using the ‘promote your app’ feature. The site has a lot of updates and takes an unreasonable amount of time to install and update the software. Furthermore, you can say that they do not have a customer service function because nobody ever responds to the customer’s queries.
4 1 Mobile
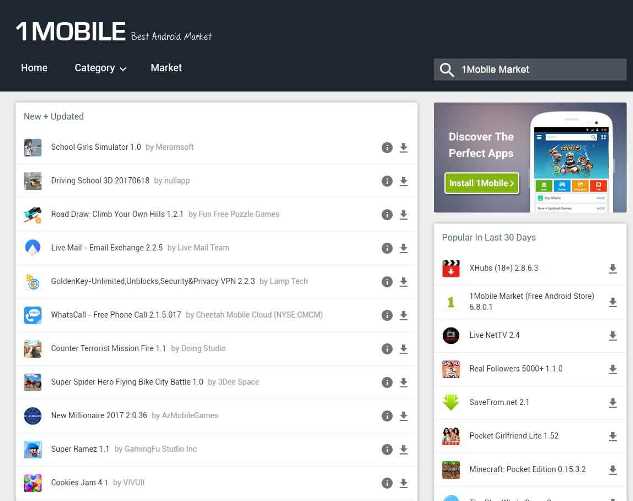
One mobile is a free android store. It provides its users the easiest way to locate, download and manage free apps. 1 Mobile has over eighty (80) million apps. One mobile has just been recently updated, has a brand new interface design, and operates much smoother. The content is more prosperous, smoother, and a thousand times better than before the latest update. All the apps and games are 100% free forever without hidden charges. It supports various languages like English, Korean, Chinese, French, Spanish, Japanese, and Portugal.
5 Approx

It provides the best free apps not only for android but OS as well. You can download it on your phone by scanning a QR code. This software has been functioning for the past six years and is free from viruses or malware.
To furnish your gameplay videos, Filmora also provides some cool effects, transitions, and elements, such as camera shake chaos effects, distortion effects, 3D change, speed blur transitions, and more. Moreover, you can always find some specially designed gaming effects in the Filmstock effects store.
Ollie Mattison
Ollie Mattison is a writer and a lover of all things video.
Follow @Ollie Mattison
Ollie Mattison
Mar 27, 2024• Proven solutions
We all know and firmly believe that games are an integral part of our life. But the world has progressed, and we yearn to achieve real-life experiences through virtual reality instead of experiencing the actual thing. Online games are not only mentally stimulating, but they are also very addictive. Not everyone wants to pay to play games for a couple of hours, so here is a list of top free game downloading sites. You can download full versions of your favorite games for free.
Recommended Video Recorder & Editor for Gameplay: Filmora
If you want to edit a video recorded from games with more effects and templates, we recommend using Filmora . It is an easy-to-use video editor. It offers various title templates. You can also use it to record game videos. Just download it to have a try. Don’t know how to make a video? Visit the Wondershare Video Community and get some inspiration in video creation.
Part 1: Best Free PC Game Download Sites
1 Acid Play
Platforms: OS X and Windows
Key Features:
- Huge gaming library
The acid play has a gigantic collection of games of various types. The games at acid play have been categorized into action, arcade, board games, RPG, card games, puzzles, driving games, simulation, etc.
- Custom Search
The customized search helps you find the exact game you are looking for. It saves time since you cannot browse through thousands of games.
- Ratings
If you are new to this site or looking for a new game to play, you can choose only without trying every game to decide the best one. Just check the ratings provided by other players, and it will solve your problem. You can also rate a game according to your liking.
Pros:
- The games are easily downloadable and free.
- There is a large variety of games available to play.
Cons:
- The site is not updated, and no new games are introduced.
2 Origin Games
Platforms: OS X and Windows
Origin games are another best-known digital distribution platform for a free online gaming experience. It contains a fairly large library of premium games, but origin games provide links for free downloads for a limited time.
Key Features:
- Social Features
Origin provides its users with many social features like profile management, networking with friends through chatting, and video streaming via TwitchTV. You can also share your game library and community integration through social media and networking sites like Facebook, Xbox Live, PlayStation Network, and Nintendo Network.
- Variety in games
It provides various games, from PC games to Fifa and even classic games like Plant Vs. Zombies are also available.
- On-the-house games
The on-the-house features allow the customers to download a free trial of a premium game.
Pros:
- It provides great game streaming features.
- is developed by a renowned and successful company so that it can be trusted.
- The ‘on-the-house specials’ are appreciated by many gamers, allowing them to play a paid game for free now and then.
Cons:
- It has a lot of updates and takes an unreasonable amount of time to install and update the software.
- Customers have complained that they provide expired discount codes.
- Customer service needs to be improved as it is not very responsive.
3 AllGamesAtoZ
Platforms: OS X and Windows
If you want the best full version of a game for free, then AllGamesAtoZ is where you should go.
Key Features:
- The website is full of addictive games from different genres like action, arcade, shooting, role-playing, adventure, racing, simulation, etc.
- Multiple links for downloading a single game are available.
- A customized search bar is available so that you can locate the exact game you are looking for without having to browse through thousands of games.
- The games on AllGamesAtoZ are available on Windows, Linux, and Mac.
- A forum for game reviews is provided, so it is easier to decide which game you want to download without trying them all.
Pros:
- The gaming library is enormous.
- The game reviews make it easier to make a decision and save time.
- The website does not transfer viruses and is entirely safe from scams.
Cons:
- The downloading process is quite long.
- The website is not updated with new games.
4 Mega Games
Platforms: OS X and Windows
It is another highly recommended online gaming site. It not only provides PC games for free but also offers 3D PlayStation games to be downloaded on your PC without any charge.
Key Features:
- Search and download
Mega games allow a search and download option for every game published on their site.
- PlayStation games
It has provided its customers with not only PC games but also 3D PlayStation games that can be downloaded for free.
- Cheat codes
Apart from all the standard gaming features, mega games also provide free cheat codes for the games.
Pros:
- The games are easily downloaded.
- The games have variety.
Cons:
- The website stops working after a while, and the download gets interrupted
5 Caiman.us
Platforms: OS X and Windows
It is another digital distribution platform for free online gaming. After the death of the site’s developer, the site has gone offline.
Key Features:
- It has a vast collection of games and over twenty free games categories.
- 2D and 3D gaming experiences are also provided.
- A customized search is available to make it easier for players to find the game they are looking for.
Pros:
- There is a vast collection of free games to download and play.
Cons:
- The site is not well organized and confusing.
- The search bar is at the very bottom of the page, so a person might find it hard to locate.
- Since the site has gone offline, the games are not updated, so there are no new games.
Part 2: Best Android Game Download Sites to Download Free Android Games
Android is growing very fast; now, almost everyone uses it and prefers it over any other software. Here are the best websites from where you can download free android apps:
1 Google Play
Google Play is the most common website to download free android apps. It is free, it is fast, and it is efficient. You can not only use this from your android mobile but also operate it and download apps using your laptop.
Key Features:
- The apps are easily downloaded, depending upon your internet connection.
- The purchase methods are through credit cards, and the procedure is straightforward.
- The platform allows everyone and anyone to sell their games.
- Sign up through your Google account is necessary to access these features.
Pros:
- It is easily accessible.
- It is pre-installed on all android supported devices.
- It contains a massive collection of unique apps, from books to music, workout, and games of various types.
Cons:
- Since everyone and anyone can access it without paying any registration fee, it is exposed to scams and harassment.
- A few games do not function and keep crashing.
2 Android Games Room
It contains thousands of free gaming apps in different categories like action, arcade, adventure, simulation, song games, and puzzle games. The download links are readily available; you can even access this site from your mobile by scanning a QR code. This site is a pretty good platform to download free games but has certain flaws. It does not allow a multiplayer gaming experience, and no customer services are provided.
3 Android Apps
It is another platform to download android apps for free. This site is pretty good since it updates games that developers handpick almost daily. You can also promote your app using the ‘promote your app’ feature. The site has a lot of updates and takes an unreasonable amount of time to install and update the software. Furthermore, you can say that they do not have a customer service function because nobody ever responds to the customer’s queries.
4 1 Mobile
One mobile is a free android store. It provides its users the easiest way to locate, download and manage free apps. 1 Mobile has over eighty (80) million apps. One mobile has just been recently updated, has a brand new interface design, and operates much smoother. The content is more prosperous, smoother, and a thousand times better than before the latest update. All the apps and games are 100% free forever without hidden charges. It supports various languages like English, Korean, Chinese, French, Spanish, Japanese, and Portugal.
5 Approx
It provides the best free apps not only for android but OS as well. You can download it on your phone by scanning a QR code. This software has been functioning for the past six years and is free from viruses or malware.
To furnish your gameplay videos, Filmora also provides some cool effects, transitions, and elements, such as camera shake chaos effects, distortion effects, 3D change, speed blur transitions, and more. Moreover, you can always find some specially designed gaming effects in the Filmstock effects store.
Ollie Mattison
Ollie Mattison is a writer and a lover of all things video.
Follow @Ollie Mattison
Don’t Lose Your Work! How to Properly Save a Final Cut Pro Project
How to Save Final Cut Pro Project the Right Way?

Shanoon Cox
Mar 27, 2024• Proven solutions
aIn the Final Cut Pro, you can find the autosave option to store the changes made on the file automatically without any manual intervention.
To overcome the manual mechanism, the autosave feature in the FCP app keeps the last changes on the file precisely. In this article, you can find insightful ideas about the autosave mechanism and the manual storage process.
In addition, you will learn how to save the finished projects on the external drives effortlessly. A detailed focus on saving the completed projects on the Final Cut Pro app has been highlighted in the below content. Synopsis on the usage of batch export and discovery of the missing files are discussed to enlighten you with the essential data.
Part 1: The autosave mechanism of Final Cut Pro X and manual storage procedure
In this section, get some mind-blowing facts on the autosave and manual options on the Final Cut Pro app!
The FCP tool autosaves the changes every 15 minutes. The saved projects are available in the libraries file as a backup for the restore process. You can go to the library folder to view the autosaved projects. The last edited changes can be reflected by tapping the undo option in the Edit menu.
Stepwise instructions to modify the autosave settings in the FCPX program
Step 1: Launch the FCPX app, press Ctrl+Q to open the ‘User Preferences’ window.
Step 2: In the ‘User Preferences’ screen, you can find a wide range of options to modify. Alter the levels of Undo, autosave vault attributes according to your needs, and save the changes. You can witness these parameters in the General section in the User Preference screen.
Use the User Preference window to make necessary changes according to your requirement. BY default, the Autosave Vault is enabled, and you can work on the projects without any hesitation. Additionally, you can modify the attributes like ‘Save a copy for every’, ‘ Keep at most’, and ‘Maximum of’ to personalize your projects.

When the FCP file is open, you need not worry about the saving procedure. The app triggers the autosave mechanism for regular intervals, and the changes will be up-to-date. If you want to store the files manually, then work with its library files. A simple operation like Ctrl+c and Ctrl+v helps you to move the autosaved projects to any storage location. Here are few tips to restore the autosaved FCP files.
Detailed guidelines on the restoration of autosaved files.
Step 1 Open the Final Cut Pro app on your device.
Step 2 Tap the ‘Libraries Sidebar’ to choose the desired library for restore action. Now hit File -> Open Library -> Backup options on the screen.
Step 3 Surf the backup files and choose the desired one that requires a view. Press the Restore from’ option from the pop-up items. Finally, press the ‘Open’ button.

The manual storage option is feasible only after deactivating the autosave mechanism on the FCPX tool. It is not advisable to carry out this activity. The autosave option keeps your works up-to-date, and you will not miss the recent changes at any cost. You can still disable the autosave option to try the manual storage process.
In the FCPX app, press ‘File -> Library Properties’, then from the displayed items, select the ‘Modify Settings’ option beside the ‘Storage Location’ label. Now, in the backups option select ‘Do not Save’ to deactivate the autosave mechanism.

After completing this procedure, save the changes and get back to the working timeline of
FCPX to continue with your projects. When you edit any projects use the save option without fail else the changes made will be lost in no time.
Part 2: How to save FCPX projects to desktop or external drives?
Many experts recommend opting for an external storage location to save the FCPX files. It occupies more space, and you need to be careful while selecting the drives to store the library files of the FCPX projects. While saving the files, remove the generated data to optimize the storage process.
First, remove the generated files in the library
Step 1: Tap the Libraries sidebar in the FCPX tool and select ‘Library’ and choose the ’Cache’ option in the property window of Library.
Step 2: Next, press ‘File -> Delete Generated Library Files’. To remove the unnecessary generated files.

The above action helps to clear up the space occupied by the project. If you want to free up more space, then delete most of the listed generated files.
Secondly, now transfer the FCPX project to external drives.
Step 1 Select the Libraries Sidebar in the FCPX program and choose the desired ‘Library’. Then hit ‘File -> Reveal in Finder. Now, the file opens in the new finder window.
Step 2 Close the FCPX screen and drag the library files from the Finder window to the external hard drive.

Finally, you had made it. The FCPX projects were successfully moved on to the external drives quickly. Use the above technique to carry out flawless storage or transfer process.
Part 3: Where to find missing files or projects in final cut pro?
Many users feel that their project files were lost in the event of renaming. It becomes a missed file, and they will feel that the files were no were on their system. To handle this scenario, you must learn to think out of the box. You can use the relink technique to find the missed files in the Final Cut Pro app.
The procedure is like the method of searching a particular file in your system using the ‘Search’ option. Here, Relink file functionality is available to set up a link again with the lost file to get back its storage space.
Open the application and select the clip you want to discover. Go to the File menu on the title bar and choose Relink File option from the expanded items. A bunch of files will be displayed below, and you can choose the desired missed file from the collections. There are options to filter the discovered files by choosing between Missing and All options.
Click the ‘Locate All’ button available at the bottom right side of the screen and navigate the folders to link with the perfect file. Press the ‘Choose’ button after selecting the missed file from the list.
From the selected options, The Final Cut Pro application analyses all the attributes in the files and lists out the original files. Now hit the ‘Relink Files’ option to complete the file hunt process.

Part 4: How to use Batch Export to save multiple projects in FCPX?
Perform the batch export for the files that carry similar settings. You can proceed with the flawless export procedure when the project files have the same roles, captions, and settings. The export option becomes limited if the project contains a mix of these attributes.
Batch Export is the processing of sharing multiple files to desired storage space from your app ambiance. Appropriate clicks on the correct controls simplify the task. This procedure requires special attention because there is a chance of data loss when you handle bulk files at a time. The purpose of opting for the bunch export option is that you can complete the transfer tasks quickly. Exporting individual files is time-consuming and requires many clicks to move the desired files to the respective destination. This Batch Export feature in FCPX program enhances the users while working with many files.
Step 1 Launch the FCPX app on your device.
Step 2 In the Libraries sidebar, tap the library option, and select the desired projects that require the batch export.
Step 1 Now, click the File -> Share option to trigger the export process.

It is advisable to export the Master files to retain the quality of the project. You can share the projects without compromising their quality factors.
Conclusion
As you all know that saving a project after successful completion is a crucial action. Few designers, editors, and developers unknowingly ignore this step. There are many applications embeds automatic saving function to enhance the editors to store their finished tasks.
Thus, this article had given valuable insights on how to save the FCPX projects and the methods to backup and restore them. You had acquired an idea about the effective way to spot the missed project files. Finally, tips and tricks associated with the batch export were discussed to ensure flawless bulk file sharing in the secure channel. Use the above content to work comfortably with the FCPX app. Stay tuned to this article to discover enlightening facts on the Final Cut Pro application.
Shanoon Cox
Shanoon Cox is a writer and a lover of all things video.
Follow @Shanoon Cox
Shanoon Cox
Mar 27, 2024• Proven solutions
aIn the Final Cut Pro, you can find the autosave option to store the changes made on the file automatically without any manual intervention.
To overcome the manual mechanism, the autosave feature in the FCP app keeps the last changes on the file precisely. In this article, you can find insightful ideas about the autosave mechanism and the manual storage process.
In addition, you will learn how to save the finished projects on the external drives effortlessly. A detailed focus on saving the completed projects on the Final Cut Pro app has been highlighted in the below content. Synopsis on the usage of batch export and discovery of the missing files are discussed to enlighten you with the essential data.
Part 1: The autosave mechanism of Final Cut Pro X and manual storage procedure
In this section, get some mind-blowing facts on the autosave and manual options on the Final Cut Pro app!
The FCP tool autosaves the changes every 15 minutes. The saved projects are available in the libraries file as a backup for the restore process. You can go to the library folder to view the autosaved projects. The last edited changes can be reflected by tapping the undo option in the Edit menu.
Stepwise instructions to modify the autosave settings in the FCPX program
Step 1: Launch the FCPX app, press Ctrl+Q to open the ‘User Preferences’ window.
Step 2: In the ‘User Preferences’ screen, you can find a wide range of options to modify. Alter the levels of Undo, autosave vault attributes according to your needs, and save the changes. You can witness these parameters in the General section in the User Preference screen.
Use the User Preference window to make necessary changes according to your requirement. BY default, the Autosave Vault is enabled, and you can work on the projects without any hesitation. Additionally, you can modify the attributes like ‘Save a copy for every’, ‘ Keep at most’, and ‘Maximum of’ to personalize your projects.
When the FCP file is open, you need not worry about the saving procedure. The app triggers the autosave mechanism for regular intervals, and the changes will be up-to-date. If you want to store the files manually, then work with its library files. A simple operation like Ctrl+c and Ctrl+v helps you to move the autosaved projects to any storage location. Here are few tips to restore the autosaved FCP files.
Detailed guidelines on the restoration of autosaved files.
Step 1 Open the Final Cut Pro app on your device.
Step 2 Tap the ‘Libraries Sidebar’ to choose the desired library for restore action. Now hit File -> Open Library -> Backup options on the screen.
Step 3 Surf the backup files and choose the desired one that requires a view. Press the Restore from’ option from the pop-up items. Finally, press the ‘Open’ button.
The manual storage option is feasible only after deactivating the autosave mechanism on the FCPX tool. It is not advisable to carry out this activity. The autosave option keeps your works up-to-date, and you will not miss the recent changes at any cost. You can still disable the autosave option to try the manual storage process.
In the FCPX app, press ‘File -> Library Properties’, then from the displayed items, select the ‘Modify Settings’ option beside the ‘Storage Location’ label. Now, in the backups option select ‘Do not Save’ to deactivate the autosave mechanism.
After completing this procedure, save the changes and get back to the working timeline of
FCPX to continue with your projects. When you edit any projects use the save option without fail else the changes made will be lost in no time.
Part 2: How to save FCPX projects to desktop or external drives?
Many experts recommend opting for an external storage location to save the FCPX files. It occupies more space, and you need to be careful while selecting the drives to store the library files of the FCPX projects. While saving the files, remove the generated data to optimize the storage process.
First, remove the generated files in the library
Step 1: Tap the Libraries sidebar in the FCPX tool and select ‘Library’ and choose the ’Cache’ option in the property window of Library.
Step 2: Next, press ‘File -> Delete Generated Library Files’. To remove the unnecessary generated files.
The above action helps to clear up the space occupied by the project. If you want to free up more space, then delete most of the listed generated files.
Secondly, now transfer the FCPX project to external drives.
Step 1 Select the Libraries Sidebar in the FCPX program and choose the desired ‘Library’. Then hit ‘File -> Reveal in Finder. Now, the file opens in the new finder window.
Step 2 Close the FCPX screen and drag the library files from the Finder window to the external hard drive.
Finally, you had made it. The FCPX projects were successfully moved on to the external drives quickly. Use the above technique to carry out flawless storage or transfer process.
Part 3: Where to find missing files or projects in final cut pro?
Many users feel that their project files were lost in the event of renaming. It becomes a missed file, and they will feel that the files were no were on their system. To handle this scenario, you must learn to think out of the box. You can use the relink technique to find the missed files in the Final Cut Pro app.
The procedure is like the method of searching a particular file in your system using the ‘Search’ option. Here, Relink file functionality is available to set up a link again with the lost file to get back its storage space.
Open the application and select the clip you want to discover. Go to the File menu on the title bar and choose Relink File option from the expanded items. A bunch of files will be displayed below, and you can choose the desired missed file from the collections. There are options to filter the discovered files by choosing between Missing and All options.
Click the ‘Locate All’ button available at the bottom right side of the screen and navigate the folders to link with the perfect file. Press the ‘Choose’ button after selecting the missed file from the list.
From the selected options, The Final Cut Pro application analyses all the attributes in the files and lists out the original files. Now hit the ‘Relink Files’ option to complete the file hunt process.
Part 4: How to use Batch Export to save multiple projects in FCPX?
Perform the batch export for the files that carry similar settings. You can proceed with the flawless export procedure when the project files have the same roles, captions, and settings. The export option becomes limited if the project contains a mix of these attributes.
Batch Export is the processing of sharing multiple files to desired storage space from your app ambiance. Appropriate clicks on the correct controls simplify the task. This procedure requires special attention because there is a chance of data loss when you handle bulk files at a time. The purpose of opting for the bunch export option is that you can complete the transfer tasks quickly. Exporting individual files is time-consuming and requires many clicks to move the desired files to the respective destination. This Batch Export feature in FCPX program enhances the users while working with many files.
Step 1 Launch the FCPX app on your device.
Step 2 In the Libraries sidebar, tap the library option, and select the desired projects that require the batch export.
Step 1 Now, click the File -> Share option to trigger the export process.
It is advisable to export the Master files to retain the quality of the project. You can share the projects without compromising their quality factors.
Conclusion
As you all know that saving a project after successful completion is a crucial action. Few designers, editors, and developers unknowingly ignore this step. There are many applications embeds automatic saving function to enhance the editors to store their finished tasks.
Thus, this article had given valuable insights on how to save the FCPX projects and the methods to backup and restore them. You had acquired an idea about the effective way to spot the missed project files. Finally, tips and tricks associated with the batch export were discussed to ensure flawless bulk file sharing in the secure channel. Use the above content to work comfortably with the FCPX app. Stay tuned to this article to discover enlightening facts on the Final Cut Pro application.
Shanoon Cox
Shanoon Cox is a writer and a lover of all things video.
Follow @Shanoon Cox
Free Video Stabilization Software to Enhance Your Videos
Are you having issues regarding your video quality and looking for a video stabilizer to improve it? Guess what? You can create high-quality videos through free video stabilization software, either for your professional or personal use.
It helps to remove the shakiness you get on videos recorded on handheld devices such as mobile phones. It makes your clips and home movies look more stable and standard. Why upload the same boring and shady videos all the time when you can stabilize them and look more professional? This article takes you through some of the best video stabilization software to stabilize your videos and stand out.
Top 10 Best Free Video Stabilization Software for Windows and Mac
1. iMovie
iMovie is a video editing software available exclusively for iOS and macOS users. It is a complete video editing software that enables users to make professional cinematic movies. Additionally, it allows you to smooth out the shaky footage and create high-quality videos. You also get access to a handful of themes and templates that you can use to customize your videos.
iMovie’s user-friendly interface does not require you to be tech-savvy to operate it. It allows any ordinary user to stabilize videos and yield elegant videos.
Key features:
- It enables easy sharing of movies across mobile devices.
- You can freely adjust the levels of your audio clip.
- Easy green-screen control
- It essentializes professional movie creation
Steps to stabilize shaky clips on iMovie
Step 1: Import the video you want to stabilize into the iMovie application on Mac computer;
Step 2: In the adjustment tab, click on the Stabilization button and turn on Stabilize Shaky Video tool.

Step 3: To adjust the amount of stabilization, click and drag the stabilize shaky video slider.
2. Windows movie maker
Windows Movie Maker is another video stabilizer available exclusively for Windows users. It allows you to make personalized movies and incorporate video, still images, background music, and narration. It is also beneficial for stabilizing videos, adding titles and transactions.
Key features:
- It enables you to add special effects to your videos.
- Options for extensive audio track selection.
- Timeline narration options.
If you are using Windows 7, you are lucky to use Windows Movie Maker to stabilize the shaky videos easily. Watch the video tutorial to find out how.
Steps to stabilize shaky clips on Windows Movie Maker
Step 1: Open the app and click on the Add videos and photos icon, and select the video clip you want to stabilize.
Step 2: Select the portion of the clip that you want to stabilize. You can do this by selecting the shaky video selection option on the right side of the software’s windows.
Step 3: Click on the Edit tab to access the Video stabilization feature.
Step 4: Under the video stabilization feature, you will see three options, namely Anti-shake, Anti-shake and wobble correction- low, Anti-shake and wobble correction- high. Select the most suitable option.

3. HitFilm express
The HitFilm Express is one of the best video stabilization software. It is available for both macOS and Windows. It is an all-in-one video editing software that allows you to import clips and add visual effects and audio to the videos. You can also import your 3D model and create themes like star wars or other animation themes.
Key features:-
- Advance tracking
- Lighting effects
- Muzzle flash effects
- Masking and layering technique
- Screen simulation
Steps to stabilize shaky clips on HitFilm Express
Step 1: Import the clip you want to stabilize and navigate to the control panel.
Step 2: Under the control panel menu, select the track option, and locate your tracking points.
Step 3: It will provide you with two options under the type menu, Single-point position only and double-point position scale/rotation. Select the most appropriate option.
Step 4: Under the purpose-tab, select stabilize options and hit apply.
4. FilmForth
FilmForth is a new name in the video editing industry but it allows you to create videos easily with powerful features. If you are looking for free video stabilization software, FilmForth might be one of them for you. It is compact with powerful and easy-to-apply features.
You can edit video, add filters and transitions, titles, record voiceover, or add background music to video. What’s more, it allows you to save the video without watermark.
Key features:-
- Slideshow maker with photos, videos, music, and effects;
- Change the video background or make the logo transparent;
Steps to stabilize videos using FilmForth
Step 1: Select the stabilize video option under the quick tool menu.
Step 2: Select the video file that you want to stabilize.
Step 3: Manually fill the video resolution, video quality, and frame rate settings.
Step 4: Give the file an output name, and choose the video to save the video file.
5. Video DeShake
Video DeShake is solely developed for video stabilization. You can easily download it from av2video.com. It is an effective solution for video stabilization. However, it does not provide you with fancy video editing features, but if you are looking for an instant solution for video stabilization, it is one of the best options.
Steps to stabilize videos using video Deshake:
Step 1: Download and install video Deshake software from av2video.com.
Step 2: Select the plus icon from the left-aligned menu bar.
Step 3: Select the video file that you want to stabilize.
Step 4: Select your preferred format for the output video, and click on the stabilize option present at the bottom of the interface.
6. Shotcut
Shotcut is a free video stabilizer. You don’t need to sign up or log in to begin. There is no sales funnel waiting for you once you get addicted to using it. Another reason for its popularity is beginner-focused design. It is easy to learn and use. However, it lacks advanced editing features like iMovie or HitFilm Express.
Key features:-
- It can load videos recorded in high resolution or above 60 fps.
- Single frame image extraction options.
- Video stabilization feature
- Blurring effect
Steps to stabilize videos using Shotcut:-
Step 1: Drag the video file you want to stabilize into the software interface. Select the timeline feature to select the portion of the video clip that you want to stabilize.
Step 2: Select the filter tab and follow by selecting the plus button. Under the plus icon, select the monitor option and find the stabilize option under the menu.
Step 3: Customize the stabilizations options according to your specific needs and click on analyze to monitor the stabilization. After stabilization is complete, select the file option and click on save to save the video.
7. Blender
The Blender is free and one of the best video editing software for professionals . Besides video editing, it provides you with 3D modeling, rigging animation, simulation, and motion tracking features . It allows you to perform basic actions like video cuts and splicing and complex tasks like video masking or color grading.
Key features:-
- Live preview, chroma vectorscope, and histogram displays.
- Scrubbing and waveform visualization.
- Audion mixing and syncing.
- Speed control, adjustment layers, transitions, and keyframe options.
Steps to stabilize videos using Blender
Step 1: Begin by going to the motion tracking workspace.
Step 2: Click on open and select the video file you want to stabilize.
Step 3: Select the tracking option from the toolbar and click on the movie to set tracking points.
Step 4: Set the tracking point size and press the right arrow to start tracking.
Step 5: Select the file menu and navigate the save option to save the stabilized video.
8. AVS video stabilizer
AVS video editor is suitable for both beginners and professionals. It enables you to create videos of any resolution and length. It allows you to cut, trim, join, and rotate videos. It also amazes you with the freedom of using over 300 effects. With AVS video editor, you can edit VHS videos and convert them into digital format.
Key features:-
- Audio capture
- Brand overlay
- Customizable templates
- Easy to use interface with drag and drop features
- Multimedia format support
Steps to stabilize videos using AVS video editor:
Step 1: Click on the import option under the media library tab and import the video you want to stabilize.
Step 2: Press the video stabilization button present over the timeline.
Step 3: Under the stabilization video, drag the compensation bar to adjust the degree of stabilization.
Step 4: Click on the ok button at the bottom of the stabilization menu to save the changes.
9. VSDC
VSDC is a free video stabilizer that allows you to stabilize and edit videos of any complexity. It is compact with advanced features to cut and merge video files and apply visual and audio effects to make a slideshow and add appropriate soundtracks. It also facilitates easy video conversion for playback on specific media devices.
Key features:-
- Side by side and split-screen videos
- Videos in the text effects
- Green screen removal
- Double exposure
Steps to stabilize videos using VSDC
Step 1: Open the VSDC video editor, and navigate to the video stabilization feature from the Tools tab.
Step2: Select the open file option and export the video file you want to stabilize.
Step 3: In the stabilization, tab adjust the settings that best suit your specific requirements.
Step 4: Complete the process by clicking on the export project to view the outcome.
10. Openshot
OpenShot video editor is an easy-to-use video stabilization and edition software. It is helping professionals around the world with its excellent video editing features. Another factor that makes it different from other software is its compatibility with multiple operating software. It goes with Mac, Linux and Windows and is easily downloadable from its website.
Key features:-
- Compatible with multiple operating systems (Linux, Mac, and Windows)
- It supports a handful of video audio and image formats.
- Video transition along with the real-time preview.
- Options for creating title and sub-title creation
- Titles formation with 3D animation
Steps to stabilize videos using Openshot
Step 1: Open the video you want to stabilize using the project file tab.
Step 2: Drag the video timeline tab and locate the shaky part of the video you want to stabilize.
Step 3: Select the effects tab and navigate the stabilizer feature from the menu.
Step 4: Drag the stabilizer feature to your video clip in the timeline.
Step 5: You will see the stabilizer: initialize effect window. Select the degree of percentage as per your specific requirements.
Step 6: Select the process effects option.
Bonus: Stabilize shaky videos using Filmora video editor
Filmora video editor is a powerful video stabilizing software filled with powerful editing features. Unlike other editing software, Filmora is compatible with both Windows and Mac.
Some of the above video stabilizers are complex and require expertise. On the other hand, Wondershare Filmora video editor provides you with an easy-to-use interface and easy navigation options.
Key features:
- Modern and intuitive interface.
- Video stabilization in one click.
- Powerful edition features.
- Rich effects and templates.
Steps to stabilize videos using Wondershare Filmora video editor
For Win 7 or later (64-bit)
For macOS 10.12 or later
Step 1: Drag shaky videos into the Filmora video editor timeline.
Step 2: Click on the edit option in the toolbar to access the editing panel.
Step 3: Select the stabilization option from the editing panel.
Step 4: Click the play button to preview the stabilized video clip. It also allows you to stabilize the smooth level to obtain better results.
Conclusion
Videos are the most popular types of content. They instantly convey the message and engage the consumers. However, the quality of your video is crucial from your business perspective. Video stabilizing software provides stability to videos and makes them look professional and smooth.
Even if you don’t use video stabilizers for stabilizing videos for your business purposes, they can still come in handy while stabilizing your private videos.
Steps to stabilize shaky clips on iMovie
Step 1: Import the video you want to stabilize into the iMovie application on Mac computer;
Step 2: In the adjustment tab, click on the Stabilization button and turn on Stabilize Shaky Video tool.
Step 3: To adjust the amount of stabilization, click and drag the stabilize shaky video slider.
2. Windows movie maker
Windows Movie Maker is another video stabilizer available exclusively for Windows users. It allows you to make personalized movies and incorporate video, still images, background music, and narration. It is also beneficial for stabilizing videos, adding titles and transactions.
Key features:
- It enables you to add special effects to your videos.
- Options for extensive audio track selection.
- Timeline narration options.
If you are using Windows 7, you are lucky to use Windows Movie Maker to stabilize the shaky videos easily. Watch the video tutorial to find out how.
Steps to stabilize shaky clips on Windows Movie Maker
Step 1: Open the app and click on the Add videos and photos icon, and select the video clip you want to stabilize.
Step 2: Select the portion of the clip that you want to stabilize. You can do this by selecting the shaky video selection option on the right side of the software’s windows.
Step 3: Click on the Edit tab to access the Video stabilization feature.
Step 4: Under the video stabilization feature, you will see three options, namely Anti-shake, Anti-shake and wobble correction- low, Anti-shake and wobble correction- high. Select the most suitable option.
3. HitFilm express
The HitFilm Express is one of the best video stabilization software. It is available for both macOS and Windows. It is an all-in-one video editing software that allows you to import clips and add visual effects and audio to the videos. You can also import your 3D model and create themes like star wars or other animation themes.
Key features:-
- Advance tracking
- Lighting effects
- Muzzle flash effects
- Masking and layering technique
- Screen simulation
Steps to stabilize shaky clips on HitFilm Express
Step 1: Import the clip you want to stabilize and navigate to the control panel.
Step 2: Under the control panel menu, select the track option, and locate your tracking points.
Step 3: It will provide you with two options under the type menu, Single-point position only and double-point position scale/rotation. Select the most appropriate option.
Step 4: Under the purpose-tab, select stabilize options and hit apply.
4. FilmForth
FilmForth is a new name in the video editing industry but it allows you to create videos easily with powerful features. If you are looking for free video stabilization software, FilmForth might be one of them for you. It is compact with powerful and easy-to-apply features.
You can edit video, add filters and transitions, titles, record voiceover, or add background music to video. What’s more, it allows you to save the video without watermark.
Key features:-
- Slideshow maker with photos, videos, music, and effects;
- Change the video background or make the logo transparent;
Steps to stabilize videos using FilmForth
Step 1: Select the stabilize video option under the quick tool menu.
Step 2: Select the video file that you want to stabilize.
Step 3: Manually fill the video resolution, video quality, and frame rate settings.
Step 4: Give the file an output name, and choose the video to save the video file.
5. Video DeShake
Video DeShake is solely developed for video stabilization. You can easily download it from av2video.com. It is an effective solution for video stabilization. However, it does not provide you with fancy video editing features, but if you are looking for an instant solution for video stabilization, it is one of the best options.
Steps to stabilize videos using video Deshake:
Step 1: Download and install video Deshake software from av2video.com.
Step 2: Select the plus icon from the left-aligned menu bar.
Step 3: Select the video file that you want to stabilize.
Step 4: Select your preferred format for the output video, and click on the stabilize option present at the bottom of the interface.
6. Shotcut
Shotcut is a free video stabilizer. You don’t need to sign up or log in to begin. There is no sales funnel waiting for you once you get addicted to using it. Another reason for its popularity is beginner-focused design. It is easy to learn and use. However, it lacks advanced editing features like iMovie or HitFilm Express.
Key features:-
- It can load videos recorded in high resolution or above 60 fps.
- Single frame image extraction options.
- Video stabilization feature
- Blurring effect
Steps to stabilize videos using Shotcut:-
Step 1: Drag the video file you want to stabilize into the software interface. Select the timeline feature to select the portion of the video clip that you want to stabilize.
Step 2: Select the filter tab and follow by selecting the plus button. Under the plus icon, select the monitor option and find the stabilize option under the menu.
Step 3: Customize the stabilizations options according to your specific needs and click on analyze to monitor the stabilization. After stabilization is complete, select the file option and click on save to save the video.
7. Blender
The Blender is free and one of the best video editing software for professionals . Besides video editing, it provides you with 3D modeling, rigging animation, simulation, and motion tracking features . It allows you to perform basic actions like video cuts and splicing and complex tasks like video masking or color grading.
Key features:-
- Live preview, chroma vectorscope, and histogram displays.
- Scrubbing and waveform visualization.
- Audion mixing and syncing.
- Speed control, adjustment layers, transitions, and keyframe options.
Steps to stabilize videos using Blender
Step 1: Begin by going to the motion tracking workspace.
Step 2: Click on open and select the video file you want to stabilize.
Step 3: Select the tracking option from the toolbar and click on the movie to set tracking points.
Step 4: Set the tracking point size and press the right arrow to start tracking.
Step 5: Select the file menu and navigate the save option to save the stabilized video.
8. AVS video stabilizer
AVS video editor is suitable for both beginners and professionals. It enables you to create videos of any resolution and length. It allows you to cut, trim, join, and rotate videos. It also amazes you with the freedom of using over 300 effects. With AVS video editor, you can edit VHS videos and convert them into digital format.
Key features:-
- Audio capture
- Brand overlay
- Customizable templates
- Easy to use interface with drag and drop features
- Multimedia format support
Steps to stabilize videos using AVS video editor:
Step 1: Click on the import option under the media library tab and import the video you want to stabilize.
Step 2: Press the video stabilization button present over the timeline.
Step 3: Under the stabilization video, drag the compensation bar to adjust the degree of stabilization.
Step 4: Click on the ok button at the bottom of the stabilization menu to save the changes.
9. VSDC
VSDC is a free video stabilizer that allows you to stabilize and edit videos of any complexity. It is compact with advanced features to cut and merge video files and apply visual and audio effects to make a slideshow and add appropriate soundtracks. It also facilitates easy video conversion for playback on specific media devices.
Key features:-
- Side by side and split-screen videos
- Videos in the text effects
- Green screen removal
- Double exposure
Steps to stabilize videos using VSDC
Step 1: Open the VSDC video editor, and navigate to the video stabilization feature from the Tools tab.
Step2: Select the open file option and export the video file you want to stabilize.
Step 3: In the stabilization, tab adjust the settings that best suit your specific requirements.
Step 4: Complete the process by clicking on the export project to view the outcome.
10. Openshot
OpenShot video editor is an easy-to-use video stabilization and edition software. It is helping professionals around the world with its excellent video editing features. Another factor that makes it different from other software is its compatibility with multiple operating software. It goes with Mac, Linux and Windows and is easily downloadable from its website.
Key features:-
- Compatible with multiple operating systems (Linux, Mac, and Windows)
- It supports a handful of video audio and image formats.
- Video transition along with the real-time preview.
- Options for creating title and sub-title creation
- Titles formation with 3D animation
Steps to stabilize videos using Openshot
Step 1: Open the video you want to stabilize using the project file tab.
Step 2: Drag the video timeline tab and locate the shaky part of the video you want to stabilize.
Step 3: Select the effects tab and navigate the stabilizer feature from the menu.
Step 4: Drag the stabilizer feature to your video clip in the timeline.
Step 5: You will see the stabilizer: initialize effect window. Select the degree of percentage as per your specific requirements.
Step 6: Select the process effects option.
Bonus: Stabilize shaky videos using Filmora video editor
Filmora video editor is a powerful video stabilizing software filled with powerful editing features. Unlike other editing software, Filmora is compatible with both Windows and Mac.
Some of the above video stabilizers are complex and require expertise. On the other hand, Wondershare Filmora video editor provides you with an easy-to-use interface and easy navigation options.
Key features:
- Modern and intuitive interface.
- Video stabilization in one click.
- Powerful edition features.
- Rich effects and templates.
Steps to stabilize videos using Wondershare Filmora video editor
For Win 7 or later (64-bit)
For macOS 10.12 or later
Step 1: Drag shaky videos into the Filmora video editor timeline.
Step 2: Click on the edit option in the toolbar to access the editing panel.
Step 3: Select the stabilization option from the editing panel.
Step 4: Click the play button to preview the stabilized video clip. It also allows you to stabilize the smooth level to obtain better results.
Conclusion
Videos are the most popular types of content. They instantly convey the message and engage the consumers. However, the quality of your video is crucial from your business perspective. Video stabilizing software provides stability to videos and makes them look professional and smooth.
Even if you don’t use video stabilizers for stabilizing videos for your business purposes, they can still come in handy while stabilizing your private videos.
Top 10 Online Resources for Creating Eye-Catching Gaming Intros
The Game’s world is so enthralling that it catches the eyes of all in no time, whether you are playing a game on the board or heading towards the online game versions. Here, what matters the most is the starting few seconds of the game. That decides whether the user traffic will stay to the gaming website or continue with their search online.
This is the point you will explore with this article via the best online Gaming intro makers. Besides, we shall also list the most suitable Gaming Intro maker online free with no watermark.
So, let’s know more about online Gaming intro makers with this article.
In this article
01 Top 10 Best Online Gaming Intro Makers
02 Best Video Editor to Make Gaming Intro on Windows and Mac
03 FAQs about Making Gaming Intro
Part 1: Top 10 Best Online Gaming Intro Makers
So, here you will find the top 10 online gaming intro makers. Go through all of them and make a wise choice.
1. Makewebvideo
Make Web Video online gaming intro maker gives you the option to create your Gaming Intro with special effects such as lightning, particle effects, or more. You need to follow the online instructions to add text and logo design. That’s it. Soon, you will get your video with its pre-customized video templates.
This online intro maker for gameplay offers you a monthly subscription-based purchase or per video purchase option. And if you are looking for an online gaming intro maker without a watermark, this is the option. However, you need to pay a certain amount to purchase the complete file.
2. Intromaker
Want to bring your Gaming video-making business ahead of others? Then selecting Intro maker will be the right choice. This online intro maker for Gaming provides you with multiple instant gaming intro templates that will boost your speed with customization power. So that the output intro video capable of reflecting a professional look.
Multiple gaming intro templates vary from Minecraft content, Fortnite, Letsplay, and more. What you need to do is to browse through all the available templates, select the best one, click on the ‘Customize’ button that is present at the bottom of each template, followed by some prompts. Then, upload your Logo, enter text and define the color. That’s the whole process. Here, you can create your track with the help of YouTube Audio tracks.

3. Photoadking
Your search for a simple gaming intro maker online ends here. As with the customized templates of this online gaming intro maker, it becomes easy for your Gaming world to give an incredible prior vision. In addition to Gaming intro also suggests multiple similar services such as Gaming Banner-making, Gaming Thumbnail making, YouTube art or thumbnail making, etc.
The steps are:
Select one Template> Upload Logo> Change background color, text, font, size, etc.> Add or modify music> Export to MP4 format to download it finally.
Thus, following these simple Do It Yourself steps, you can bring life to your videos.

4. Canva
Here comes the awesome gaming intro maker online with free no watermark features for all the users. Yes! You heard that right. Canva is such an impactful platform for different artful techniques including creating free Gaming intro for a valuable user like you. Even if you have no experience of video editing, still with the simple interactive interface of Canva online intro maker for gaming gives you access to tools to create your Gaming Intro with few clicks, drag, and drop.
Canva interface allowed you to drag and drop different templates, designs, colors, variations, text, names, etc. to your intro video after choosing desired gaming style. Those who need extensive design requirements can opt for its premium features also.

5. Offeo
Offeo is an online gaming intro maker without a watermark. With this online gaming intro maker, you can also share Gaming intro to multiple social media platforms. That will add more benefits to your efforts to create a valuable userbase. Using Offeo, you can give your intro video a professional and customized look with an easy-to-use drag and drop facility.
It offers many templates to adjust the Gaming intro as per the requirements. You will also be provided with options to change the fonts, adding more animations to the short intro videos. That soon will acquire the form to result in successful marketing campaigns.

6. Motionden
On the trail of creating something to promote your brand, Motionden online Gaming intro maker supports free and premium services for those who wish to have Gaming intro maker online free with no watermark. Even with the free services, you will get various templates to form suitable Gaming intro videos with much ease.
After selecting your required template, Motionden provides you with the customized editor to make necessary changes to the video part in music, color, fonts, or other related areas. Once done with all the editing processes, either download or share directly into different social media platforms such as YouTube, Facebook, etc.

7. Video Creek
Video Creek online intro maker for Gaming provides you the opportunity to customize your Gaming intro without any watermark on the videos. That will make it stand out from others gaming intro makers online free no watermark. Different tools that it can offer to your process are multiple templates, music and sound effects, video editing features, preview the content, and a lot more.
Sign up for free, select the theme, name necessary changes, apply them, and Voila, it is done.
The interface gives you a straightforward environment for even novice users to apply the customized templates and get awesome Gaming Intro videos.

8. Veed
Veed online Gaming intro maker makes you enable create free and unique intros for gaming videos. You can easily add different elements, screen recordings, and effects that you can share to various media platforms. You can even add music, motion effects, text, camera effects, or other special effects to your video with Veed.
To create a gaming intro with Veed, drag-drop the video or select it from the folders. Add different gaming elements or modify the content and then export it directly to your device folder. This way, personalization and customization of the video become super easy with editing facilities.

9. Flexclip
Out of the different services offered by Flexclip, gaming intro making is quite popular. Flexclip Gaming intro maker uses the online medium in an organized way. This tool is trusted by prominent organizations such as YouTube, Google, Unsplash, Microsoft, and a lot more to name. While exploring the software, you will realize different attractive Gaming intro templates are available on the website.
You may need gaming intros for multiple purposes that vary from user to user in terms of social engagement, sales enhancement, or traffic boost. Whatever be your concern, the solution lies with Flexclip. So add your media file, proceed with customization, and export it.

10. Panzoid
Now, the time comes to reveal the trump card with Panzoid online intro maker for Gaming**,** which provides you with instant short intro-making solutions. The selection panel is full of various templates that give your broad spectrum of videos for gaming intro. The Discussion board is here to discuss your requirements, among others.
So, jump-start it by creating an account, then log in to it. After that, you can customize your templates by uploading your brand logo, making changes in the background if needed, doing some interactive creations with Panzoid to finalize your intro, and then getting it ready to share on any platform.
Part 2: Best Video Editor to Make Gaming Intro on Windows and Mac
Last but not least, let’s discuss that gaming Intro maker that does not provide one solution but gives your healthy options to modify and customize your video intro in no time. And that name comes with Wondershare Filmora Video Editor.
Filmora is one of the best video editors for gamers provides you an opportunity to make creative changes to your video with different editing options. Some of its related features are:

- Customizable and popular titles, effects, and transitions for making an attractive gaming intro;
- All-in-one screen recorder and video editor for capture and edit gameplay video easily;
- Keyframing animation to animated any subject in the video;
For Win 7 or later (64-bit)
For macOS 10.12 or later
Part 3: FAQs about Making Gaming Intro
All those who are getting set to be in Game making business or planning to create some online games might have some questions. So, here is a quick look over some of the prime FAQs related to online gaming intro makers.
1. What is Gaming Intro?
Gaming intro refers to that glance provided by a brand, company, or gaming website to reflect the area of specialization your brand is dealing with. It represents the customized short video you want to share or view with prospective users or subscribers for your Gaming industry.
2. How long should a YouTube Gaming intro be?
YouTube Gaming’s intro duration should be exact that is neither too long nor too short, simultaneously must be capable of capturing the viewer’s vision instantly. So the optimal period for gaming intro should be around 10-15 seconds.
Conclusion
The Gaming Intro comes at the front desk while working on your Game videos, console, or online advertising your gaming brand. The arrival of so many gaming intro makers online sometimes creates confusion about which one to choose for your specific purpose. Thus, the article guided you on which online intro maker for Gaming suits your gaming business well. Along with that, you also got informed about online Gaming Intro without a watermark that leaves a better impression.
02 Best Video Editor to Make Gaming Intro on Windows and Mac
03 FAQs about Making Gaming Intro
Part 1: Top 10 Best Online Gaming Intro Makers
So, here you will find the top 10 online gaming intro makers. Go through all of them and make a wise choice.
1. Makewebvideo
Make Web Video online gaming intro maker gives you the option to create your Gaming Intro with special effects such as lightning, particle effects, or more. You need to follow the online instructions to add text and logo design. That’s it. Soon, you will get your video with its pre-customized video templates.
This online intro maker for gameplay offers you a monthly subscription-based purchase or per video purchase option. And if you are looking for an online gaming intro maker without a watermark, this is the option. However, you need to pay a certain amount to purchase the complete file.
2. Intromaker
Want to bring your Gaming video-making business ahead of others? Then selecting Intro maker will be the right choice. This online intro maker for Gaming provides you with multiple instant gaming intro templates that will boost your speed with customization power. So that the output intro video capable of reflecting a professional look.
Multiple gaming intro templates vary from Minecraft content, Fortnite, Letsplay, and more. What you need to do is to browse through all the available templates, select the best one, click on the ‘Customize’ button that is present at the bottom of each template, followed by some prompts. Then, upload your Logo, enter text and define the color. That’s the whole process. Here, you can create your track with the help of YouTube Audio tracks.
3. Photoadking
Your search for a simple gaming intro maker online ends here. As with the customized templates of this online gaming intro maker, it becomes easy for your Gaming world to give an incredible prior vision. In addition to Gaming intro also suggests multiple similar services such as Gaming Banner-making, Gaming Thumbnail making, YouTube art or thumbnail making, etc.
The steps are:
Select one Template> Upload Logo> Change background color, text, font, size, etc.> Add or modify music> Export to MP4 format to download it finally.
Thus, following these simple Do It Yourself steps, you can bring life to your videos.
4. Canva
Here comes the awesome gaming intro maker online with free no watermark features for all the users. Yes! You heard that right. Canva is such an impactful platform for different artful techniques including creating free Gaming intro for a valuable user like you. Even if you have no experience of video editing, still with the simple interactive interface of Canva online intro maker for gaming gives you access to tools to create your Gaming Intro with few clicks, drag, and drop.
Canva interface allowed you to drag and drop different templates, designs, colors, variations, text, names, etc. to your intro video after choosing desired gaming style. Those who need extensive design requirements can opt for its premium features also.
5. Offeo
Offeo is an online gaming intro maker without a watermark. With this online gaming intro maker, you can also share Gaming intro to multiple social media platforms. That will add more benefits to your efforts to create a valuable userbase. Using Offeo, you can give your intro video a professional and customized look with an easy-to-use drag and drop facility.
It offers many templates to adjust the Gaming intro as per the requirements. You will also be provided with options to change the fonts, adding more animations to the short intro videos. That soon will acquire the form to result in successful marketing campaigns.
6. Motionden
On the trail of creating something to promote your brand, Motionden online Gaming intro maker supports free and premium services for those who wish to have Gaming intro maker online free with no watermark. Even with the free services, you will get various templates to form suitable Gaming intro videos with much ease.
After selecting your required template, Motionden provides you with the customized editor to make necessary changes to the video part in music, color, fonts, or other related areas. Once done with all the editing processes, either download or share directly into different social media platforms such as YouTube, Facebook, etc.
7. Video Creek
Video Creek online intro maker for Gaming provides you the opportunity to customize your Gaming intro without any watermark on the videos. That will make it stand out from others gaming intro makers online free no watermark. Different tools that it can offer to your process are multiple templates, music and sound effects, video editing features, preview the content, and a lot more.
Sign up for free, select the theme, name necessary changes, apply them, and Voila, it is done.
The interface gives you a straightforward environment for even novice users to apply the customized templates and get awesome Gaming Intro videos.
8. Veed
Veed online Gaming intro maker makes you enable create free and unique intros for gaming videos. You can easily add different elements, screen recordings, and effects that you can share to various media platforms. You can even add music, motion effects, text, camera effects, or other special effects to your video with Veed.
To create a gaming intro with Veed, drag-drop the video or select it from the folders. Add different gaming elements or modify the content and then export it directly to your device folder. This way, personalization and customization of the video become super easy with editing facilities.
9. Flexclip
Out of the different services offered by Flexclip, gaming intro making is quite popular. Flexclip Gaming intro maker uses the online medium in an organized way. This tool is trusted by prominent organizations such as YouTube, Google, Unsplash, Microsoft, and a lot more to name. While exploring the software, you will realize different attractive Gaming intro templates are available on the website.
You may need gaming intros for multiple purposes that vary from user to user in terms of social engagement, sales enhancement, or traffic boost. Whatever be your concern, the solution lies with Flexclip. So add your media file, proceed with customization, and export it.
10. Panzoid
Now, the time comes to reveal the trump card with Panzoid online intro maker for Gaming**,** which provides you with instant short intro-making solutions. The selection panel is full of various templates that give your broad spectrum of videos for gaming intro. The Discussion board is here to discuss your requirements, among others.
So, jump-start it by creating an account, then log in to it. After that, you can customize your templates by uploading your brand logo, making changes in the background if needed, doing some interactive creations with Panzoid to finalize your intro, and then getting it ready to share on any platform.
Part 2: Best Video Editor to Make Gaming Intro on Windows and Mac
Last but not least, let’s discuss that gaming Intro maker that does not provide one solution but gives your healthy options to modify and customize your video intro in no time. And that name comes with Wondershare Filmora Video Editor.
Filmora is one of the best video editors for gamers provides you an opportunity to make creative changes to your video with different editing options. Some of its related features are:
- Customizable and popular titles, effects, and transitions for making an attractive gaming intro;
- All-in-one screen recorder and video editor for capture and edit gameplay video easily;
- Keyframing animation to animated any subject in the video;
For Win 7 or later (64-bit)
For macOS 10.12 or later
Part 3: FAQs about Making Gaming Intro
All those who are getting set to be in Game making business or planning to create some online games might have some questions. So, here is a quick look over some of the prime FAQs related to online gaming intro makers.
1. What is Gaming Intro?
Gaming intro refers to that glance provided by a brand, company, or gaming website to reflect the area of specialization your brand is dealing with. It represents the customized short video you want to share or view with prospective users or subscribers for your Gaming industry.
2. How long should a YouTube Gaming intro be?
YouTube Gaming’s intro duration should be exact that is neither too long nor too short, simultaneously must be capable of capturing the viewer’s vision instantly. So the optimal period for gaming intro should be around 10-15 seconds.
Conclusion
The Gaming Intro comes at the front desk while working on your Game videos, console, or online advertising your gaming brand. The arrival of so many gaming intro makers online sometimes creates confusion about which one to choose for your specific purpose. Thus, the article guided you on which online intro maker for Gaming suits your gaming business well. Along with that, you also got informed about online Gaming Intro without a watermark that leaves a better impression.
Also read:
- Switch It Up Top-Rated Face Swap Apps for iPhone and Android Users
- In 2024, Edit in High-Def The Best Video Software
- New AVCHD Video Editing Software Top Recommendations
- In 2024, Download Windows Movie Maker for Free A Beginners Guide to Video Editing
- The Ultimate Time Lapse Crash Course Final Cut Pro Edition
- Discount Alert! 4 Authorized Ways to Get Cheap Filmora Subscriptions for 2024
- In 2024, Amazon Prime Video Display Secrets Unlock the Full Screen Potential
- Adobe Premiere 2023 A Step-by-Step Guide to Importing and Exporting Videos
- In 2024, From Confusion to Clarity Why This Mp3 Converter Article Is a Must-Read
- New Elevate Your Video Content A Guide to Creating 3D Effects on Windows
- Updated Crop Like a Pro A Step-by-Step Guide for Final Cut Pro X Users
- 2024 Approved Free M4A Editor Software Top 5 Recommendations
- In 2024, 3GP Cutter How to Cut 3GP Files
- Updated Discover the Perfect Twitter Video Size for Your Content
- In 2024, FLAC Converter Reviews Discover the Perfect One for You
- New You Cannot Just Copy and Paste the Data From a DVD or Blu-Ray to a Computer Since You Need a File Conversion Software in Order to Change the Format of a Video File. In This Article, We Are Going to Ta
- 2024 Approved Bringing Your Photos to Life A Final Cut Pro Slideshow Tutorial
- In 2024, Convert YouTube Videos to MP4 with Ease Best Tools
- 2024 Approved Beginner-Friendly Free Video Editors Cut, Trim, and Merge
- Best Video Editing Software for Mac Similar to Pinnacle Studio
- Discover the Best 3D Animation Programs Free Trials and Paid Favorites for 2024
- FCP X Visual Effects How to Create Seamless Green Screen Composites
- 2024 Approved Edit Like a Pro Without Spending a Dime Top 10 Free Open-Source Video Editors
- New Two Ways to Fade In/Out Audio in Final Cut Pro
- Mastering Mobile How to Optimize Vertical Video for Social Media
- 2024 Approved Top 10 Online&PC Cartoon Video Maker 2023 For Beginner
- New Discover the Best Animation Software for Education
- 2024 Approved 8 Best Stop Motion Animation Software for Mac and Windows
- 10 Essential Apps for Creating Glitch Art Videos on iOS and Android for 2024
- Final Cut Pro 2023 Unlocking Professional Color Correction
- Updated 10 Best Video Editing Apps for Creating Mind-Bending Glitch Art on Mobile
- S Best Free Whiteboard Animation Software for Windows, Mac, and Online
- Edit Videos Like a Pro Microsoft Video Editor for Windows 10, 8, and 7 for 2024
- Updated Discover the Best Free MOV Video Rotators
- In 2024, Final Cut Pro on a Budget? Yes, with Our Education Bundle Offers
- Chromebook Video Editing on a Budget 10 Free Options for 2024
- In 2024, Easy GoPro Video Editing A Step-by-Step Guide for MacBook Users
- New Smooth Operator Fixing Shaky Footage in Adobe Premiere Pro
- New Ways to Convert Speech to Text
- New From iMovie to Pro The Best Apple Video Editing Software Options
- Get Professional Images Without the Cost Free Commercial Use
- Updated Create Stunning Cartoons Top 10 Mobile Apps
- 2024 Approved FCP 2023 The Ultimate Guide to Reversing Video Footage
- Gaming Intro Creation Made Easy Top 10 Tools for Windows and Mac for 2024
- New Edit Videos for Free on Your Chromebook Top Software
- Online Stop Motion Animation Studios Top 5 Free and Paid Options
- Bring Your Vision to Life WeVideos User-Friendly Video Maker for 2024
- In 2024, A Perfect Guide To Remove or Disable Google Smart Lock On Poco M6 5G
- New Users Guide How To Create Photo Talking Videos With the Best Tools, In 2024
- Home Button Not Working on Xiaomi 14 Ultra? Here Are Real Fixes | Dr.fone
- How to Unlock Disabled iPhone 8 Plus/iPad Without Computer
- 15 Best Strongest Pokémon To Use in Pokémon GO PvP Leagues For Nubia Red Magic 8S Pro | Dr.fone
- Locked Out of iPhone 14 Pro Max? 5 Ways to get into a Locked iPhone 14 Pro Max | Dr.fone
- Why Your WhatsApp Live Location is Not Updating and How to Fix on your Apple iPhone 6s Plus | Dr.fone
- In 2024, Is pgsharp legal when you are playing pokemon On Samsung Galaxy A54 5G? | Dr.fone
- In 2024, What Is a SIM Network Unlock PIN? Get Your Samsung Galaxy M54 5G Phone Network-Ready
- In 2024, Top 10 Best Spy Watches For your Samsung Galaxy A34 5G | Dr.fone
- In 2024, Does Huawei Nova Y91 Have Find My Friends? | Dr.fone
- Title: Download Now The Top 10 Free Game Sites for PC, Android, and More for 2024
- Author: Giselle
- Created at : 2024-04-25 07:34:51
- Updated at : 2024-04-26 07:34:51
- Link: https://ai-vdieo-software.techidaily.com/download-now-the-top-10-free-game-sites-for-pc-android-and-more-for-2024/
- License: This work is licensed under CC BY-NC-SA 4.0.
