
:max_bytes(150000):strip_icc():format(webp)/Google-Cloud-Next-59a9cb4a03e644389e2ffa9939c420f8.jpg)
Basic Video Editing Apps for Everyday Creators for 2024
Basic Video Editing Apps for Everyday Creators
New to video editing and don’t know how and where to edit videos, don’t have a media production, or can’t find a qualified video editor to film and produce your highlights? It’s all fine! The purpose of today’s article is to demonstrate that, with the correct video editor, you also can create slick, sophisticated video content—regardless of perception—and maintain your content marketing strategy ahead of the game.
In the coming year, over half of marketers will add YouTube and Facebook platforms for streaming video; one-third of all internet usage is spent viewing video; video will make for more than 80% of all internet traffic by 2019. 80% of the time! Let’s get started! From the most affordable (i.e., free!) for the beginners. Here is the best basic video editor that includes the features you’ll find handy in a video editor.
In this article
01 Best Basic Video Editors for Windows and Mac [Free and Paid]
02 Best Free Basic Video Editors Online
Part 1: Best Basic Video Editors for Windows and Mac [Free and Paid]
What should you do when you do not have access to a video studio or a team of video experts on staff to film and edit your videos? Do not be concerned!
Without the need for an in-house team or outsourcing your video brand awareness, it’s quicker than ever to make high-quality films on your own. Here are some of the top picks.
1. Windows Photos App
Microsoft Photos, a free digital viewer and video editor included with Windows 10 and Windows 11, provides capable visual effects and video enhancements, as well as techniques for organizing and editing videos, everything in a touch-friendly functionality. Windows 10/11 comes with the Photos app pre-integrated. You don’t have to do anything to obtain the app when you have Windows 10/11.
The free Microsoft photo and video editing app is a great choice for viewing, editing, and sharing digital photos and videos. As the name suggests, it’s for Windows users – a delight to use a picture and video-editing tool that’s simple to use, clean, and has all the functions you need for basic viewing and repairs. Obviously, a full-featured program like the Windows Photos App is required for advanced photo organizing, optimization, and effects.

Clips may be trimmed or divided, text can be added , motion or 3D effects can be applied, filters can be used, and the speed can be changed . It’s a huge array that allows you to create an interesting result. There are over 20 options for adding soundtracks at the backend at the top.
The Photos app features the Automatic Video tool which can create video automatically with the images or videos uploaded .
2. iMovie
Okay, so this one won’t actually apply to those of you who deal with computers, but we’d be negligent if we left it off the roster. Thanks to its high-class interface, it doesn’t get much nicer than Apple iMovie regarding elegance and beauty. It is only supported by macOS and iOS.
The ten high-fidelity filters in iMovie are among the best in the video editing game, and you can utilize AirDrop to instantly and smoothly transmit your video to your Mac when you’re filming on your iPhone or working on your iPad.

Green-screen , or “chroma-key,” is among iMovie’s most prized tools since it enables you to relocate your characters to exotic locations—say, Hawaii—at any time. Do you want to add “Somewhere Over the Rainbow” to the image? Because iMovie is integrated with iTunes and GarageBand, you may quickly add unique music and sounds to your movie. Once your video is finished, send it out into the world via iMessage, Facebook, YouTube, or any of iMovie’s numerous easily accessible venues.
Here are some tips and tricks in editing videos with iMovie, hope that will help you edit faster.
3. Apple Photos App
Apple Photos, a free app included with macOS and iOS, is our pick for the best basic video editing software for Mac and iOS users because it embodies the company’s concept of fun, easy-to-use software. The interface of Apple Photos is clean, straightforward, and direct, allowing you to express yourself using basic, uncomplicated shortcuts rather than the complex layers of capabilities seen in more feature-rich products. It is only supported by Apple devices only.
Years, collections, and Moments are used to arrange the videos. Only current devices with 64-bit CPUs, such as the iPhone 5s or above, is compliant with the new release of Apple Photos. The Apple Photos mobile application includes thumbnail sliders to switch numerous characteristics of a photo quickly, in addition to options for auto-enhance, red-eye removal, and crop/rotate.
In Adjust, for example, you may move an indicator over a thumbnail variant to change the video’s luminance or color intensity. The one-click filters are basic, but they can provide some interesting results. You can also use your fingers or type text on display to mark up a video, trim a video and save it as a short teaser, change the slow-motion segment of a film, and trim a video and save it as a new video.
Here are some of the best Apple video editing software , make sure to check it if you’re using a Mac.
4. Wondershare Filmora
In terms of video editors, Wondershare Filmora has long been a current favorite of several, particularly regular customers, due to its ease of use. You will be met with the interface where you will do all of your film editing production. You’ll note how clean, tidy, and uncomplicated it looks and seems at first sight.
For Win 7 or later (64-bit)
For macOS 10.12 or later
Library, Timeline, and Preview are the three options available in the interface. By heading to a specific section of the video on your timeline, double-clicking the area, waiting for it to pop into the preview segment, and then adding effects, transitions, audio, or stabilizing and correcting the video using any of the editing options that are available to you, you can perform simple video editing features.

Additional but equally impressive functions include Lens Correction, Compositing, which applies blend modes to transitions and overlays; Drop Shadow, which applies shadows to images and words. And Auto Enhance, which significantly improves the quality of a substandard video.
5. Adobe Premiere Elements
Adobe Premiere Elements allows even beginner editors to create polished projects from their video sources. It’s an all-in-one video editing and video production software for those who love graphic user interfaces and straightforward layouts. You may sketch around an item or region within a video after adding an effect to it.
As the videos go on, Elements keeps track of this item and conceals the effect on it. You can brighten the sky, change the color of a driving car, and blur a person’s face. Guided Edits, which walk the user step-by-step through multiple things, is a fundamental component of Elements. It is supported by Windows
They help learn the ropes and gain confidence thanks to the user-friendly design. The current version of Premiere Elements has received some under-the-hood improvements, depending less on the CPU and more on the graphics card to improve results.

Part 2: Best Free Basic Video Editors Online
With the advent of social video sharing platforms such as YouTube, Vimeo, Instagram, and TikTok, video editing and production are no longer limited to experts. In this section of the article, we’ll go through the top 5 most highly suggested free online video editing tools that you may use.
The majority of the free basic video editor are beginner-friendly, so even if you’re new to video production, you can rapidly create a movie with these resources.
1. Clipchamp
Clipchamp is an excellent free online video editing program that includes a video compressor, converter, and webcam recorder in addition to video editing features. You can cut, crop, rotate and flip films with ease using drag-and-drop tools.
It allows you to upload media files from a local computer or online cloud storage sites like Google Drive, Dropbox, etc. You can also record the screen, camera or use the text to speech feature to generate audio sound.
Besides the basic video editing feature, this online video editor also provides some templates, stock video and music & sound effect libraries, which makes creating a video much easier. Furthermore, brightness, saturation, and contrast may all be easily adjusted. Transitions, text, overlays, and backdrops may all be added.
You may choose from a variety of aspect ratios, including 1:1, 9:16, 4:3, and 16:9, and it also comes with a built-in instruction to help you build a movie quickly. Plus, the software provides the editor with a large number of templates to pick from.

2. Magisto
Magisto is a fantastic online video creator who automatically transforms ordinary movies into gorgeous, dynamic videos and amazing social videos. It’s easy to use and speedy, with all the features you’d expect from software you paid your kidney for.

You may contribute photographs and videos to Magisto after signing up with your Facebook or Google+ account. Magisto also offers a variety of video themes for a variety of sectors, including birthday wishes, weddings, promotions, announcements, and inspiration. Select from trendy, family, business, social, seasonal, fun, and clean editing themes.
3. Kizoa
Kizoa is well-known for its extensive transition effects, which may help you create professional-looking films quickly. Kizoa also offers 4K UHD videos in various aspect ratios, including 16:9, 4:3, 3:2, 1:1, and 9:16, 3:4, and 2:3 portraits. That’s not even taking into account the software’s numerous templates.

Kizoa’s library has a large number of animations and effects which can be used to adapt films to meet the demands of certain editing tasks. Many aspects of video clips will be considerably easier to customize, such as position, size, length, and timing. Because there is no need to log in to obtain all of these amazing features, most pros and novices prefer to utilize Kizoa for their daily requirements.
4. Canva
Another one on our list is the Canva , which is as easy and simpler to use as the rest of these. The interface on a computer’s web browser is quite straightforward, with a sidebar on the left-side guiding you through all of the stages required to complete your work. You may choose from a variety of templates. They’re divided into categories like Education, Reviews, Explainer, Sale, Fashion, Slideshow, YouTube into, and Outro, and so on.

There are dozens of templates to pick from, with some appearing in many categories. Canva makes use of layers to allow things to be put in front of and behind each other. You may view and adjust that function by clicking the ‘Position’ option. Transparency, filters, color tweaks, cut, and flip are some of the other options available.
5. Adobe Spark
Adobe Spark , like Canva, is a video design platform. It enables you to generate a variety of images and social media material for professional or personal usage. Adobe Spark’s layout and usability will appeal to you. The primary interface, which appears before you use the editor, is straightforward.

Adobe Spark includes a vast library of templates when you’re looking for ideas or motivation for your creations. For organizations who wish to maintain a strong brand image in their material, the Brand area is a must-have element. You may develop new brands with the corporate logo, color palette, and typefaces as the starting point. Adobe Spark features a separate project tab that stores all of your work in one place.
Conclusion
Well, there you have it – the best basic video editors for beginners. Video editing has grown by ten folds from where it was five or six years ago. Almost anyone can edit a video to an extent. But what takes them to the next level is the use of efficient, effective, and productive software in place to do almost any kind of video editing. If you don’t want to install any software on your computer, you can try these online video editors or the preset video makers; if you want to improve the video quality, desktop software is recommended.
02 Best Free Basic Video Editors Online
Part 1: Best Basic Video Editors for Windows and Mac [Free and Paid]
What should you do when you do not have access to a video studio or a team of video experts on staff to film and edit your videos? Do not be concerned!
Without the need for an in-house team or outsourcing your video brand awareness, it’s quicker than ever to make high-quality films on your own. Here are some of the top picks.
1. Windows Photos App
Microsoft Photos, a free digital viewer and video editor included with Windows 10 and Windows 11, provides capable visual effects and video enhancements, as well as techniques for organizing and editing videos, everything in a touch-friendly functionality. Windows 10/11 comes with the Photos app pre-integrated. You don’t have to do anything to obtain the app when you have Windows 10/11.
The free Microsoft photo and video editing app is a great choice for viewing, editing, and sharing digital photos and videos. As the name suggests, it’s for Windows users – a delight to use a picture and video-editing tool that’s simple to use, clean, and has all the functions you need for basic viewing and repairs. Obviously, a full-featured program like the Windows Photos App is required for advanced photo organizing, optimization, and effects.
Clips may be trimmed or divided, text can be added , motion or 3D effects can be applied, filters can be used, and the speed can be changed . It’s a huge array that allows you to create an interesting result. There are over 20 options for adding soundtracks at the backend at the top.
The Photos app features the Automatic Video tool which can create video automatically with the images or videos uploaded .
2. iMovie
Okay, so this one won’t actually apply to those of you who deal with computers, but we’d be negligent if we left it off the roster. Thanks to its high-class interface, it doesn’t get much nicer than Apple iMovie regarding elegance and beauty. It is only supported by macOS and iOS.
The ten high-fidelity filters in iMovie are among the best in the video editing game, and you can utilize AirDrop to instantly and smoothly transmit your video to your Mac when you’re filming on your iPhone or working on your iPad.
Green-screen , or “chroma-key,” is among iMovie’s most prized tools since it enables you to relocate your characters to exotic locations—say, Hawaii—at any time. Do you want to add “Somewhere Over the Rainbow” to the image? Because iMovie is integrated with iTunes and GarageBand, you may quickly add unique music and sounds to your movie. Once your video is finished, send it out into the world via iMessage, Facebook, YouTube, or any of iMovie’s numerous easily accessible venues.
Here are some tips and tricks in editing videos with iMovie, hope that will help you edit faster.
3. Apple Photos App
Apple Photos, a free app included with macOS and iOS, is our pick for the best basic video editing software for Mac and iOS users because it embodies the company’s concept of fun, easy-to-use software. The interface of Apple Photos is clean, straightforward, and direct, allowing you to express yourself using basic, uncomplicated shortcuts rather than the complex layers of capabilities seen in more feature-rich products. It is only supported by Apple devices only.
Years, collections, and Moments are used to arrange the videos. Only current devices with 64-bit CPUs, such as the iPhone 5s or above, is compliant with the new release of Apple Photos. The Apple Photos mobile application includes thumbnail sliders to switch numerous characteristics of a photo quickly, in addition to options for auto-enhance, red-eye removal, and crop/rotate.
In Adjust, for example, you may move an indicator over a thumbnail variant to change the video’s luminance or color intensity. The one-click filters are basic, but they can provide some interesting results. You can also use your fingers or type text on display to mark up a video, trim a video and save it as a short teaser, change the slow-motion segment of a film, and trim a video and save it as a new video.
Here are some of the best Apple video editing software , make sure to check it if you’re using a Mac.
4. Wondershare Filmora
In terms of video editors, Wondershare Filmora has long been a current favorite of several, particularly regular customers, due to its ease of use. You will be met with the interface where you will do all of your film editing production. You’ll note how clean, tidy, and uncomplicated it looks and seems at first sight.
For Win 7 or later (64-bit)
For macOS 10.12 or later
Library, Timeline, and Preview are the three options available in the interface. By heading to a specific section of the video on your timeline, double-clicking the area, waiting for it to pop into the preview segment, and then adding effects, transitions, audio, or stabilizing and correcting the video using any of the editing options that are available to you, you can perform simple video editing features.
Additional but equally impressive functions include Lens Correction, Compositing, which applies blend modes to transitions and overlays; Drop Shadow, which applies shadows to images and words. And Auto Enhance, which significantly improves the quality of a substandard video.
5. Adobe Premiere Elements
Adobe Premiere Elements allows even beginner editors to create polished projects from their video sources. It’s an all-in-one video editing and video production software for those who love graphic user interfaces and straightforward layouts. You may sketch around an item or region within a video after adding an effect to it.
As the videos go on, Elements keeps track of this item and conceals the effect on it. You can brighten the sky, change the color of a driving car, and blur a person’s face. Guided Edits, which walk the user step-by-step through multiple things, is a fundamental component of Elements. It is supported by Windows
They help learn the ropes and gain confidence thanks to the user-friendly design. The current version of Premiere Elements has received some under-the-hood improvements, depending less on the CPU and more on the graphics card to improve results.
Part 2: Best Free Basic Video Editors Online
With the advent of social video sharing platforms such as YouTube, Vimeo, Instagram, and TikTok, video editing and production are no longer limited to experts. In this section of the article, we’ll go through the top 5 most highly suggested free online video editing tools that you may use.
The majority of the free basic video editor are beginner-friendly, so even if you’re new to video production, you can rapidly create a movie with these resources.
1. Clipchamp
Clipchamp is an excellent free online video editing program that includes a video compressor, converter, and webcam recorder in addition to video editing features. You can cut, crop, rotate and flip films with ease using drag-and-drop tools.
It allows you to upload media files from a local computer or online cloud storage sites like Google Drive, Dropbox, etc. You can also record the screen, camera or use the text to speech feature to generate audio sound.
Besides the basic video editing feature, this online video editor also provides some templates, stock video and music & sound effect libraries, which makes creating a video much easier. Furthermore, brightness, saturation, and contrast may all be easily adjusted. Transitions, text, overlays, and backdrops may all be added.
You may choose from a variety of aspect ratios, including 1:1, 9:16, 4:3, and 16:9, and it also comes with a built-in instruction to help you build a movie quickly. Plus, the software provides the editor with a large number of templates to pick from.
2. Magisto
Magisto is a fantastic online video creator who automatically transforms ordinary movies into gorgeous, dynamic videos and amazing social videos. It’s easy to use and speedy, with all the features you’d expect from software you paid your kidney for.
You may contribute photographs and videos to Magisto after signing up with your Facebook or Google+ account. Magisto also offers a variety of video themes for a variety of sectors, including birthday wishes, weddings, promotions, announcements, and inspiration. Select from trendy, family, business, social, seasonal, fun, and clean editing themes.
3. Kizoa
Kizoa is well-known for its extensive transition effects, which may help you create professional-looking films quickly. Kizoa also offers 4K UHD videos in various aspect ratios, including 16:9, 4:3, 3:2, 1:1, and 9:16, 3:4, and 2:3 portraits. That’s not even taking into account the software’s numerous templates.
Kizoa’s library has a large number of animations and effects which can be used to adapt films to meet the demands of certain editing tasks. Many aspects of video clips will be considerably easier to customize, such as position, size, length, and timing. Because there is no need to log in to obtain all of these amazing features, most pros and novices prefer to utilize Kizoa for their daily requirements.
4. Canva
Another one on our list is the Canva , which is as easy and simpler to use as the rest of these. The interface on a computer’s web browser is quite straightforward, with a sidebar on the left-side guiding you through all of the stages required to complete your work. You may choose from a variety of templates. They’re divided into categories like Education, Reviews, Explainer, Sale, Fashion, Slideshow, YouTube into, and Outro, and so on.
There are dozens of templates to pick from, with some appearing in many categories. Canva makes use of layers to allow things to be put in front of and behind each other. You may view and adjust that function by clicking the ‘Position’ option. Transparency, filters, color tweaks, cut, and flip are some of the other options available.
5. Adobe Spark
Adobe Spark , like Canva, is a video design platform. It enables you to generate a variety of images and social media material for professional or personal usage. Adobe Spark’s layout and usability will appeal to you. The primary interface, which appears before you use the editor, is straightforward.
Adobe Spark includes a vast library of templates when you’re looking for ideas or motivation for your creations. For organizations who wish to maintain a strong brand image in their material, the Brand area is a must-have element. You may develop new brands with the corporate logo, color palette, and typefaces as the starting point. Adobe Spark features a separate project tab that stores all of your work in one place.
Conclusion
Well, there you have it – the best basic video editors for beginners. Video editing has grown by ten folds from where it was five or six years ago. Almost anyone can edit a video to an extent. But what takes them to the next level is the use of efficient, effective, and productive software in place to do almost any kind of video editing. If you don’t want to install any software on your computer, you can try these online video editors or the preset video makers; if you want to improve the video quality, desktop software is recommended.
The Ultimate FCP Voice Over Guide: Tips, Tricks, and Best Practices
Quick Tips on Recording Voice Over with Final Cut Pro

Benjamin Arango
Mar 27, 2024• Proven solutions
With the help of Final Cut Pro you can easily create various changes to audio file with time, one can adjust volume fading and apply audio enhancement as per need. With this advanced video editing application, it is possible to record audios on live channels as Final Cut Pro can directly process input signals taken from external as well as built-in microphones.
Check more articles here, if you are also interested in other audio editing tips in Final Cut Pro like how to fade in/out audio with FCP.
Related article: How to edit audio files in Final Cut Pro >>
If you are new to the world of editing and find Final Cut Pro little difficult to use then it is good to try another professional tool for ease and learning. Experts suggest using Wondershare Filmora for fast video editing on Mac devices. This latest and advanced software tool contains all interactive features and can be used by beginners without any special training. To download its trial version for free.
 Download Mac Version ](https://tools.techidaily.com/wondershare/filmora/download/ )
How to Record Voice Over with Final Cut Pro
Most of you might be interested to know how to record voice with Final Cut Pro. Actually, the method is quite simple and can be used by beginners too.
What is Audition in FCP:
The term auditions are commonly used on FCP platform that represents sets of some related clips out of which you have to select anyone for your final project. Users are allowed to take multiple inputs of different clips for the composition of the audition and the other interesting task is to apply different effects on the same clip to create an audition with multiple versions. During live audio recording, this software tool allows automatic grouping of auditions with several retakes. You can easily find created auditions in the top left corner of your timeline as well as on the browser.

Now in order to record voice over FCP, you need to follow the steps as below:
Step 1
First of all, you need to place your playhead at a specific location on the timeline from where you wish to start your recording.
Step 2
Now in order to start your recording, you need to press Shift+A from the keyboard or simply go to Window then select Record Voiceover, and finally hit Record Button.

The countdown will automatically start.

Step 3
As soon as your recording is complete then you need to stop the process by simply pressing space bar or hitting the Shift+A button again.
Note that as the recording is stopped, the playhead automatically returns to initial position and it asks you for retake. If you click on the option ‘Create Audition from Takes’ by selecting the checkbox then FCP automatically starts creating auditions.

Here we recommend you keep this box selected because it can make your timeline looking disordered if you uncheck this box.

Step 4
It is possible to record numbers of voiceovers for same audio section. For this you simply need to press record button or initiate retake by pressing Shift+A.
Note:
- The retakes never sweep over previously created voiceover as the final audition of FCP will be containing all recordings.
- In case if you wish to record a fresh section then user needs to move playhead manually to starting point.
Step 5
Now it is time to select the desired voiceover from auditions and you can preview them all for better selection. All that you need to do is:
- Simple select your desired audition out of which you need to review voiceovers and then open recordings either by simply pressing Y or go to Clip then select Audition and finally choose Open.
- Select the take from Audition window and press space bar to play it or you can also switch it on by using Control+Command+Y command.

- Once you find your desired take then select it and hit Done. Note that a selected take appears in yellow outline.
- Now as you want to finalize your decision so choose your clip then go to auditions and then press Finalize Audition.
Step 6
It is also possible to extract desired recordings from auditions; for example if you wish to edit any take from a set of clips available in a certain audition or you want to join two different takes to create one final take then it is possible to extract audio sets from the audition by simply choosing Clip and then hit the option “Break Apart Clip Items”, it can also be done by pressing Shift+Command+G. Hence, it is possible to edit audio clips using FCP to create a unique output.

Ok, that’s all about how to record a voice-over in FCPX. Click here for more tips about recording and adding tips.
FAQ
How to sync voiceover with my video with FCPX?
You try the auto-sync feature of FCPX. For more details please read this: Practical Guide on How to Sync Audio and Video in Final Cut Pro X 2021.
How to get my missing sound effect back in FCPX?
It’s quite common in FCPX. If reopening the software or rebooting Mac won’t fix it, you may want to refer to this article: Proven Ways to Get Missing Sound Effects Back in Final Cut Pro.
Benjamin Arango
Benjamin Arango is a writer and a lover of all things video.
Follow @Benjamin Arango
Benjamin Arango
Mar 27, 2024• Proven solutions
With the help of Final Cut Pro you can easily create various changes to audio file with time, one can adjust volume fading and apply audio enhancement as per need. With this advanced video editing application, it is possible to record audios on live channels as Final Cut Pro can directly process input signals taken from external as well as built-in microphones.
Check more articles here, if you are also interested in other audio editing tips in Final Cut Pro like how to fade in/out audio with FCP.
Related article: How to edit audio files in Final Cut Pro >>
If you are new to the world of editing and find Final Cut Pro little difficult to use then it is good to try another professional tool for ease and learning. Experts suggest using Wondershare Filmora for fast video editing on Mac devices. This latest and advanced software tool contains all interactive features and can be used by beginners without any special training. To download its trial version for free.
Download Mac Version ](https://tools.techidaily.com/wondershare/filmora/download/ )
How to Record Voice Over with Final Cut Pro
Most of you might be interested to know how to record voice with Final Cut Pro. Actually, the method is quite simple and can be used by beginners too.
What is Audition in FCP:
The term auditions are commonly used on FCP platform that represents sets of some related clips out of which you have to select anyone for your final project. Users are allowed to take multiple inputs of different clips for the composition of the audition and the other interesting task is to apply different effects on the same clip to create an audition with multiple versions. During live audio recording, this software tool allows automatic grouping of auditions with several retakes. You can easily find created auditions in the top left corner of your timeline as well as on the browser.
Now in order to record voice over FCP, you need to follow the steps as below:
Step 1
First of all, you need to place your playhead at a specific location on the timeline from where you wish to start your recording.
Step 2
Now in order to start your recording, you need to press Shift+A from the keyboard or simply go to Window then select Record Voiceover, and finally hit Record Button.
The countdown will automatically start.
Step 3
As soon as your recording is complete then you need to stop the process by simply pressing space bar or hitting the Shift+A button again.
Note that as the recording is stopped, the playhead automatically returns to initial position and it asks you for retake. If you click on the option ‘Create Audition from Takes’ by selecting the checkbox then FCP automatically starts creating auditions.
Here we recommend you keep this box selected because it can make your timeline looking disordered if you uncheck this box.
Step 4
It is possible to record numbers of voiceovers for same audio section. For this you simply need to press record button or initiate retake by pressing Shift+A.
Note:
- The retakes never sweep over previously created voiceover as the final audition of FCP will be containing all recordings.
- In case if you wish to record a fresh section then user needs to move playhead manually to starting point.
Step 5
Now it is time to select the desired voiceover from auditions and you can preview them all for better selection. All that you need to do is:
- Simple select your desired audition out of which you need to review voiceovers and then open recordings either by simply pressing Y or go to Clip then select Audition and finally choose Open.
- Select the take from Audition window and press space bar to play it or you can also switch it on by using Control+Command+Y command.
- Once you find your desired take then select it and hit Done. Note that a selected take appears in yellow outline.
- Now as you want to finalize your decision so choose your clip then go to auditions and then press Finalize Audition.
Step 6
It is also possible to extract desired recordings from auditions; for example if you wish to edit any take from a set of clips available in a certain audition or you want to join two different takes to create one final take then it is possible to extract audio sets from the audition by simply choosing Clip and then hit the option “Break Apart Clip Items”, it can also be done by pressing Shift+Command+G. Hence, it is possible to edit audio clips using FCP to create a unique output.
Ok, that’s all about how to record a voice-over in FCPX. Click here for more tips about recording and adding tips.
FAQ
How to sync voiceover with my video with FCPX?
You try the auto-sync feature of FCPX. For more details please read this: Practical Guide on How to Sync Audio and Video in Final Cut Pro X 2021.
How to get my missing sound effect back in FCPX?
It’s quite common in FCPX. If reopening the software or rebooting Mac won’t fix it, you may want to refer to this article: Proven Ways to Get Missing Sound Effects Back in Final Cut Pro.
Benjamin Arango
Benjamin Arango is a writer and a lover of all things video.
Follow @Benjamin Arango
Do You Have Any Idea to Save Projects on the Final Cut Pro App? If You Are in Search of This Content, Then You Are in the Right Place to Obtain the Valuable Facts About It in Detail
How to Save Final Cut Pro Project the Right Way?

Shanoon Cox
Mar 27, 2024• Proven solutions
aIn the Final Cut Pro, you can find the autosave option to store the changes made on the file automatically without any manual intervention.
To overcome the manual mechanism, the autosave feature in the FCP app keeps the last changes on the file precisely. In this article, you can find insightful ideas about the autosave mechanism and the manual storage process.
In addition, you will learn how to save the finished projects on the external drives effortlessly. A detailed focus on saving the completed projects on the Final Cut Pro app has been highlighted in the below content. Synopsis on the usage of batch export and discovery of the missing files are discussed to enlighten you with the essential data.
Part 1: The autosave mechanism of Final Cut Pro X and manual storage procedure
In this section, get some mind-blowing facts on the autosave and manual options on the Final Cut Pro app!
The FCP tool autosaves the changes every 15 minutes. The saved projects are available in the libraries file as a backup for the restore process. You can go to the library folder to view the autosaved projects. The last edited changes can be reflected by tapping the undo option in the Edit menu.
Stepwise instructions to modify the autosave settings in the FCPX program
Step 1: Launch the FCPX app, press Ctrl+Q to open the ‘User Preferences’ window.
Step 2: In the ‘User Preferences’ screen, you can find a wide range of options to modify. Alter the levels of Undo, autosave vault attributes according to your needs, and save the changes. You can witness these parameters in the General section in the User Preference screen.
Use the User Preference window to make necessary changes according to your requirement. BY default, the Autosave Vault is enabled, and you can work on the projects without any hesitation. Additionally, you can modify the attributes like ‘Save a copy for every’, ‘ Keep at most’, and ‘Maximum of’ to personalize your projects.

When the FCP file is open, you need not worry about the saving procedure. The app triggers the autosave mechanism for regular intervals, and the changes will be up-to-date. If you want to store the files manually, then work with its library files. A simple operation like Ctrl+c and Ctrl+v helps you to move the autosaved projects to any storage location. Here are few tips to restore the autosaved FCP files.
Detailed guidelines on the restoration of autosaved files.
Step 1 Open the Final Cut Pro app on your device.
Step 2 Tap the ‘Libraries Sidebar’ to choose the desired library for restore action. Now hit File -> Open Library -> Backup options on the screen.
Step 3 Surf the backup files and choose the desired one that requires a view. Press the Restore from’ option from the pop-up items. Finally, press the ‘Open’ button.

The manual storage option is feasible only after deactivating the autosave mechanism on the FCPX tool. It is not advisable to carry out this activity. The autosave option keeps your works up-to-date, and you will not miss the recent changes at any cost. You can still disable the autosave option to try the manual storage process.
In the FCPX app, press ‘File -> Library Properties’, then from the displayed items, select the ‘Modify Settings’ option beside the ‘Storage Location’ label. Now, in the backups option select ‘Do not Save’ to deactivate the autosave mechanism.

After completing this procedure, save the changes and get back to the working timeline of
FCPX to continue with your projects. When you edit any projects use the save option without fail else the changes made will be lost in no time.
Part 2: How to save FCPX projects to desktop or external drives?
Many experts recommend opting for an external storage location to save the FCPX files. It occupies more space, and you need to be careful while selecting the drives to store the library files of the FCPX projects. While saving the files, remove the generated data to optimize the storage process.
First, remove the generated files in the library
Step 1: Tap the Libraries sidebar in the FCPX tool and select ‘Library’ and choose the ’Cache’ option in the property window of Library.
Step 2: Next, press ‘File -> Delete Generated Library Files’. To remove the unnecessary generated files.

The above action helps to clear up the space occupied by the project. If you want to free up more space, then delete most of the listed generated files.
Secondly, now transfer the FCPX project to external drives.
Step 1 Select the Libraries Sidebar in the FCPX program and choose the desired ‘Library’. Then hit ‘File -> Reveal in Finder. Now, the file opens in the new finder window.
Step 2 Close the FCPX screen and drag the library files from the Finder window to the external hard drive.

Finally, you had made it. The FCPX projects were successfully moved on to the external drives quickly. Use the above technique to carry out flawless storage or transfer process.
Part 3: Where to find missing files or projects in final cut pro?
Many users feel that their project files were lost in the event of renaming. It becomes a missed file, and they will feel that the files were no were on their system. To handle this scenario, you must learn to think out of the box. You can use the relink technique to find the missed files in the Final Cut Pro app.
The procedure is like the method of searching a particular file in your system using the ‘Search’ option. Here, Relink file functionality is available to set up a link again with the lost file to get back its storage space.
Open the application and select the clip you want to discover. Go to the File menu on the title bar and choose Relink File option from the expanded items. A bunch of files will be displayed below, and you can choose the desired missed file from the collections. There are options to filter the discovered files by choosing between Missing and All options.
Click the ‘Locate All’ button available at the bottom right side of the screen and navigate the folders to link with the perfect file. Press the ‘Choose’ button after selecting the missed file from the list.
From the selected options, The Final Cut Pro application analyses all the attributes in the files and lists out the original files. Now hit the ‘Relink Files’ option to complete the file hunt process.

Part 4: How to use Batch Export to save multiple projects in FCPX?
Perform the batch export for the files that carry similar settings. You can proceed with the flawless export procedure when the project files have the same roles, captions, and settings. The export option becomes limited if the project contains a mix of these attributes.
Batch Export is the processing of sharing multiple files to desired storage space from your app ambiance. Appropriate clicks on the correct controls simplify the task. This procedure requires special attention because there is a chance of data loss when you handle bulk files at a time. The purpose of opting for the bunch export option is that you can complete the transfer tasks quickly. Exporting individual files is time-consuming and requires many clicks to move the desired files to the respective destination. This Batch Export feature in FCPX program enhances the users while working with many files.
Step 1 Launch the FCPX app on your device.
Step 2 In the Libraries sidebar, tap the library option, and select the desired projects that require the batch export.
Step 1 Now, click the File -> Share option to trigger the export process.

It is advisable to export the Master files to retain the quality of the project. You can share the projects without compromising their quality factors.
Conclusion
As you all know that saving a project after successful completion is a crucial action. Few designers, editors, and developers unknowingly ignore this step. There are many applications embeds automatic saving function to enhance the editors to store their finished tasks.
Thus, this article had given valuable insights on how to save the FCPX projects and the methods to backup and restore them. You had acquired an idea about the effective way to spot the missed project files. Finally, tips and tricks associated with the batch export were discussed to ensure flawless bulk file sharing in the secure channel. Use the above content to work comfortably with the FCPX app. Stay tuned to this article to discover enlightening facts on the Final Cut Pro application.
Shanoon Cox
Shanoon Cox is a writer and a lover of all things video.
Follow @Shanoon Cox
Shanoon Cox
Mar 27, 2024• Proven solutions
aIn the Final Cut Pro, you can find the autosave option to store the changes made on the file automatically without any manual intervention.
To overcome the manual mechanism, the autosave feature in the FCP app keeps the last changes on the file precisely. In this article, you can find insightful ideas about the autosave mechanism and the manual storage process.
In addition, you will learn how to save the finished projects on the external drives effortlessly. A detailed focus on saving the completed projects on the Final Cut Pro app has been highlighted in the below content. Synopsis on the usage of batch export and discovery of the missing files are discussed to enlighten you with the essential data.
Part 1: The autosave mechanism of Final Cut Pro X and manual storage procedure
In this section, get some mind-blowing facts on the autosave and manual options on the Final Cut Pro app!
The FCP tool autosaves the changes every 15 minutes. The saved projects are available in the libraries file as a backup for the restore process. You can go to the library folder to view the autosaved projects. The last edited changes can be reflected by tapping the undo option in the Edit menu.
Stepwise instructions to modify the autosave settings in the FCPX program
Step 1: Launch the FCPX app, press Ctrl+Q to open the ‘User Preferences’ window.
Step 2: In the ‘User Preferences’ screen, you can find a wide range of options to modify. Alter the levels of Undo, autosave vault attributes according to your needs, and save the changes. You can witness these parameters in the General section in the User Preference screen.
Use the User Preference window to make necessary changes according to your requirement. BY default, the Autosave Vault is enabled, and you can work on the projects without any hesitation. Additionally, you can modify the attributes like ‘Save a copy for every’, ‘ Keep at most’, and ‘Maximum of’ to personalize your projects.
When the FCP file is open, you need not worry about the saving procedure. The app triggers the autosave mechanism for regular intervals, and the changes will be up-to-date. If you want to store the files manually, then work with its library files. A simple operation like Ctrl+c and Ctrl+v helps you to move the autosaved projects to any storage location. Here are few tips to restore the autosaved FCP files.
Detailed guidelines on the restoration of autosaved files.
Step 1 Open the Final Cut Pro app on your device.
Step 2 Tap the ‘Libraries Sidebar’ to choose the desired library for restore action. Now hit File -> Open Library -> Backup options on the screen.
Step 3 Surf the backup files and choose the desired one that requires a view. Press the Restore from’ option from the pop-up items. Finally, press the ‘Open’ button.
The manual storage option is feasible only after deactivating the autosave mechanism on the FCPX tool. It is not advisable to carry out this activity. The autosave option keeps your works up-to-date, and you will not miss the recent changes at any cost. You can still disable the autosave option to try the manual storage process.
In the FCPX app, press ‘File -> Library Properties’, then from the displayed items, select the ‘Modify Settings’ option beside the ‘Storage Location’ label. Now, in the backups option select ‘Do not Save’ to deactivate the autosave mechanism.
After completing this procedure, save the changes and get back to the working timeline of
FCPX to continue with your projects. When you edit any projects use the save option without fail else the changes made will be lost in no time.
Part 2: How to save FCPX projects to desktop or external drives?
Many experts recommend opting for an external storage location to save the FCPX files. It occupies more space, and you need to be careful while selecting the drives to store the library files of the FCPX projects. While saving the files, remove the generated data to optimize the storage process.
First, remove the generated files in the library
Step 1: Tap the Libraries sidebar in the FCPX tool and select ‘Library’ and choose the ’Cache’ option in the property window of Library.
Step 2: Next, press ‘File -> Delete Generated Library Files’. To remove the unnecessary generated files.
The above action helps to clear up the space occupied by the project. If you want to free up more space, then delete most of the listed generated files.
Secondly, now transfer the FCPX project to external drives.
Step 1 Select the Libraries Sidebar in the FCPX program and choose the desired ‘Library’. Then hit ‘File -> Reveal in Finder. Now, the file opens in the new finder window.
Step 2 Close the FCPX screen and drag the library files from the Finder window to the external hard drive.
Finally, you had made it. The FCPX projects were successfully moved on to the external drives quickly. Use the above technique to carry out flawless storage or transfer process.
Part 3: Where to find missing files or projects in final cut pro?
Many users feel that their project files were lost in the event of renaming. It becomes a missed file, and they will feel that the files were no were on their system. To handle this scenario, you must learn to think out of the box. You can use the relink technique to find the missed files in the Final Cut Pro app.
The procedure is like the method of searching a particular file in your system using the ‘Search’ option. Here, Relink file functionality is available to set up a link again with the lost file to get back its storage space.
Open the application and select the clip you want to discover. Go to the File menu on the title bar and choose Relink File option from the expanded items. A bunch of files will be displayed below, and you can choose the desired missed file from the collections. There are options to filter the discovered files by choosing between Missing and All options.
Click the ‘Locate All’ button available at the bottom right side of the screen and navigate the folders to link with the perfect file. Press the ‘Choose’ button after selecting the missed file from the list.
From the selected options, The Final Cut Pro application analyses all the attributes in the files and lists out the original files. Now hit the ‘Relink Files’ option to complete the file hunt process.
Part 4: How to use Batch Export to save multiple projects in FCPX?
Perform the batch export for the files that carry similar settings. You can proceed with the flawless export procedure when the project files have the same roles, captions, and settings. The export option becomes limited if the project contains a mix of these attributes.
Batch Export is the processing of sharing multiple files to desired storage space from your app ambiance. Appropriate clicks on the correct controls simplify the task. This procedure requires special attention because there is a chance of data loss when you handle bulk files at a time. The purpose of opting for the bunch export option is that you can complete the transfer tasks quickly. Exporting individual files is time-consuming and requires many clicks to move the desired files to the respective destination. This Batch Export feature in FCPX program enhances the users while working with many files.
Step 1 Launch the FCPX app on your device.
Step 2 In the Libraries sidebar, tap the library option, and select the desired projects that require the batch export.
Step 1 Now, click the File -> Share option to trigger the export process.
It is advisable to export the Master files to retain the quality of the project. You can share the projects without compromising their quality factors.
Conclusion
As you all know that saving a project after successful completion is a crucial action. Few designers, editors, and developers unknowingly ignore this step. There are many applications embeds automatic saving function to enhance the editors to store their finished tasks.
Thus, this article had given valuable insights on how to save the FCPX projects and the methods to backup and restore them. You had acquired an idea about the effective way to spot the missed project files. Finally, tips and tricks associated with the batch export were discussed to ensure flawless bulk file sharing in the secure channel. Use the above content to work comfortably with the FCPX app. Stay tuned to this article to discover enlightening facts on the Final Cut Pro application.
Shanoon Cox
Shanoon Cox is a writer and a lover of all things video.
Follow @Shanoon Cox
Elevate Your Video Experience: Free Online Quality Enhancement Tools
Top 9 Best Online Video Quality Enhancer for FREE

Ollie Mattison
Apr 24, 2024• Proven solutions
In 2024, the average person will watch 17 hours of video content every week. Improving the quality of your videos can make your content more noticeable.
Fortunately, there are many excellent video quality enhancer tools to choose from. These tools can enhance both the visual and audio clarity of your content. Ultimately, this will enhance your professionalism and reputation as a trustworthy creator.
Are you wondering where to start when selecting an effective, user-friendly video enhancer? Here are some of our top recommendations to help you begin.
- Part 2: 5 Free AI Video Enhancers [Software Options]
- Part 3: Top 2 4K Video Enhancer Online Free Options
- Part 4: How to Choose the Best Video Enhancer
- In this article
Why Do You Need an AI Video Enhancer?
AI video enhancers utilize generative AI to remove noise, stabilize shaky videos, upscale, or enhance their overall appearance. These tools employ machine learning and neural network techniques to analyze videos and apply different effects for enhancement. Trained on extensive datasets, most AI video enhancers can understand video content like faces, scenes, and objects, automatically adjusting imperfections.
Using an AI video enhancer is an excellent way to boost video quality quickly. Unlike traditional methods, AI speeds up the enhancement process significantly. There are additional benefits, such as:
- **Enhanced Media Quality:**AI video enhancers enhance videos automatically with advanced algorithms, maintaining quality, clarity, and detail.
- Noise Reduction: Many AI video enhancer tools effectively reduce visual noise in videos, resulting in cleaner and clearer footage.
- **Reviving Old Clip:**AI video enhancers are adept at restoring old video footage to make it appear more vibrant.
5 Free AI Video Enhancers [Software Options]
Are blurry videos on your large screen getting on your nerves? Thanks to advancements in artificial intelligence (AI), you can now enhance your low-resolution videos for a crystal-clear viewing experience.
Whether you’re a video editor, content creator, or streamer, incorporating an AI video upscaler into your toolkit is a wise choice. Here are the top 5 picks for the best free AI video enhancer software to improve your video editing.
1.Wondershare Filmora - AI Video Enhancer

Pricing:Filmora offers a free trial without exporting.
Wondershare Filmora stands out in video editing by combining comprehensive editing features with AI-powered enhancement tools. With 4K editing, Filmora ensures videos are improved and future-proofed.
In addition to enhancement, Filmora offers over 300 unique transitions and effects catering to creative minds. Audio enthusiasts will enjoy advanced audio tools like audio ducking and equalizers.
Filmora’s standout feature is its motion tracking capability, enabling dynamic video compositions. While beginners may find the abundance of features overwhelming, regular updates and an active online community provide ample support.
Features
- Filmora’s advanced AI video-enhancing algorithms let you convert black-and-white footage to colored ones.
- It boosts frame rates up to 240 FPS using AI-enhanced frame interpolation technology and 4x super-resolution algorithms.
- Filmora enhances videos’ clarity and quality through audio ducking, equalizers, and more.
- This AI Video Enhancer tracks and attaches objects in videos.
- The tool preserves details and enhances quality in slow-motion scenes.
- Offers over 300 unique transitions and effects.
Pros
- Versatile editing and enhancement options.
- This AI video enhancer is designed to assist both beginners and professionals.
- It supports batch processing, enhancing 10+ videos simultaneously.
Cons
- The free version adds a watermark.
2.AVCLabs Video Enhancer AI
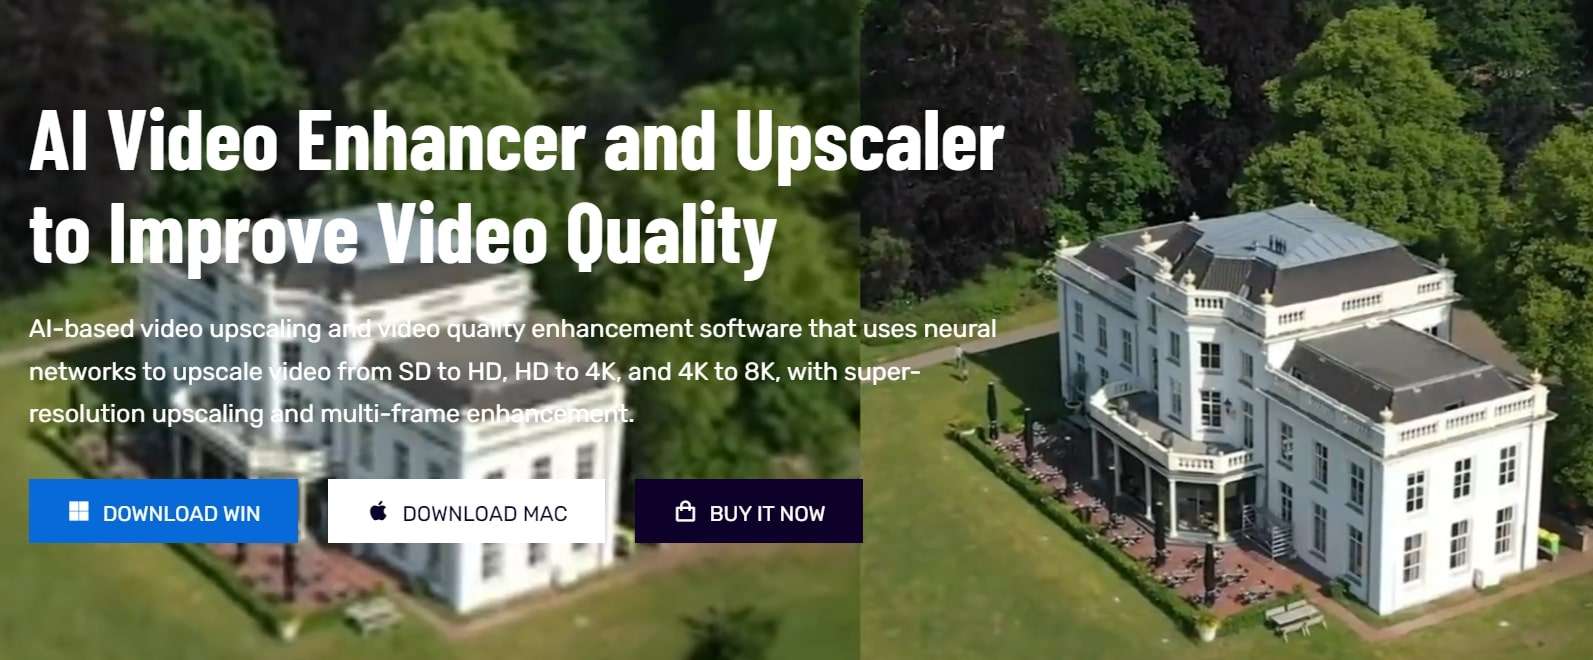
Pricing:AVCLabs offers new users a 7-day free trial.
AVCLabs Video Enhancer AI utilizes a neural network to improve video clip quality. With super-resolution AI video upscaling and multi-frame enhancement, it can easily upscale video from SD to HD (720p or 1080p) to 4K and up to 8K in just one click.
With support for various video and audio formats, users can work seamlessly without compatibility issues. A notable feature is its batch processing capability, enabling users to upscale and enhance multiple videos simultaneously, saving time. The real-time preview feature is invaluable for those who wish to see the software’s results before finalizing their project.
Features
- AVCLabs seamlessly enhances any video footage without quality loss. Whether single or multi-frame, you’ll experience smooth transitions and improved frames.
- With AVCLabs’ color correction feature, you can easily adjust each video frame’s brightness, saturation, and contrast. This tool employs AI video upscaling to create larger, more detailed images without sacrificing quality.
- This video enhancement tool offers automatic face refinement to enhance facial details, which is ideal for improving low-quality videos with excessive noise and blurriness.
- The Super Resolution feature recovers high-resolution videos from low-resolution materials by generating additional pixel data to fill gaps, resulting in enhanced output.
- AVCLabs Video Enhancer AI uses a multi-frame convolutional neural network to stabilize video shakes and remove motion artifacts, overlay noise, and grain, producing natural and enhanced results.
Pros
- AVCLabs features a color calibration algorithm that accurately portrays natural colors.
- It allows you to add color to old black-and-white videos.
- The video processing is fully automatic, requiring no manual fine-tuning.
Cons
- The app demands a significant amount of free space, up to 15 GB.
- It is only compatible with Windows and Mac operating systems.
- The free trial adds a watermark from AVC Labs to the videos.
3.UniFab Video Enhancer
Pricing: UniFab provides a 30-day free trial for new AI users and a 30-day money-back guarantee for paid.
UniFab is a comprehensive AI-powered video enhancer to enhance video quality for all types of videos. Standout features like upscaling video to HDR10/Dolby Vision, denoising, and deinterlacing set this tool apart.
The models are regularly updated with the latest advancements in Deep Learning. Whether you’re a novice or an expert, UniFab offers both automatic and manual modes for video enhancement, making it easy to use without requiring complex settings.
Features
- Upgrade any video to 720p, 1080p, or even 4k resolution with remarkable clarity.
- Convert SDR videos to stunning HDR formats like HDR10+ and Dolby Vision. This feature revitalizes your videos, making them significantly more vibrant and immersive.
- Utilize AI technology to deinterlace your videos, ensuring smooth playback and a pristine viewing experience on modern displays.
- Specifically designed for videos captured in low-light conditions or with high ISO settings, this tool intuitively reduces grain and noise, restoring your footage’s true essence without sacrificing detail.
- Experience unprecedented fluidity as the software boosts your videos to an impressive 120FPS using AI. This transforms your content into a smooth motion stream, ideal for high-definition screens and attentive audiences.
Pros
- It allows audio up-mixing to EAC3 5.1/DTS 7.1 through AI.
- Utilizes GPU-accelerated technology.
- Supports video conversion, compression, and editing.
Cons
- The free trial is limited to 3 videos.
- Does not support Mac systems.
4.Topaz Video Enhance AI
Pricing:Topaz video enhancement tool offers a 30-day no-questions-asked refund policy.
Topaz Video Enhance AI enhances video quality by increasing its resolution. It supports batch upscaling of videos and is compatible with DVD, DSLR, Game, and HD stock footage.
Many notable film studios consider Topaz Video Enhance AI one of the best video editing software tools. It is suitable for various uses, such as commercials, movie content, and YouTube videos.
Features
- This free video upscaling software swiftly analyzes video footage quality using AI tools and recreates it into high-resolution videos.
- Topaz offers Gaia CGI and Theia for enhancing CG and animated videos, along with Proteus and Artemis for noise removal and sharpening.
- Easily recover details from any video footage by injecting original details using adjacent frames’ additional information. It detects and corrects visual artifacts formed during compression.
- Topaz provides an automatic mode for quick video quality enhancement and manual fine-tuning options using available controls.
- With this free video enhancer software, preserve video audio tracks and select from different conversion options for optimal output in the final project.
Pros
- Reduces motion artifacts.
- Adds extra frames for smooth, slow-motion videos.
- Enhances video quality up to 8K.
Cons
- AI processing can be time-consuming, sometimes taking hours.
- Requires a high-quality graphics card.
5.HitPaw Video Enhancer

Pricing:HitPaw AI video enhancer offers a 30-day refund guarantee on paid plans.
HitPaw is a user-friendly video enhancer suitable for both beginners and professionals. It features an easy-to-navigate interface, ensuring even those with minimal experience can improve their videos. Despite its simplicity, HitPaw offers robust enhancement tools, including color correction and stabilization. Its extensive support for various video formats eliminates compatibility concerns.
The software prioritizes efficient video enhancement without compromising quality or speed. Comprehensive tutorials help users explore different editing tasks and unlock their content’s full potential.
Features
- Utilize advanced AI algorithms to upscale low-resolution videos for a more appealing look. The AI feature optimizes content for sharper and more vibrant visuals.
- The HitPaw video quality enhancer app uses AI tools to improve detailing on human faces. Apply filters and adjust settings to enhance facial output in videos.
- The app includes a video stabilization feature that eliminates shaky camera movements, producing smoother and clearer videos with a professional touch.
- HitPaw offers an AI video repair option to restore damaged, corrupted, and old videos. It can also use deep learning AI to colorize black-and-white videos.
- Remove noise from videos with the General Denoise feature, making them look sharper, clearer, and newer.
Pros
- Supports various video formats.
- Has a user-friendly and intuitive interface.
- Can repair and enhance animation videos.
Cons
- The free plan has limited editing features.
Top 2 4K Video Enhancer Online Free Options
The AI-enhanced video tools mentioned above excel in their field. However, there are times when you might run out of storage or need a quick fix through your browser. So, here are some online AI tools that can enhance your videos. Unlike offline video enhancer AIs, online tools are easily accessible. While they may offer fewer features than desktop solutions, they are still useful for some editors.
1.Cutout.Pro
Many editing professionals rely on this free AI video enhancer for unlimited video improvements. Cutout.Pro utilizes advanced features such as video upscaling, motion interpolation, deinterlacing, and shake stabilization to enhance overall quality. This tool converts low-quality videos to higher resolutions like 2K, 30fps, and beyond. Moreover, this online tool swiftly reduces visual noise and other motion artifacts from clips using AI.
Features
- Reduce noise, motion artifacts, and improve video resolution significantly with this powerful online video quality enhancer and upscaler. Perfect for enhancing low-resolution videos like 240p, 360p, 480p, and more.
- Pro increases video frame rates without sacrificing quality. Smooth out shaky footage for better slow-motion effects.
- This tool enhances video resolution up to 2K at a maximum of 30fps effortlessly. It sharpens and defines your videos, bringing your story to life like a professional.
- This is perfect for filmmakers seeking to enhance footage quality and create professional-looking films. Improve video resolution and quality to unblur, upscale, and smooth videos for cinematic results.
- Enhance the quality of personal videos as this tool features shake stabilization for professional results.
- This video enhancer is ideal for professionals creating cinematic frames and restoring old footage. It’s also great for individuals looking to improve the quality of compressed videos downloaded from social media platforms like YouTube, Netflix, and TikTok.
Pros
- It boosts video frame rates and enables HD clip exports.
- Users can upload videos in MP4, MOV, WebM, and GIF formats for processing.
Cons
- It only offers a 5-second preview of the results after enhancement.
2.Clideo Video Enhancer
Clideo is an online video-enhancing tool that can completely transform any random video. It lets you add special AI effects and filters to adjust the video’s brightness, saturation, and contrast, making it stunning, vibrant, and attractive. You can enhance any video professionally for social media attention or business branding.
When it comes to video-enhancing tools, users seek maximum customization options. Clideo offers various features, functions, and facilities to transform average-looking videos into 4k video resolutions.
Features
- The interface is intuitive, so you don’t need any video editing experience to use it.
- You can enhance your video regardless of format because Clideo works with MP4, WMV, MOV, VOB, AVI, and other popular formats.
- You don’t need to download and install the video enhancer to your device. It’s not only faster but also more secure.
- Enhance multiple videos or images simultaneously.
- Add subtitles with customizable text fonts.
- Text Overlay feature with support for HD resolution.
- Access a media library with social sharing options.
Pros
- User-friendly tool is ideal for beginners.
- Supports multiple formats.
- As an online tool, it saves device storage space.
- Reasonable pricing.
- Provides uninterrupted video editing with customizable features.
Cons
- A premium subscription is required to remove watermarking.
- No offline app available; internet connection always necessary.
- No dedicated mobile app.
How to Choose the Best Video Enhancer
Consider the following to ensure you select the right video enhancer for your needs and creative vision.
1.Type of Content
Think about the type of content you’re working with. Are you creating short-form clips for social media or longer, more complex videos? Different enhancers may better suit different content types, so consider your file type and potential quality issues.
2.Consider The Features You Need
Consider the tools and features you need from your video quality enhancer software. Each system offers different capabilities, so planning can help you find the option that best fits your requirements.
3.Sharing Formats and Requirements
Determine the purpose of your video project and any specific sharing requirements. Understanding your goals will help you plan accordingly, whether for online sharing or commercial use.
4.Your Budget
Keep your budget in mind. Some enhancers offer free features, while others may require a purchase or subscription fee for full access. Budgeting effectively ensures you get the best value for your money while achieving great video results.
Conclusion
The video enhancement landscape has been transformed by artificial intelligence, providing numerous options to enhance your videos’ quality. Whether a professional filmmaker or a casual content creator, free AI video enhancers offer a chance to take your productions to the next level.
Each software has unique strengths, from Wondershare Filmora’s comprehensive editing features to AVCLabs’ neural network-powered upscaling and UniFab’s HDR conversion capabilities. User-friendly options like HitPaw cater to beginners while providing robust enhancement tools.
Moreover, for quick fixes or limited storage, online options like Cutout.Pro and Clideo offer accessible solutions with impressive results. With these advancements, achieving professional-quality videos is now achievable for everyone.
Ollie Mattison
Ollie Mattison is a writer and a lover of all things video.
Follow @Ollie Mattison
Ollie Mattison
Apr 24, 2024• Proven solutions
In 2024, the average person will watch 17 hours of video content every week. Improving the quality of your videos can make your content more noticeable.
Fortunately, there are many excellent video quality enhancer tools to choose from. These tools can enhance both the visual and audio clarity of your content. Ultimately, this will enhance your professionalism and reputation as a trustworthy creator.
Are you wondering where to start when selecting an effective, user-friendly video enhancer? Here are some of our top recommendations to help you begin.
- Part 2: 5 Free AI Video Enhancers [Software Options]
- Part 3: Top 2 4K Video Enhancer Online Free Options
- Part 4: How to Choose the Best Video Enhancer
- In this article
Why Do You Need an AI Video Enhancer?
AI video enhancers utilize generative AI to remove noise, stabilize shaky videos, upscale, or enhance their overall appearance. These tools employ machine learning and neural network techniques to analyze videos and apply different effects for enhancement. Trained on extensive datasets, most AI video enhancers can understand video content like faces, scenes, and objects, automatically adjusting imperfections.
Using an AI video enhancer is an excellent way to boost video quality quickly. Unlike traditional methods, AI speeds up the enhancement process significantly. There are additional benefits, such as:
- **Enhanced Media Quality:**AI video enhancers enhance videos automatically with advanced algorithms, maintaining quality, clarity, and detail.
- Noise Reduction: Many AI video enhancer tools effectively reduce visual noise in videos, resulting in cleaner and clearer footage.
- **Reviving Old Clip:**AI video enhancers are adept at restoring old video footage to make it appear more vibrant.
5 Free AI Video Enhancers [Software Options]
Are blurry videos on your large screen getting on your nerves? Thanks to advancements in artificial intelligence (AI), you can now enhance your low-resolution videos for a crystal-clear viewing experience.
Whether you’re a video editor, content creator, or streamer, incorporating an AI video upscaler into your toolkit is a wise choice. Here are the top 5 picks for the best free AI video enhancer software to improve your video editing.
1.Wondershare Filmora - AI Video Enhancer
Pricing:Filmora offers a free trial without exporting.
Wondershare Filmora stands out in video editing by combining comprehensive editing features with AI-powered enhancement tools. With 4K editing, Filmora ensures videos are improved and future-proofed.
In addition to enhancement, Filmora offers over 300 unique transitions and effects catering to creative minds. Audio enthusiasts will enjoy advanced audio tools like audio ducking and equalizers.
Filmora’s standout feature is its motion tracking capability, enabling dynamic video compositions. While beginners may find the abundance of features overwhelming, regular updates and an active online community provide ample support.
Features
- Filmora’s advanced AI video-enhancing algorithms let you convert black-and-white footage to colored ones.
- It boosts frame rates up to 240 FPS using AI-enhanced frame interpolation technology and 4x super-resolution algorithms.
- Filmora enhances videos’ clarity and quality through audio ducking, equalizers, and more.
- This AI Video Enhancer tracks and attaches objects in videos.
- The tool preserves details and enhances quality in slow-motion scenes.
- Offers over 300 unique transitions and effects.
Pros
- Versatile editing and enhancement options.
- This AI video enhancer is designed to assist both beginners and professionals.
- It supports batch processing, enhancing 10+ videos simultaneously.
Cons
- The free version adds a watermark.
2.AVCLabs Video Enhancer AI
Pricing:AVCLabs offers new users a 7-day free trial.
AVCLabs Video Enhancer AI utilizes a neural network to improve video clip quality. With super-resolution AI video upscaling and multi-frame enhancement, it can easily upscale video from SD to HD (720p or 1080p) to 4K and up to 8K in just one click.
With support for various video and audio formats, users can work seamlessly without compatibility issues. A notable feature is its batch processing capability, enabling users to upscale and enhance multiple videos simultaneously, saving time. The real-time preview feature is invaluable for those who wish to see the software’s results before finalizing their project.
Features
- AVCLabs seamlessly enhances any video footage without quality loss. Whether single or multi-frame, you’ll experience smooth transitions and improved frames.
- With AVCLabs’ color correction feature, you can easily adjust each video frame’s brightness, saturation, and contrast. This tool employs AI video upscaling to create larger, more detailed images without sacrificing quality.
- This video enhancement tool offers automatic face refinement to enhance facial details, which is ideal for improving low-quality videos with excessive noise and blurriness.
- The Super Resolution feature recovers high-resolution videos from low-resolution materials by generating additional pixel data to fill gaps, resulting in enhanced output.
- AVCLabs Video Enhancer AI uses a multi-frame convolutional neural network to stabilize video shakes and remove motion artifacts, overlay noise, and grain, producing natural and enhanced results.
Pros
- AVCLabs features a color calibration algorithm that accurately portrays natural colors.
- It allows you to add color to old black-and-white videos.
- The video processing is fully automatic, requiring no manual fine-tuning.
Cons
- The app demands a significant amount of free space, up to 15 GB.
- It is only compatible with Windows and Mac operating systems.
- The free trial adds a watermark from AVC Labs to the videos.
3.UniFab Video Enhancer
Pricing: UniFab provides a 30-day free trial for new AI users and a 30-day money-back guarantee for paid.
UniFab is a comprehensive AI-powered video enhancer to enhance video quality for all types of videos. Standout features like upscaling video to HDR10/Dolby Vision, denoising, and deinterlacing set this tool apart.
The models are regularly updated with the latest advancements in Deep Learning. Whether you’re a novice or an expert, UniFab offers both automatic and manual modes for video enhancement, making it easy to use without requiring complex settings.
Features
- Upgrade any video to 720p, 1080p, or even 4k resolution with remarkable clarity.
- Convert SDR videos to stunning HDR formats like HDR10+ and Dolby Vision. This feature revitalizes your videos, making them significantly more vibrant and immersive.
- Utilize AI technology to deinterlace your videos, ensuring smooth playback and a pristine viewing experience on modern displays.
- Specifically designed for videos captured in low-light conditions or with high ISO settings, this tool intuitively reduces grain and noise, restoring your footage’s true essence without sacrificing detail.
- Experience unprecedented fluidity as the software boosts your videos to an impressive 120FPS using AI. This transforms your content into a smooth motion stream, ideal for high-definition screens and attentive audiences.
Pros
- It allows audio up-mixing to EAC3 5.1/DTS 7.1 through AI.
- Utilizes GPU-accelerated technology.
- Supports video conversion, compression, and editing.
Cons
- The free trial is limited to 3 videos.
- Does not support Mac systems.
4.Topaz Video Enhance AI
Pricing:Topaz video enhancement tool offers a 30-day no-questions-asked refund policy.
Topaz Video Enhance AI enhances video quality by increasing its resolution. It supports batch upscaling of videos and is compatible with DVD, DSLR, Game, and HD stock footage.
Many notable film studios consider Topaz Video Enhance AI one of the best video editing software tools. It is suitable for various uses, such as commercials, movie content, and YouTube videos.
Features
- This free video upscaling software swiftly analyzes video footage quality using AI tools and recreates it into high-resolution videos.
- Topaz offers Gaia CGI and Theia for enhancing CG and animated videos, along with Proteus and Artemis for noise removal and sharpening.
- Easily recover details from any video footage by injecting original details using adjacent frames’ additional information. It detects and corrects visual artifacts formed during compression.
- Topaz provides an automatic mode for quick video quality enhancement and manual fine-tuning options using available controls.
- With this free video enhancer software, preserve video audio tracks and select from different conversion options for optimal output in the final project.
Pros
- Reduces motion artifacts.
- Adds extra frames for smooth, slow-motion videos.
- Enhances video quality up to 8K.
Cons
- AI processing can be time-consuming, sometimes taking hours.
- Requires a high-quality graphics card.
5.HitPaw Video Enhancer
Pricing:HitPaw AI video enhancer offers a 30-day refund guarantee on paid plans.
HitPaw is a user-friendly video enhancer suitable for both beginners and professionals. It features an easy-to-navigate interface, ensuring even those with minimal experience can improve their videos. Despite its simplicity, HitPaw offers robust enhancement tools, including color correction and stabilization. Its extensive support for various video formats eliminates compatibility concerns.
The software prioritizes efficient video enhancement without compromising quality or speed. Comprehensive tutorials help users explore different editing tasks and unlock their content’s full potential.
Features
- Utilize advanced AI algorithms to upscale low-resolution videos for a more appealing look. The AI feature optimizes content for sharper and more vibrant visuals.
- The HitPaw video quality enhancer app uses AI tools to improve detailing on human faces. Apply filters and adjust settings to enhance facial output in videos.
- The app includes a video stabilization feature that eliminates shaky camera movements, producing smoother and clearer videos with a professional touch.
- HitPaw offers an AI video repair option to restore damaged, corrupted, and old videos. It can also use deep learning AI to colorize black-and-white videos.
- Remove noise from videos with the General Denoise feature, making them look sharper, clearer, and newer.
Pros
- Supports various video formats.
- Has a user-friendly and intuitive interface.
- Can repair and enhance animation videos.
Cons
- The free plan has limited editing features.
Top 2 4K Video Enhancer Online Free Options
The AI-enhanced video tools mentioned above excel in their field. However, there are times when you might run out of storage or need a quick fix through your browser. So, here are some online AI tools that can enhance your videos. Unlike offline video enhancer AIs, online tools are easily accessible. While they may offer fewer features than desktop solutions, they are still useful for some editors.
1.Cutout.Pro
Many editing professionals rely on this free AI video enhancer for unlimited video improvements. Cutout.Pro utilizes advanced features such as video upscaling, motion interpolation, deinterlacing, and shake stabilization to enhance overall quality. This tool converts low-quality videos to higher resolutions like 2K, 30fps, and beyond. Moreover, this online tool swiftly reduces visual noise and other motion artifacts from clips using AI.
Features
- Reduce noise, motion artifacts, and improve video resolution significantly with this powerful online video quality enhancer and upscaler. Perfect for enhancing low-resolution videos like 240p, 360p, 480p, and more.
- Pro increases video frame rates without sacrificing quality. Smooth out shaky footage for better slow-motion effects.
- This tool enhances video resolution up to 2K at a maximum of 30fps effortlessly. It sharpens and defines your videos, bringing your story to life like a professional.
- This is perfect for filmmakers seeking to enhance footage quality and create professional-looking films. Improve video resolution and quality to unblur, upscale, and smooth videos for cinematic results.
- Enhance the quality of personal videos as this tool features shake stabilization for professional results.
- This video enhancer is ideal for professionals creating cinematic frames and restoring old footage. It’s also great for individuals looking to improve the quality of compressed videos downloaded from social media platforms like YouTube, Netflix, and TikTok.
Pros
- It boosts video frame rates and enables HD clip exports.
- Users can upload videos in MP4, MOV, WebM, and GIF formats for processing.
Cons
- It only offers a 5-second preview of the results after enhancement.
2.Clideo Video Enhancer
Clideo is an online video-enhancing tool that can completely transform any random video. It lets you add special AI effects and filters to adjust the video’s brightness, saturation, and contrast, making it stunning, vibrant, and attractive. You can enhance any video professionally for social media attention or business branding.
When it comes to video-enhancing tools, users seek maximum customization options. Clideo offers various features, functions, and facilities to transform average-looking videos into 4k video resolutions.
Features
- The interface is intuitive, so you don’t need any video editing experience to use it.
- You can enhance your video regardless of format because Clideo works with MP4, WMV, MOV, VOB, AVI, and other popular formats.
- You don’t need to download and install the video enhancer to your device. It’s not only faster but also more secure.
- Enhance multiple videos or images simultaneously.
- Add subtitles with customizable text fonts.
- Text Overlay feature with support for HD resolution.
- Access a media library with social sharing options.
Pros
- User-friendly tool is ideal for beginners.
- Supports multiple formats.
- As an online tool, it saves device storage space.
- Reasonable pricing.
- Provides uninterrupted video editing with customizable features.
Cons
- A premium subscription is required to remove watermarking.
- No offline app available; internet connection always necessary.
- No dedicated mobile app.
How to Choose the Best Video Enhancer
Consider the following to ensure you select the right video enhancer for your needs and creative vision.
1.Type of Content
Think about the type of content you’re working with. Are you creating short-form clips for social media or longer, more complex videos? Different enhancers may better suit different content types, so consider your file type and potential quality issues.
2.Consider The Features You Need
Consider the tools and features you need from your video quality enhancer software. Each system offers different capabilities, so planning can help you find the option that best fits your requirements.
3.Sharing Formats and Requirements
Determine the purpose of your video project and any specific sharing requirements. Understanding your goals will help you plan accordingly, whether for online sharing or commercial use.
4.Your Budget
Keep your budget in mind. Some enhancers offer free features, while others may require a purchase or subscription fee for full access. Budgeting effectively ensures you get the best value for your money while achieving great video results.
Conclusion
The video enhancement landscape has been transformed by artificial intelligence, providing numerous options to enhance your videos’ quality. Whether a professional filmmaker or a casual content creator, free AI video enhancers offer a chance to take your productions to the next level.
Each software has unique strengths, from Wondershare Filmora’s comprehensive editing features to AVCLabs’ neural network-powered upscaling and UniFab’s HDR conversion capabilities. User-friendly options like HitPaw cater to beginners while providing robust enhancement tools.
Moreover, for quick fixes or limited storage, online options like Cutout.Pro and Clideo offer accessible solutions with impressive results. With these advancements, achieving professional-quality videos is now achievable for everyone.
Ollie Mattison
Ollie Mattison is a writer and a lover of all things video.
Follow @Ollie Mattison
Also read:
- MacAVS Editor
- Elevate Your Video Game Best 1080P Editing Software for Creators
- In 2024, Free MOV Video Joiner Top 5 Picks
- In 2024, Top 10 Webcam Capture Tools for Windows 10 Users
- Cut, Trim, and Polish The Best Free Online Video Editors for 2024
- In 2024, 4K Video Conversion Mastery Downloading in MP4 Format Made Simple
- Updated Best Windows 10 Video Editors for Trimming and Cutting Videos
- Get Animated! Top 7 Drawing Software for Bringing Your Ideas to Life
- 2024 Approved Audio-Visual Mastery Top Video Editors with Music Support
- Unleash the Glitch Top Video Editing Software for Creatives
- Updated 8 Best Video Animation App for Android/iPhone/iPad
- Updated Expert-Recommended Free Video Splitters Top 5 List
- Unleash Your Creativity Top Video Makers with Sound Effects and Music for Mobile
- 2024 Approved Final Cut Pro X Tutorial L-Cuts and J-Cuts
- New Free Video Editing Powerhouses Top Picks Online
- In 2024, Best Video Brightness Editors Online & Desktop Tools
- In 2024, From Zero to Hero Beginner-Friendly Video Editors
- The Ultimate List of Video Editors with Audio Features
- 3D Animation Software Roundup Top Picks for Every Budget
- 8 Best Timecode Calculator to Use (Online/iPhone/Android) for 2024
- How to Convert Animated GIF From Video
- In 2024, How To Do Tecno Spark 10 5G Screen Sharing | Dr.fone
- Lock Your Vivo Y100 Phone in Style The Top 5 Gesture Lock Screen Apps
- 6 Ways to Change Spotify Location On Your Honor Play 40C | Dr.fone
- How to restore wiped videos on Vivo Y27 4G
- In 2024, How to Transfer from Apple iPhone SE (2022) to iPhone 8/X/11 | Dr.fone
- In 2024, How to Check Distance and Radius on Google Maps For your Lava Blaze Curve 5G | Dr.fone
- Fix Unfortunately Settings Has Stopped on Realme GT 5 Pro Quickly | Dr.fone
- Ultimate Guide on HTC U23 Pro FRP Bypass
- Here Are Some Reliable Ways to Get Pokemon Go Friend Codes For OnePlus 12R | Dr.fone
- Network Locked SIM Card Inserted On Your Vivo Y36i Phone? Unlock It Now
- What is Fake GPS Location Pro and Is It Good On Vivo Y56 5G? | Dr.fone
- 11 Ways to Fix it When My Itel P55 Wont Charge | Dr.fone
- Title: Basic Video Editing Apps for Everyday Creators for 2024
- Author: Giselle
- Created at : 2024-05-19 07:46:00
- Updated at : 2024-05-20 07:46:00
- Link: https://ai-vdieo-software.techidaily.com/basic-video-editing-apps-for-everyday-creators-for-2024/
- License: This work is licensed under CC BY-NC-SA 4.0.
