
:max_bytes(150000):strip_icc():format(webp)/jens-kreuter-85328-c5ada5fb87224444a49aaa4ad1e16897.jpg)
2024 Approved Elevate Your Brand 20 Professional Adobe Premiere Title Templates Free to Download
Elevate Your Brand: 20 Professional Adobe Premiere Title Templates Free to Download
Top 20 Adobe Premiere Title/Intro Templates [Free Download]

Benjamin Arango
Mar 29, 2024• Proven solutions
One of the things that can make your output stand out from the crowd is the titles. Many people think creating eye-catching title effects is beyond them, but with Premiere Pro, you really couldn’t be more wrong.
As Premiere Pro doesn’t have built-in templates, the ability to import free Premiere Pro templates is a must. Anyone need to find a custom title style that suits the project and looks professional and carries impact.
The great thing is that there are many of these resources that are offered entirely free! If you don’t know how to add text/title to Adobe Premiere, here are steps to add text resources .
In this article, we will share with you 20 Free to download Title Templates for Premiere Pro.
- Part1: Top 15 Free Adobe Premiere Pro Title Templates
- Part2: Best 5 Premiere Pro Intro Templates Free Download
- Part3: How to Import and Customize Title Templates in Premiere
You may also like: 10 Free Star Wars Fonts to Make Your Video Amazing
Part 1: Top 15 Free Adobe Premiere Title Templates
Adding the finishing touches to a project, like creating the opening titles or end credits, is often not at the top of anyone’s priority list during the video editing process.
Nonetheless, making a unique opening sequence along with impressive animations in Adobe Premiere Pro can be a time-consuming endeavor, so instead of spending countless hours on producing a perfect combination of text and images, you can just download a title template from the Internet.
1 Premier Pro
Jarle Leirpoll runs this site, and it is a treasure trove of information, help, and advice on Premiere from a man who wrote the book (literally, it’s for sale on the site!) on Premiere.
His first title collection is consisting of 8 templates, including Lower Thirds templates, end credit template, and some special characters. However, it well worth a look around the site as there is plenty more free stuff including presets, and a whole range of tips and tricks to help with your editing.
Features:
- Free Premiere Pro templates to download
- Easy to import the title template to Premiere
- 100% ready to use
In case that you’re just a beginner of video editing software, you can start with Wondershare Filmora (Latest Filmora version 11) to add text to videos, which is powerful but easy-to-use for green hands. Download the Wondershare Filmora below.
There are hundreds of Text and Titles presets available in Filmora, which allows you to add titles, subtitles, scrolling end credits, lower 3d, and openers with ease. You can also apply some animation effects to the selected title presets.
Check the video below to find out how to add text to video with Wondershare Filmora.
Besides the built-in title presets, Wondershare Filmora (Latest Filmora version X) also provides more title templates in Filmstock , which offers lots of special effects templates.
Currently, there are Title Expansion Set, business title set, wedding title set, and lower third expansion set to download. Check the video below to watch the Title Expansion set templates.
 Download Mac Version ](https://tools.techidaily.com/wondershare/filmora/download/ )
Learn more details about How to Add Text to Video with Filmora.
2 Richard Harrington
This is another site that offers templates for download but is also a great place to visit for ideas and information. Richard approaches Premiere from a photographer’s viewpoint, and so has a slightly different view on many topics that are well worth reading.
He has links to a sizable number of templates on Richard Harrington covering a range of styles and subjects, including DVD menus, animated text, and high-quality models. Still, his blog is updated regularly and often includes free downloads.
Features:
- Supports Adobe Premiere intro templates to use
- It includes various templates and presets on Windows and Mac
- More than title templates also has DVD menus and animated text
3 ProVideoCoalition
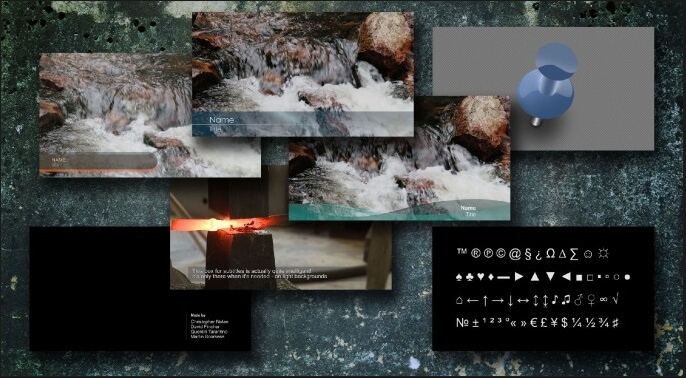
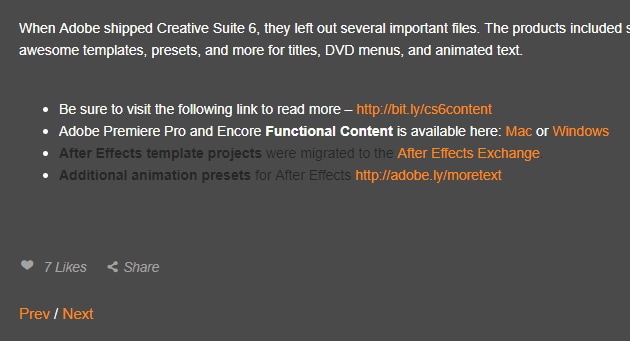
Another all-encompassing site has a huge amount of information and knowledge to be gained. The templates are just part of the story. They are available on Pro Video Coalition and include numerous files and even some free video content showing their implementation.
Also on this page are links to some other sites offering free content or advice on various aspects of Premiere, making it well worth a visit and definitely worth its place in this top 10.
Of particular interest on this site is the regularly updated news which focuses on the latest hardware and software announcements.
Features:
- Supports lower thirds for Adobe Premiere
- You can customize the Premiere Pro intro template free download
- You can create graphic elements
4 Coremelt
This is a commercial site that offers a wide variety of high-quality plugins and templates for several video editing platforms. However, we are on the lookout for that fabulous price of free here, so a little digging finds this page , here you will find ten templates from one of their best selling products offered entirely free.
All templates are quality professionally produced products and worth the visit alone. For anyone who is looking to take their editing output to the professional level, the commercial products on offer here are well worth a look, high quality, and a reasonable cost.
Features:
- It includes 3D text and motion graphics templates
- Free and safe download the Premiere template

5 Bestproaction
Another commercial site. This one has a range of free templates and presets to download for Premiere. Fourteen open items altogether can be downloaded. This site at least deserves a browse through their catalog after a download. The emphasis here is on low cost but high quality, useful templates, and plugins to suit any project.
Even for those of us with a limited budget, there may be something that catches the eye. It is an excellent site for browsing when looking for inspiration.
Features:
- Offers multimedia products like free Premiere Pro text, title templates
- Includes professional Premiere Pro template for videographers
- You can create graphic elements
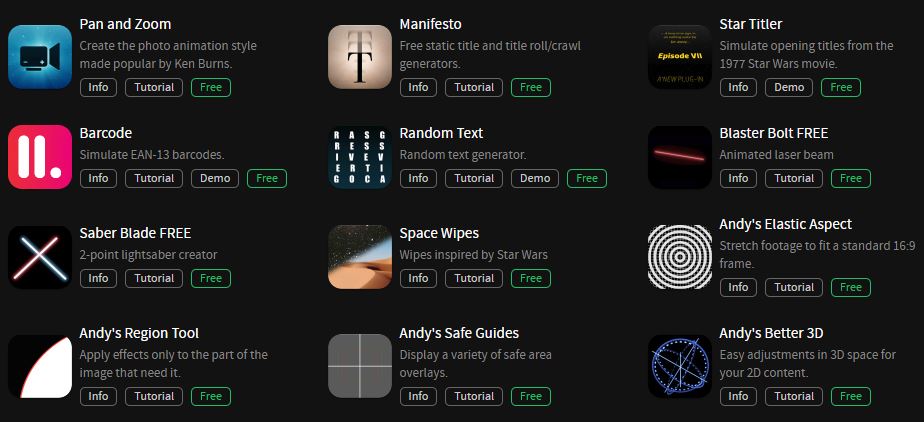
6 FXFactory
This is another commercial site that has a smattering of very high-quality free downloads on offer, including a beautiful template for the original Star Wars movie style scrolling titles.
Again, it is worth browsing the catalog when you are on the site, but all the free products can be found here .
FX Factory has also created some great video tutorials on a variety of aspects of video production that are well worth a view when you are at the site.
Features:
- Free Premiere Pro effects templates to download
- Includes a step by step Premiere Pro tutorial
7 Creative Impatience
A fantastic site full of information, tips, and opinion on all aspects of video production, it’s a great place to spend some time, with the bonus of a bunch of free downloads for Premiere.
Of particular note are the tutorials, an excellent source of information and tricks that you may not have seen before, with their YouTube channel being a great source of free guidance for editors of any sort of experience.
Features:
- Apart from free Premiere Pro templates, you can also find blogs
- Easy steps to make Premiere Pro templates
- Safe and clean to use. All real
8Filmimpact
A commercial site is offering some great products at competitive prices. At first glance, this may not seem to be a useful place for our search for the free stuff.
However, all the products do have a free trial download, and as a bonus, the trial for pack one includes four free to use templates. They are quality products too, and well worth a look.

9 Style4Type
Style4Type is an exciting site regularly updated with new free templates as well as offering technical advice and having further templates available as commercial products.
And to the side is even a free download for a PDF file that walks you through installing and using the templates within Premiere once you have them.
There are already a lot of free templates on offer covering a wide variety of styles, but they are added to with regularity, so it is a site to bookmark for the future.
Features:
- Free title templates to use including texture templates
- Professional tools to better your video

10 Premiere Beat
Lots of information on this site as its been running for a decade, it is a website that imparts a wealth of knowledge along the way on not just video editing but music.
The pack includes 21 Premiere title templates to use. Another site that you will want to visit again and again.
Features:
- High-quality Premiere Pro templates to download
- A large number of Premiere templates to use
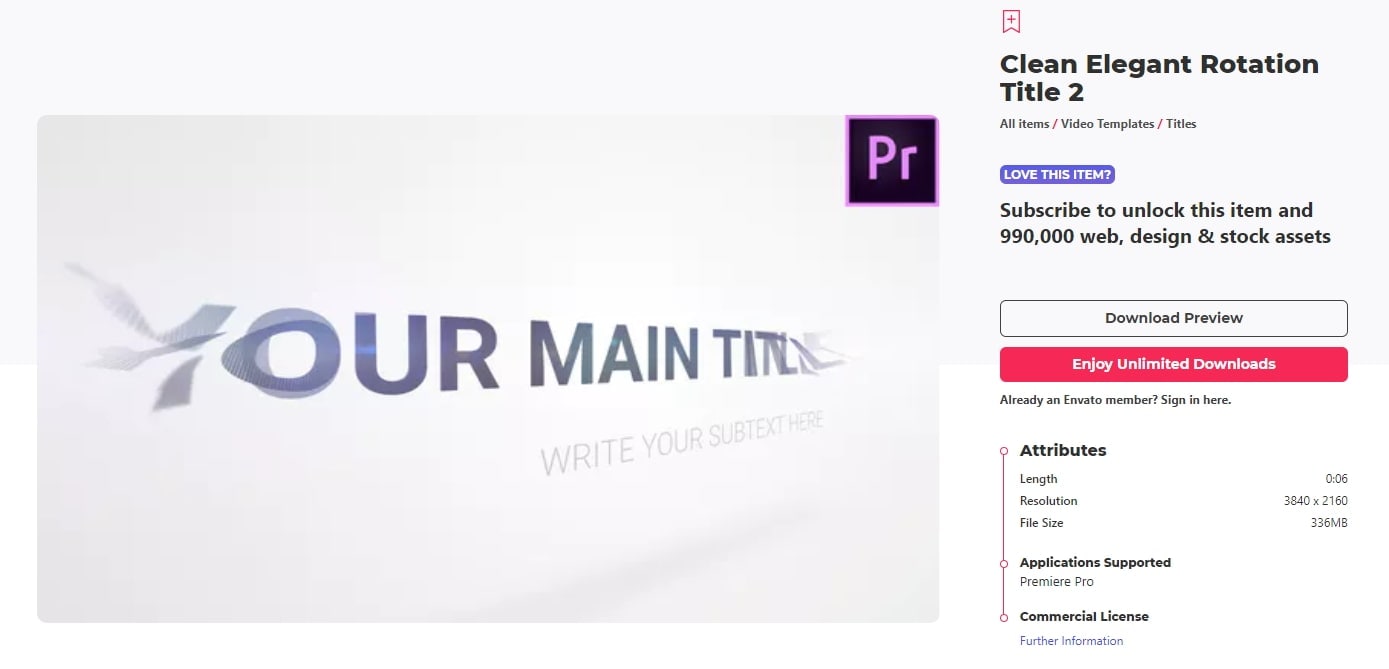
11 Clean Elegant Rotation Title
It is a clean title template without unnecessary parts. If you like simple titles, this one is best for you. You can customize in Premiere easily with a few clicks. For beginners, it also includes free tutorials to use.
Features:
- Simple and clean Premiere title templates
- Customizable in Premiere
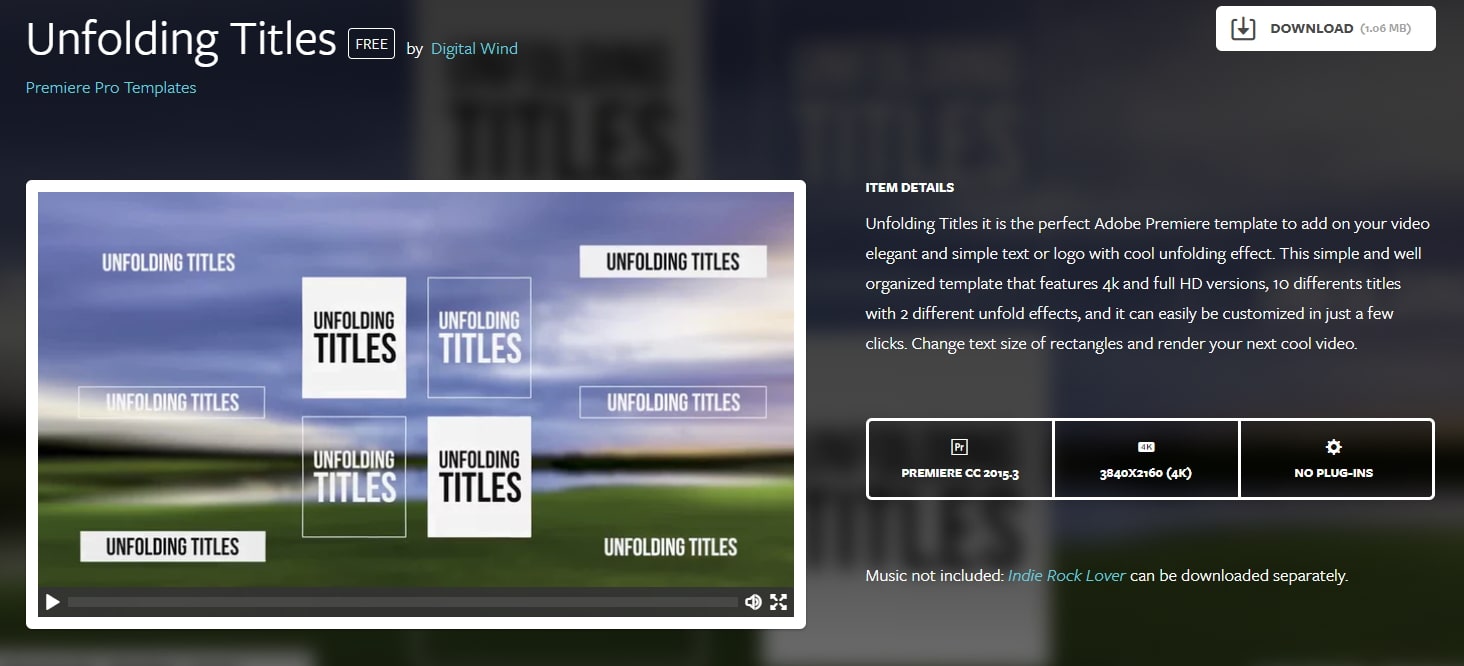
12 Unfolding Titles
It is a clean title template with an unfolding effect. Each text has two unfolding effects, which are convenient to use with customization. It supports 4K and HD versions. In this pack, it wons 10 title formats. After importing Premiere, you can also change text size.
Features:
- 20 unfolding title effects
- Supports rendering your video
13 Orange83
These are five modern title packs for Premiere. With it, you don’t need to use After Effects as you can import them to edit. The best part is you can include your logo and other stuff you like.
Features:
- Include 5 title packs
- Modern and clean titles
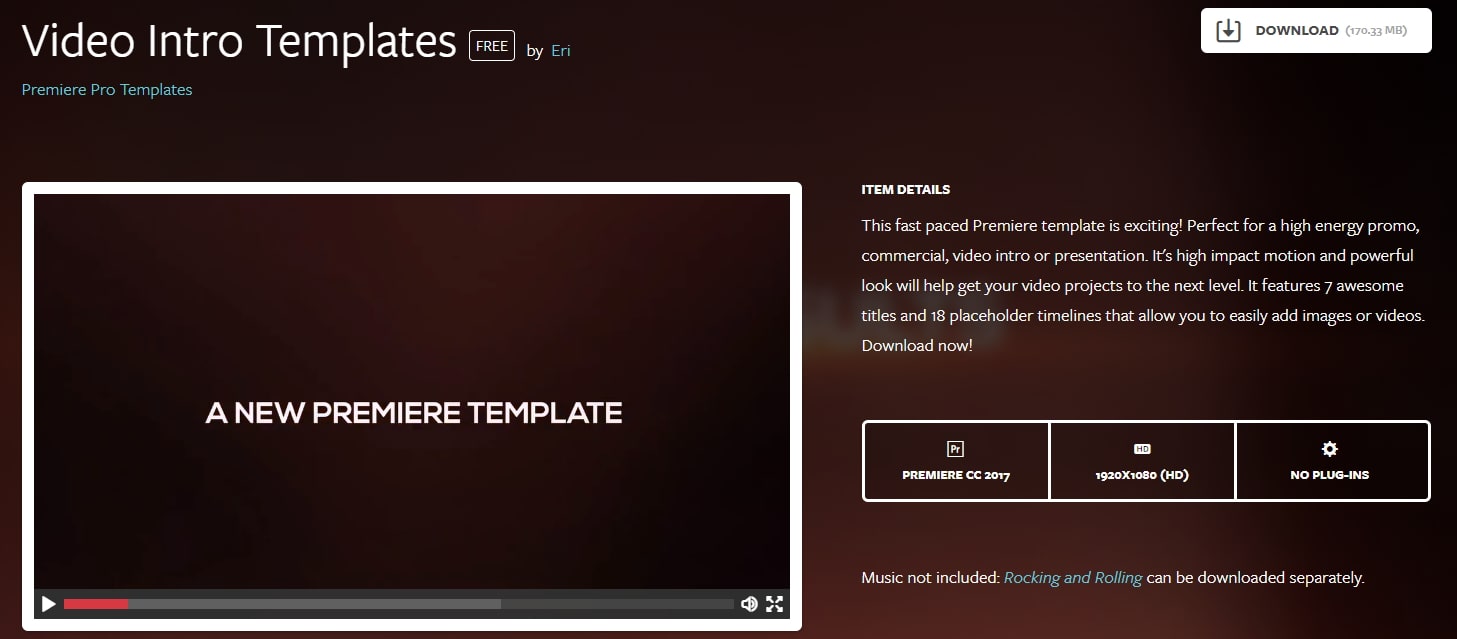
14 Video Intro Templates - Premiere Pro intro template free download
It is a free download Premiere Pro intro template that you can add to your video. It is highly recommended to use promotion and commercial video.
This intro template can be adjusted after you import it to Premiere Pro. This Premiere Pro intro template is HD, so you don’t need to worry about the whole video quality.
Features:
- 1920X1080 (HD) is supported
- This intro template doesn’t include built-in music
15 Elegant Promo - another Premiere Pro intro template free to use
It is intro template for Premiere Pro is modern and free to use. The whole style is young and energetic, which will give viewers a fresh new feeling. It includes 12 images and 26 text layers, and all of them are free to download.
You can use it for your presentation, promotional video, and product video. Besides, it doesn’t require a plug in to use this intro template in Premiere Pro.
Features:
- It includes animated intro elements.
- Use an HD intro template to make a popular video.

These are free templates, and they are enough to get anyone up and running with a new project. As said before, with the commercial enterprises that offer freebies, it’s always worth checking out their paid for output as well, you may not be in the market for it right now, but something may stick for a later time.
Part 2: Bonus: Best 5 Premiere Pro Intro Templates Free Download
Even though all websites we featured in this article offer some free intro templates for Adobe Premiere Pro. However, it is still a much better solution to buy a subscription plan on a platform if you are working on a large number of projects each month.
Let’s see which websites you can use to download the intro and title templates for Premiere Pro.
16. Motion Array
In addition to an impressive library of intro templates, Motion Array offers presets, sound effects, royalty-free music, and stock footage.
Furthermore, you can choose the software version to make sure that the templates you download can be used with the version of Adobe Premiere Pro you have installed on your computer.
The website provides you with powerful search tools, so you can select the resolution of the template, up to 8K, or choose which types of templates are going to be displayed.
Using the free subscription plan can limit your options since you’ll only be able to download free templates, and your upload storage will be limited to just 1GB.
The Pro subscription plan that can be purchased for $54 per month will grant you access to an almost endless selection of title templates as well as a huge selection of plugins for Adobe Premiere Pro.

17. Cinecom – Simple Intro for Premiere Pro
It is a designer pack that features ten pre-animated lower-thirds intro templates. You can change the duration of the font and color of the text in each template, and you can choose if you want to download a 1080 or the 4K version of the designer pack.
The templates are compatible with CS6, CC2013, CC2014, and CC2016 versions of the Premiere Pro. The Simple Titles pack can be easily installed, as you just have to drag and drop it into the software.
However, before you can download these title templates, you have to subscribe to Cinecom’s mailing list.
Even though this can be a bit inconvenient, it is very well worth the trouble since you’ll be able to transform or build upon the intro templates and use them freely in all videos you edit in Adobe Premiere Pro.
18. EnvatoElements
You can find much more than intro templates on the EnvatoElements platform since you can choose from 740.000 items you can use for anything from creating a WordPress website to preparing your next business presentation.
The Video Templates category alone features over 4000 items, including Logo Stings or Infographics assets.
There are nearly one hundred available intro templates for Adobe Premiere Pro, but downloading any of them requires you to create an account and purchase a subscription plan.
Prices start from $16.50 per month, and packages include virtually unlimited access to stock photos and videos, video templates, and much more. The EnvatoElements platform also offers assets that can be used with Final Cut Pro, Adobe After Effects or Apple Motion.

19. Videohive
Videohive is a part of the Envato Market platform that also features Web Themes and Templates, Code, Audio, or Graphic sections. It is free to use, but only a limited amount of assets can be downloaded for free.
To download an item, you must purchase it, and prices can range from $16 to $50 for a single title template.
Videohive is also a great source of title templates for Adobe After Effects, as it offers more than 5000 titles and intros that are compatible with this software.
Furthermore, you can download presets for both Premiere Pro and After Effects that can be used to create stop-motion animations, perform color correction, or make the footage look like it was captured with a VHS camera.

20. RocketStock
This option is best suited for video editors who want to create their intros because RocketStok’s Cinematic Style Library extends the scope of options provided by Premiere Pro.
Downloading all fonts except Helvetica Neue is free, but you must check which fonts you can use in commercial projects. You will have no trouble installing the fonts since you can just double-click on the font and follow the on-screen instructions.
Once you’ve installed all the fonts from the library, you can use them to replace the software’s default library. You just have to click on the Replace Style Library option that can be accessed from Premiere Pro’s Title Style tab.
If you don’t feel comfortable creating your titles or if you simply don’t have the time to create your own titles, the Free Cinematic Style Library is not the best choice for you.
On the other hand, Premiere Pro’s users who don’t often use title templates can benefit from downloading RocketStock’s intro library.

Part 3: How to Import and Customize Title Templates in Premiere
If you download the template, all the title templates support customization. You can change its size, font, color, and add 3D effects.
It is easy to import and use it to touch up your video. Check out the steps below to know how to import title templates quickly.
- Install the title template. Choose one template you like and download it to your PC. Remember to unzip it before importing it. Now install them.
- Import the title template. You just need to go to click Effects at the top. Then at right, you will find Presets in the effects section.
- Right-click on presets, and choose Import Presets. If the title template format is .mogrt, you need to open it in Essential Graphics Panel. At the bottom right corner, click the plus icon to import the title template and install it.
- Customize the title template. Once the title template is imported, drag it to the timeline. Click the Editing tab. Here you can customize colors, text, opacities, and positions. There are more options for you to explore.
- You can also copy and paste the title template to another place in the timeline. If you change one place of the pasted template, the original one will remain the same.
Note: each version of Premiere’s interface will look different, but the workflow is similar.
Conclusion
Using title templates can help you achieve a certain visual style faster, so you don’t have to spend a lot of time looking for a perfect background or animating the text.
The Internet provides almost unlimited video editing resources, but not all of these resources can be acquired for free.
Which website you will choose as a source of fresh title templates depends on how often you work on new projects in Adobe Premiere Pro.
If you want to make professional video editing and tired of Premiere, try Filmora! It includes various titles templates to use.
You can sync audio automatically, use detailed color correction to make your title and video like a movie. Download it now (FREE)!
Benjamin Arango
Benjamin Arango is a writer and a lover of all things video.
Follow @Benjamin Arango
Benjamin Arango
Mar 29, 2024• Proven solutions
One of the things that can make your output stand out from the crowd is the titles. Many people think creating eye-catching title effects is beyond them, but with Premiere Pro, you really couldn’t be more wrong.
As Premiere Pro doesn’t have built-in templates, the ability to import free Premiere Pro templates is a must. Anyone need to find a custom title style that suits the project and looks professional and carries impact.
The great thing is that there are many of these resources that are offered entirely free! If you don’t know how to add text/title to Adobe Premiere, here are steps to add text resources .
In this article, we will share with you 20 Free to download Title Templates for Premiere Pro.
- Part1: Top 15 Free Adobe Premiere Pro Title Templates
- Part2: Best 5 Premiere Pro Intro Templates Free Download
- Part3: How to Import and Customize Title Templates in Premiere
You may also like: 10 Free Star Wars Fonts to Make Your Video Amazing
Part 1: Top 15 Free Adobe Premiere Title Templates
Adding the finishing touches to a project, like creating the opening titles or end credits, is often not at the top of anyone’s priority list during the video editing process.
Nonetheless, making a unique opening sequence along with impressive animations in Adobe Premiere Pro can be a time-consuming endeavor, so instead of spending countless hours on producing a perfect combination of text and images, you can just download a title template from the Internet.
1 Premier Pro
Jarle Leirpoll runs this site, and it is a treasure trove of information, help, and advice on Premiere from a man who wrote the book (literally, it’s for sale on the site!) on Premiere.
His first title collection is consisting of 8 templates, including Lower Thirds templates, end credit template, and some special characters. However, it well worth a look around the site as there is plenty more free stuff including presets, and a whole range of tips and tricks to help with your editing.
Features:
- Free Premiere Pro templates to download
- Easy to import the title template to Premiere
- 100% ready to use
In case that you’re just a beginner of video editing software, you can start with Wondershare Filmora (Latest Filmora version 11) to add text to videos, which is powerful but easy-to-use for green hands. Download the Wondershare Filmora below.
There are hundreds of Text and Titles presets available in Filmora, which allows you to add titles, subtitles, scrolling end credits, lower 3d, and openers with ease. You can also apply some animation effects to the selected title presets.
Check the video below to find out how to add text to video with Wondershare Filmora.
Besides the built-in title presets, Wondershare Filmora (Latest Filmora version X) also provides more title templates in Filmstock , which offers lots of special effects templates.
Currently, there are Title Expansion Set, business title set, wedding title set, and lower third expansion set to download. Check the video below to watch the Title Expansion set templates.
Download Mac Version ](https://tools.techidaily.com/wondershare/filmora/download/ )
Learn more details about How to Add Text to Video with Filmora.
2 Richard Harrington
This is another site that offers templates for download but is also a great place to visit for ideas and information. Richard approaches Premiere from a photographer’s viewpoint, and so has a slightly different view on many topics that are well worth reading.
He has links to a sizable number of templates on Richard Harrington covering a range of styles and subjects, including DVD menus, animated text, and high-quality models. Still, his blog is updated regularly and often includes free downloads.
Features:
- Supports Adobe Premiere intro templates to use
- It includes various templates and presets on Windows and Mac
- More than title templates also has DVD menus and animated text
3 ProVideoCoalition
Another all-encompassing site has a huge amount of information and knowledge to be gained. The templates are just part of the story. They are available on Pro Video Coalition and include numerous files and even some free video content showing their implementation.
Also on this page are links to some other sites offering free content or advice on various aspects of Premiere, making it well worth a visit and definitely worth its place in this top 10.
Of particular interest on this site is the regularly updated news which focuses on the latest hardware and software announcements.
Features:
- Supports lower thirds for Adobe Premiere
- You can customize the Premiere Pro intro template free download
- You can create graphic elements
4 Coremelt
This is a commercial site that offers a wide variety of high-quality plugins and templates for several video editing platforms. However, we are on the lookout for that fabulous price of free here, so a little digging finds this page , here you will find ten templates from one of their best selling products offered entirely free.
All templates are quality professionally produced products and worth the visit alone. For anyone who is looking to take their editing output to the professional level, the commercial products on offer here are well worth a look, high quality, and a reasonable cost.
Features:
- It includes 3D text and motion graphics templates
- Free and safe download the Premiere template
5 Bestproaction
Another commercial site. This one has a range of free templates and presets to download for Premiere. Fourteen open items altogether can be downloaded. This site at least deserves a browse through their catalog after a download. The emphasis here is on low cost but high quality, useful templates, and plugins to suit any project.
Even for those of us with a limited budget, there may be something that catches the eye. It is an excellent site for browsing when looking for inspiration.
Features:
- Offers multimedia products like free Premiere Pro text, title templates
- Includes professional Premiere Pro template for videographers
- You can create graphic elements
6 FXFactory
This is another commercial site that has a smattering of very high-quality free downloads on offer, including a beautiful template for the original Star Wars movie style scrolling titles.
Again, it is worth browsing the catalog when you are on the site, but all the free products can be found here .
FX Factory has also created some great video tutorials on a variety of aspects of video production that are well worth a view when you are at the site.
Features:
- Free Premiere Pro effects templates to download
- Includes a step by step Premiere Pro tutorial
7 Creative Impatience
A fantastic site full of information, tips, and opinion on all aspects of video production, it’s a great place to spend some time, with the bonus of a bunch of free downloads for Premiere.
Of particular note are the tutorials, an excellent source of information and tricks that you may not have seen before, with their YouTube channel being a great source of free guidance for editors of any sort of experience.
Features:
- Apart from free Premiere Pro templates, you can also find blogs
- Easy steps to make Premiere Pro templates
- Safe and clean to use. All real
8Filmimpact
A commercial site is offering some great products at competitive prices. At first glance, this may not seem to be a useful place for our search for the free stuff.
However, all the products do have a free trial download, and as a bonus, the trial for pack one includes four free to use templates. They are quality products too, and well worth a look.
9 Style4Type
Style4Type is an exciting site regularly updated with new free templates as well as offering technical advice and having further templates available as commercial products.
And to the side is even a free download for a PDF file that walks you through installing and using the templates within Premiere once you have them.
There are already a lot of free templates on offer covering a wide variety of styles, but they are added to with regularity, so it is a site to bookmark for the future.
Features:
- Free title templates to use including texture templates
- Professional tools to better your video
10 Premiere Beat
Lots of information on this site as its been running for a decade, it is a website that imparts a wealth of knowledge along the way on not just video editing but music.
The pack includes 21 Premiere title templates to use. Another site that you will want to visit again and again.
Features:
- High-quality Premiere Pro templates to download
- A large number of Premiere templates to use
11 Clean Elegant Rotation Title
It is a clean title template without unnecessary parts. If you like simple titles, this one is best for you. You can customize in Premiere easily with a few clicks. For beginners, it also includes free tutorials to use.
Features:
- Simple and clean Premiere title templates
- Customizable in Premiere
12 Unfolding Titles
It is a clean title template with an unfolding effect. Each text has two unfolding effects, which are convenient to use with customization. It supports 4K and HD versions. In this pack, it wons 10 title formats. After importing Premiere, you can also change text size.
Features:
- 20 unfolding title effects
- Supports rendering your video
13 Orange83
These are five modern title packs for Premiere. With it, you don’t need to use After Effects as you can import them to edit. The best part is you can include your logo and other stuff you like.
Features:
- Include 5 title packs
- Modern and clean titles
14 Video Intro Templates - Premiere Pro intro template free download
It is a free download Premiere Pro intro template that you can add to your video. It is highly recommended to use promotion and commercial video.
This intro template can be adjusted after you import it to Premiere Pro. This Premiere Pro intro template is HD, so you don’t need to worry about the whole video quality.
Features:
- 1920X1080 (HD) is supported
- This intro template doesn’t include built-in music
15 Elegant Promo - another Premiere Pro intro template free to use
It is intro template for Premiere Pro is modern and free to use. The whole style is young and energetic, which will give viewers a fresh new feeling. It includes 12 images and 26 text layers, and all of them are free to download.
You can use it for your presentation, promotional video, and product video. Besides, it doesn’t require a plug in to use this intro template in Premiere Pro.
Features:
- It includes animated intro elements.
- Use an HD intro template to make a popular video.
These are free templates, and they are enough to get anyone up and running with a new project. As said before, with the commercial enterprises that offer freebies, it’s always worth checking out their paid for output as well, you may not be in the market for it right now, but something may stick for a later time.
Part 2: Bonus: Best 5 Premiere Pro Intro Templates Free Download
Even though all websites we featured in this article offer some free intro templates for Adobe Premiere Pro. However, it is still a much better solution to buy a subscription plan on a platform if you are working on a large number of projects each month.
Let’s see which websites you can use to download the intro and title templates for Premiere Pro.
16. Motion Array
In addition to an impressive library of intro templates, Motion Array offers presets, sound effects, royalty-free music, and stock footage.
Furthermore, you can choose the software version to make sure that the templates you download can be used with the version of Adobe Premiere Pro you have installed on your computer.
The website provides you with powerful search tools, so you can select the resolution of the template, up to 8K, or choose which types of templates are going to be displayed.
Using the free subscription plan can limit your options since you’ll only be able to download free templates, and your upload storage will be limited to just 1GB.
The Pro subscription plan that can be purchased for $54 per month will grant you access to an almost endless selection of title templates as well as a huge selection of plugins for Adobe Premiere Pro.
17. Cinecom – Simple Intro for Premiere Pro
It is a designer pack that features ten pre-animated lower-thirds intro templates. You can change the duration of the font and color of the text in each template, and you can choose if you want to download a 1080 or the 4K version of the designer pack.
The templates are compatible with CS6, CC2013, CC2014, and CC2016 versions of the Premiere Pro. The Simple Titles pack can be easily installed, as you just have to drag and drop it into the software.
However, before you can download these title templates, you have to subscribe to Cinecom’s mailing list.
Even though this can be a bit inconvenient, it is very well worth the trouble since you’ll be able to transform or build upon the intro templates and use them freely in all videos you edit in Adobe Premiere Pro.
18. EnvatoElements
You can find much more than intro templates on the EnvatoElements platform since you can choose from 740.000 items you can use for anything from creating a WordPress website to preparing your next business presentation.
The Video Templates category alone features over 4000 items, including Logo Stings or Infographics assets.
There are nearly one hundred available intro templates for Adobe Premiere Pro, but downloading any of them requires you to create an account and purchase a subscription plan.
Prices start from $16.50 per month, and packages include virtually unlimited access to stock photos and videos, video templates, and much more. The EnvatoElements platform also offers assets that can be used with Final Cut Pro, Adobe After Effects or Apple Motion.
19. Videohive
Videohive is a part of the Envato Market platform that also features Web Themes and Templates, Code, Audio, or Graphic sections. It is free to use, but only a limited amount of assets can be downloaded for free.
To download an item, you must purchase it, and prices can range from $16 to $50 for a single title template.
Videohive is also a great source of title templates for Adobe After Effects, as it offers more than 5000 titles and intros that are compatible with this software.
Furthermore, you can download presets for both Premiere Pro and After Effects that can be used to create stop-motion animations, perform color correction, or make the footage look like it was captured with a VHS camera.
20. RocketStock
This option is best suited for video editors who want to create their intros because RocketStok’s Cinematic Style Library extends the scope of options provided by Premiere Pro.
Downloading all fonts except Helvetica Neue is free, but you must check which fonts you can use in commercial projects. You will have no trouble installing the fonts since you can just double-click on the font and follow the on-screen instructions.
Once you’ve installed all the fonts from the library, you can use them to replace the software’s default library. You just have to click on the Replace Style Library option that can be accessed from Premiere Pro’s Title Style tab.
If you don’t feel comfortable creating your titles or if you simply don’t have the time to create your own titles, the Free Cinematic Style Library is not the best choice for you.
On the other hand, Premiere Pro’s users who don’t often use title templates can benefit from downloading RocketStock’s intro library.
Part 3: How to Import and Customize Title Templates in Premiere
If you download the template, all the title templates support customization. You can change its size, font, color, and add 3D effects.
It is easy to import and use it to touch up your video. Check out the steps below to know how to import title templates quickly.
- Install the title template. Choose one template you like and download it to your PC. Remember to unzip it before importing it. Now install them.
- Import the title template. You just need to go to click Effects at the top. Then at right, you will find Presets in the effects section.
- Right-click on presets, and choose Import Presets. If the title template format is .mogrt, you need to open it in Essential Graphics Panel. At the bottom right corner, click the plus icon to import the title template and install it.
- Customize the title template. Once the title template is imported, drag it to the timeline. Click the Editing tab. Here you can customize colors, text, opacities, and positions. There are more options for you to explore.
- You can also copy and paste the title template to another place in the timeline. If you change one place of the pasted template, the original one will remain the same.
Note: each version of Premiere’s interface will look different, but the workflow is similar.
Conclusion
Using title templates can help you achieve a certain visual style faster, so you don’t have to spend a lot of time looking for a perfect background or animating the text.
The Internet provides almost unlimited video editing resources, but not all of these resources can be acquired for free.
Which website you will choose as a source of fresh title templates depends on how often you work on new projects in Adobe Premiere Pro.
If you want to make professional video editing and tired of Premiere, try Filmora! It includes various titles templates to use.
You can sync audio automatically, use detailed color correction to make your title and video like a movie. Download it now (FREE)!
Benjamin Arango
Benjamin Arango is a writer and a lover of all things video.
Follow @Benjamin Arango
‘S Best Video Editing Apps for Creating Stunning Collages on iPhone and iPad
Best Video Collage Apps for iPhone and iPad

Shanoon Cox
Mar 27, 2024• Proven solutions
We all record more videos with our Smartphones or cameras than we can possibly share on social media, and we often don’t get the chance to show some of our favorite moments to our friends. Video collage apps for iPhones and iPads offer an easy solution to this problem because they enable you to merge multiple video clips into a single video. You don’t even need to have advanced video editing skills in order to create visually stunning video collages, as most of these apps are extremely easy to use. So in this article, we are going to take you through some of the best video collage apps of iOS devices.
Best Free and Paid Video Collage Apps for iPhone and iPad
Even though selecting a video collage app isn’t a very complicated process, there are still a number of factors you need to consider before you choose to install a video collage app on your iPad or iPhone. Checking the list of features an app offers and making sure that it allows you to adjust each clip you include in a collage separately or to add music to your creations will help you determine if the app you’re interested in is the right choice for you. The selection of video collage presets or the border and background adjustment features should also be considered while choosing a video collage app. Let’s take a look at some of the best video collage apps you can find at the AppStore.
1. Video Collage and Photo Grid
Price: Free, but offers in-app purchases
Compatibility: iOS 8 or later

As its name suggests, this app allows you to create both photo and video collages. You can either use the existing material from your camera roll or use the Video Collage and Photo Grid app to capture new footage. You can choose from 64 fully customizable layouts and pick the texture or the color of the frames of each video or photo you include in the collage. The app also lets you adjust the sizes of the still and moving images you’re combining and it also offers the possibility to crop photos you’d like to use in your collages. The sound volume can be easily adjusted, but you must make an in-app purchase in order to unlock the background music feature.
2. PicPlayPost Movie Video Editor
Price: Free, but offers in-app purchases
Compatibility: iOS 10.3 or later

This versatile app can be used for much more than just creating video collages, as it offers the option to capture videos in Full HD and 4K resolutions, although the 4K option is only available on iPhone Xs and iPad Pro. Moreover, you can combine several video collages into a single video and apply a variety of transitions to ensure the smooth flow of the output video. Adding text layers, recording voiceovers or creating soundtracks for your video collages are just a few options you’ll have at your disposal if you install the PicPlayPost movie video editor on your iOS-based device. In case you’re planning on using this app on a daily basis, you should consider purchasing the Everything Pack that costs just $24.99.
3. PicStich
Price: Free, but offers in-app purchases
Compatibility: iOS 10.0 or later

The fact that PicStich offers more than 300 different layouts speaks volumes about its capabilities. However, the majority of the app’s features are designed to help you create photo collages. You can still add a song you like to a video collage to make it more entertaining to watch, but unfortunately, PicStich doesn’t let you apply transitions or adjust playback speeds of the videos you include in a video collage. Purchasing Frames and Borders packs will extend the scope of your options and enable you to increase the quality of the video collages you’re making. The app’s file-sharing capabilities are impressive since you can export your projects directly to Instagram or Dropbox and you can also share all of your creations to Facebook, Twitter, and other popular social networks.
4. PhotoGrid - Pic Collage Maker
Price: Free, but offers in-app purchases
Compatibility: iOS 10.0 or later

If you are looking for an app that lets you create stunning video collages in seconds, you should look no further. PhotoGrid app lets you combine multiple videos within a single frame while offering a plethora of video editing tools you can use to enhance each video in the collage. What’s more, the app features a rich font library, stickers, filters and transitions you can use to make each video collage look more authentic. There are hundreds of available layouts to choose from that let you merge up to fifteen separate video clips and more than 400 backgrounds that can fit almost any style of a video collage. The app’s photo editing features are also remarkable which means that you can use the PhotoGrid app to manipulate images in any way you want.
5. PhotoVideo Collage Maker
Price: Free, but offers in-app purchases
Compatibility: iOS 9.2 or later

Making a new video collage with PhotoVideo Collage Maker is a quick and simple process. You just have to pick a layout, arrange videos by dragging and dropping them to a preferred position and choose a frame for each video. The app features a rich collection frames and textures, and it even lets you use frames with curved edges that help your videos stand out. PhotoVideo Collage Maker enables you to import songs from your iTunes collection and allows you to control the volume of the videos or use the fade-in and fade-out effects. You can also choose if you want all the videos to play simultaneously or one after the other. Unlocking the app’s pro features will cost you $1.99, but making this investment is an excellent idea if you would like to use the PhotoVideo Collage Maker for professional purposes.
6. PicCollage Grid & Video Editor
Price: Free, but offers in-app purchases
Compatibility: iOS 10.3 or later

iPhone and iPad owners in need of a video collage app that also offers powerful photo editing tools are going to love using the PicCollage Grid & Video Editor app. You can either use templates or create authentic grids on your own to impress your friends on social media. The app’s text editor lets change fonts, pick different text colors or change its alignment, while the cutout mode enables you to remove the background from your photos within seconds. Besides making video collages, you can also use the PicCollage Grid & Video Editor to create animated collages. The only downside is that all photo or video collages you create with the free version of the app are going to be watermarked.
7. VidStitch Frames for Instagram
Price: Free, but offers in-app purchases
Compatibility: iOS 9.0

VidsStitch was designed exclusively for iPhones and iPads, and it works best with the videos captured on these devices. The process of creating a new video collage can be completed in just a few quick steps. You should start by choosing one of the pre-designed frames, then you should just import and arrange your videos within the frame and decide whether you want to post the video collage on Twitter, Instagram or Facebook. The free version of VidStich is going to watermark all your creations and it won’t allow you to add music to your collages, which is why purchasing the Pro pack and additional frames and borders will help you produce visual content that is going to impress your followers on social media.
Conclusion
Presentation of the videos you record with your iPhone or iPad is as important as their overall quality. The video collage makers for iOS-based devices provide you with all the tools you’re going to need to create visually dynamic, entertaining and attention-grabbing video collages your followers on social media are going to enjoy watching. Which video collage app for iPhones and iPads are you using to make your video collages. Leave a comment below and let us know.
Shanoon Cox
Shanoon Cox is a writer and a lover of all things video.
Follow @Shanoon Cox
Shanoon Cox
Mar 27, 2024• Proven solutions
We all record more videos with our Smartphones or cameras than we can possibly share on social media, and we often don’t get the chance to show some of our favorite moments to our friends. Video collage apps for iPhones and iPads offer an easy solution to this problem because they enable you to merge multiple video clips into a single video. You don’t even need to have advanced video editing skills in order to create visually stunning video collages, as most of these apps are extremely easy to use. So in this article, we are going to take you through some of the best video collage apps of iOS devices.
Best Free and Paid Video Collage Apps for iPhone and iPad
Even though selecting a video collage app isn’t a very complicated process, there are still a number of factors you need to consider before you choose to install a video collage app on your iPad or iPhone. Checking the list of features an app offers and making sure that it allows you to adjust each clip you include in a collage separately or to add music to your creations will help you determine if the app you’re interested in is the right choice for you. The selection of video collage presets or the border and background adjustment features should also be considered while choosing a video collage app. Let’s take a look at some of the best video collage apps you can find at the AppStore.
1. Video Collage and Photo Grid
Price: Free, but offers in-app purchases
Compatibility: iOS 8 or later
As its name suggests, this app allows you to create both photo and video collages. You can either use the existing material from your camera roll or use the Video Collage and Photo Grid app to capture new footage. You can choose from 64 fully customizable layouts and pick the texture or the color of the frames of each video or photo you include in the collage. The app also lets you adjust the sizes of the still and moving images you’re combining and it also offers the possibility to crop photos you’d like to use in your collages. The sound volume can be easily adjusted, but you must make an in-app purchase in order to unlock the background music feature.
2. PicPlayPost Movie Video Editor
Price: Free, but offers in-app purchases
Compatibility: iOS 10.3 or later
This versatile app can be used for much more than just creating video collages, as it offers the option to capture videos in Full HD and 4K resolutions, although the 4K option is only available on iPhone Xs and iPad Pro. Moreover, you can combine several video collages into a single video and apply a variety of transitions to ensure the smooth flow of the output video. Adding text layers, recording voiceovers or creating soundtracks for your video collages are just a few options you’ll have at your disposal if you install the PicPlayPost movie video editor on your iOS-based device. In case you’re planning on using this app on a daily basis, you should consider purchasing the Everything Pack that costs just $24.99.
3. PicStich
Price: Free, but offers in-app purchases
Compatibility: iOS 10.0 or later
The fact that PicStich offers more than 300 different layouts speaks volumes about its capabilities. However, the majority of the app’s features are designed to help you create photo collages. You can still add a song you like to a video collage to make it more entertaining to watch, but unfortunately, PicStich doesn’t let you apply transitions or adjust playback speeds of the videos you include in a video collage. Purchasing Frames and Borders packs will extend the scope of your options and enable you to increase the quality of the video collages you’re making. The app’s file-sharing capabilities are impressive since you can export your projects directly to Instagram or Dropbox and you can also share all of your creations to Facebook, Twitter, and other popular social networks.
4. PhotoGrid - Pic Collage Maker
Price: Free, but offers in-app purchases
Compatibility: iOS 10.0 or later
If you are looking for an app that lets you create stunning video collages in seconds, you should look no further. PhotoGrid app lets you combine multiple videos within a single frame while offering a plethora of video editing tools you can use to enhance each video in the collage. What’s more, the app features a rich font library, stickers, filters and transitions you can use to make each video collage look more authentic. There are hundreds of available layouts to choose from that let you merge up to fifteen separate video clips and more than 400 backgrounds that can fit almost any style of a video collage. The app’s photo editing features are also remarkable which means that you can use the PhotoGrid app to manipulate images in any way you want.
5. PhotoVideo Collage Maker
Price: Free, but offers in-app purchases
Compatibility: iOS 9.2 or later
Making a new video collage with PhotoVideo Collage Maker is a quick and simple process. You just have to pick a layout, arrange videos by dragging and dropping them to a preferred position and choose a frame for each video. The app features a rich collection frames and textures, and it even lets you use frames with curved edges that help your videos stand out. PhotoVideo Collage Maker enables you to import songs from your iTunes collection and allows you to control the volume of the videos or use the fade-in and fade-out effects. You can also choose if you want all the videos to play simultaneously or one after the other. Unlocking the app’s pro features will cost you $1.99, but making this investment is an excellent idea if you would like to use the PhotoVideo Collage Maker for professional purposes.
6. PicCollage Grid & Video Editor
Price: Free, but offers in-app purchases
Compatibility: iOS 10.3 or later

iPhone and iPad owners in need of a video collage app that also offers powerful photo editing tools are going to love using the PicCollage Grid & Video Editor app. You can either use templates or create authentic grids on your own to impress your friends on social media. The app’s text editor lets change fonts, pick different text colors or change its alignment, while the cutout mode enables you to remove the background from your photos within seconds. Besides making video collages, you can also use the PicCollage Grid & Video Editor to create animated collages. The only downside is that all photo or video collages you create with the free version of the app are going to be watermarked.
7. VidStitch Frames for Instagram
Price: Free, but offers in-app purchases
Compatibility: iOS 9.0
VidsStitch was designed exclusively for iPhones and iPads, and it works best with the videos captured on these devices. The process of creating a new video collage can be completed in just a few quick steps. You should start by choosing one of the pre-designed frames, then you should just import and arrange your videos within the frame and decide whether you want to post the video collage on Twitter, Instagram or Facebook. The free version of VidStich is going to watermark all your creations and it won’t allow you to add music to your collages, which is why purchasing the Pro pack and additional frames and borders will help you produce visual content that is going to impress your followers on social media.
Conclusion
Presentation of the videos you record with your iPhone or iPad is as important as their overall quality. The video collage makers for iOS-based devices provide you with all the tools you’re going to need to create visually dynamic, entertaining and attention-grabbing video collages your followers on social media are going to enjoy watching. Which video collage app for iPhones and iPads are you using to make your video collages. Leave a comment below and let us know.
Shanoon Cox
Shanoon Cox is a writer and a lover of all things video.
Follow @Shanoon Cox
Slow Down Your Videos: A Step-by-Step Guide to VLC’s Slow Motion Feature
While the files of the most common formats like MP4, WAV, etc. may look identical, they might be compiled using varied codecs which may or may not support any random player that you install on your PC. The reason why VLC media player is used by the majority of users worldwide is the versatility in the codecs that it supports natively.
Furthermore, the app is available for almost every platform, i.e., Windows, Mac, Linux, iOS, and Android, and is absolutely free to download and use.
With that said, the following sections explain how to manage the playback speed of a video while using VLC media player to add a slow motion effect to video. Here you will learn how to play slow motion on VLC on Windows, Mac, and iOS/Android, and also how to set the default speed for the app so that every time a video is played, the speed remains according to your preference.
In this article
01 How to Play Video in Slow Motion Effects on Windows with VLC?
02 How to Play Slow Motion Effects on Mac with VLC?
03 How to Control Playback Speed in VLC Media Player on Android and iOS?
04 How to Set up the Default Playback Speed on VLC?
Part 1: How to Play Video in Slow Motion Effects on Windows with VLC?
VLC is one of the best media players to play videos in slow motion . You can follow the instructions that are given below to learn how to play a video in slow motion in VLC on a Windows PC:
Step 1: Start Video Playback
Launch VLC on your Windows computer (a Windows 11 PC is used here for illustrations), click Media from the menu bar at the top, click Open File from the menu, and locate and open a video that you want to watch in slow motion. If VLC is your default media player, simply double-clicking the clip automatically opens the file in the app.

Step 2: Reduce the Playback Speed (In Decrements of 0.10x)
Once the playback begins, press the Spacebar on the keyboard to pause the video. Next, go to the Playback menu from the top, go to Speed, and click Slower (fine) once. This will reduce the speed to 0.90x. Clicking Slower (fine) again will further slow down the video to 0.80x speed. You can repeat this process until you reduce the speed to your desired level. Press Spacebar again to resume the playback in slow motion.
Note: The lowest speed that you can go to using this process is 0.03x.

Step 3: Reduce the Playback Speed (In Decrements in Percentage)
Pause the playback and go to Playback > Speed as explained in the previous step. From the list that comes up, click Slower (the last option). This will reduce the speed to 0.67x. Click Slower again and the speed will further go down to 0.50x. You can repeat this process until you reach your desired playback speed. Press Spacebar to resume the playback in slow motion. With this method, you can reduce the speed to as low as 0.02x.
Note: You can click Normal from the Speed submenu to play the video at normal speed.

Step 4: Using the Shortcut Keys (Optional)
You can press the left square bracket ‘[‘ on your keyboard to reduce the speed in decrements of 0.10x. To get back to the normal speed, press the equals to ‘=’ key. Likewise, pressing the right square bracket ‘]’ increases the speed by 0.10x.
Note: As it is with the Slower (fine) and Slower options, you can use Faster (fine) to add 0.10x increments to the speed, and Faster to increase percentage-wise. Also, if Faster (fine) is clicked repeatedly or its shortcut key is used multiple times, the speed can be increased up to 31.25x. On the other hand, by using the Faster option repeatedly, the speed can be increased to more than 100x.
Part 2: How to Play Slow Motion Effects on Mac with VLC?
The process of slowing down the video playback in VLC on a Mac computer is almost identical to that in Windows. You can learn how to get this done by following the steps that are given below:
Step 1: Open and Pause the Video
Locate and right-click the video that you want to play in slow motion, go to Open With from the context menu, and click VLC from the submenu. Once the clip opens, click the Pause button from the bottom as explained in the previous section.
Step 2: Reduce the Playback Speed
Click Playback from the menu bar at the top, and drag the Playback Speed slider to the left to reduce the speed of the video.

Step 3: Resume the Playback
Click anywhere on the screen to close the Playback menu, and then click the Play button from the bottom to resume the video playback in slow motion.
Part 3: How to Control Playback Speed in VLC Media Player on Android and iOS?
Although the playback speed of a video on both Android and iOS devices can be controlled with a slider, the location where the controller is placed on the two platforms varies, and so does the process of reaching there. Both the methods are explained below for your convenience:
Play Video in Slow Motion on Android with VLC
Step 1: Pause the Playback
Launch VLC on your Android phone (Samsung Galaxy Note 10+ is used here for illustrations), locate and open the video in VLC, tap anywhere on the screen, and tap the Pause button from the bottom to pause the playback.
Step 2: Set a Slower Playback Speed
Tap the More icon from the bottom-right corner, tap Playback speed from the menu that appears, and drag the slider that is present at the bottom to the left to reduce the speed. Alternatively, you can also repeatedly tap the down arrow that is present at the right of the slider to slow down the speed in the decrements of 0.05x.

Step 3: Resume the Playback
Tap anywhere on the screen, and when the Playback speed slider disappears, tap the screen one more time. Now, tap the Play icon from the bottom to resume the video playback.
Play Video in Slow Motion on iPhone with VLC
Step 1: Pause the Playback
Assuming that you have already added the video to the VLC library by connecting it to iTunes, launch the app on your iOS device (iPhone 13 Pro Max is used here for illustrations). Tap the video that you want to play in slow motion, and then tap the Pause icon from the bottom.
Step 2: Reduce the Playback Speed
Tap anywhere on the screen, and tap the Clock icon from the lower-left corner. Next, drag the Playback speed slider to the left to reduce the playback speed.

Step 3: Resume the Playback
Right after decreasing the speed, tap the Play icon from the bottom to resume the playback. If the controllers disappear, you can tap anywhere on the screen again, and then tap the Play icon.
Part 4: How to Set up the Default Playback Speed on VLC?
The processes of setting up default playback speed on different platforms and devices vary. For your convenience, all of them are explained below:
Set up Default Playback Speed in VLC on Windows
- Go to Tools > Preferences in VLC media player, and then click the All button from the Show settings section at the bottom.
- Select Input / Codecs from the left pane of the Advanced Preferences box, and then specify your preferred speed in the Playback speed field that is present under the Playback control section on the right window
- Click Save to save the changes

Set up Default Playback Speed in VLC on Mac
- Launch VLC, and go to VLC media player from the menu bar, and then click Preferences; and then click Show All from the bottom of the Preferences box to display all preferences setting options;

- Click the Input / Codecs from the left pane, and then define your preferred speed in the Playback speed field under the Playback control section in the right window, and then click Save to save the changes.

How to Change VLC Media Player Default Speed on Android
Note: At the time of this writing, the Android version of VLC doesn’t allow you to set a global default playback speed. However, you can set it on a per video basis. This means that every time that video is played, the playback speed will remain what you set for it. You must do this for each video in your VLC library individually.
- Launch VLC, and then tap More from the bottom-right corner; next, tap SETTINGS from the upper-left area;
- Tap Video from the Extra settings section, and then check the Save Playback Speed box

How to Change VLC Media Player Default Speed on iOS and iPhone
- Tap Settings from the Home screen, and then scroll down and tap VLC
- Tap Default playback speed from the GENERIC section, and then tap to select a playback speed from the available list to set it as the default.

Conclusion
It is pretty convenient to reduce the playback speed in VLC media player regardless of the platform or device you are using. While the processes of getting the job might be different, the principle behind it remains the same. When on Windows, the playback speed can be decreased to 0.02x and can be increased to more than 100x. This facility is not available on Mac, iOS, or Android platforms. Also, if you want, you can set the default playback speed for the videos so that every time a clip is played, the pace remains what you specified as default.
02 How to Play Slow Motion Effects on Mac with VLC?
03 How to Control Playback Speed in VLC Media Player on Android and iOS?
04 How to Set up the Default Playback Speed on VLC?
Part 1: How to Play Video in Slow Motion Effects on Windows with VLC?
VLC is one of the best media players to play videos in slow motion . You can follow the instructions that are given below to learn how to play a video in slow motion in VLC on a Windows PC:
Step 1: Start Video Playback
Launch VLC on your Windows computer (a Windows 11 PC is used here for illustrations), click Media from the menu bar at the top, click Open File from the menu, and locate and open a video that you want to watch in slow motion. If VLC is your default media player, simply double-clicking the clip automatically opens the file in the app.
Step 2: Reduce the Playback Speed (In Decrements of 0.10x)
Once the playback begins, press the Spacebar on the keyboard to pause the video. Next, go to the Playback menu from the top, go to Speed, and click Slower (fine) once. This will reduce the speed to 0.90x. Clicking Slower (fine) again will further slow down the video to 0.80x speed. You can repeat this process until you reduce the speed to your desired level. Press Spacebar again to resume the playback in slow motion.
Note: The lowest speed that you can go to using this process is 0.03x.
Step 3: Reduce the Playback Speed (In Decrements in Percentage)
Pause the playback and go to Playback > Speed as explained in the previous step. From the list that comes up, click Slower (the last option). This will reduce the speed to 0.67x. Click Slower again and the speed will further go down to 0.50x. You can repeat this process until you reach your desired playback speed. Press Spacebar to resume the playback in slow motion. With this method, you can reduce the speed to as low as 0.02x.
Note: You can click Normal from the Speed submenu to play the video at normal speed.
Step 4: Using the Shortcut Keys (Optional)
You can press the left square bracket ‘[‘ on your keyboard to reduce the speed in decrements of 0.10x. To get back to the normal speed, press the equals to ‘=’ key. Likewise, pressing the right square bracket ‘]’ increases the speed by 0.10x.
Note: As it is with the Slower (fine) and Slower options, you can use Faster (fine) to add 0.10x increments to the speed, and Faster to increase percentage-wise. Also, if Faster (fine) is clicked repeatedly or its shortcut key is used multiple times, the speed can be increased up to 31.25x. On the other hand, by using the Faster option repeatedly, the speed can be increased to more than 100x.
Part 2: How to Play Slow Motion Effects on Mac with VLC?
The process of slowing down the video playback in VLC on a Mac computer is almost identical to that in Windows. You can learn how to get this done by following the steps that are given below:
Step 1: Open and Pause the Video
Locate and right-click the video that you want to play in slow motion, go to Open With from the context menu, and click VLC from the submenu. Once the clip opens, click the Pause button from the bottom as explained in the previous section.
Step 2: Reduce the Playback Speed
Click Playback from the menu bar at the top, and drag the Playback Speed slider to the left to reduce the speed of the video.
Step 3: Resume the Playback
Click anywhere on the screen to close the Playback menu, and then click the Play button from the bottom to resume the video playback in slow motion.
Part 3: How to Control Playback Speed in VLC Media Player on Android and iOS?
Although the playback speed of a video on both Android and iOS devices can be controlled with a slider, the location where the controller is placed on the two platforms varies, and so does the process of reaching there. Both the methods are explained below for your convenience:
Play Video in Slow Motion on Android with VLC
Step 1: Pause the Playback
Launch VLC on your Android phone (Samsung Galaxy Note 10+ is used here for illustrations), locate and open the video in VLC, tap anywhere on the screen, and tap the Pause button from the bottom to pause the playback.
Step 2: Set a Slower Playback Speed
Tap the More icon from the bottom-right corner, tap Playback speed from the menu that appears, and drag the slider that is present at the bottom to the left to reduce the speed. Alternatively, you can also repeatedly tap the down arrow that is present at the right of the slider to slow down the speed in the decrements of 0.05x.
Step 3: Resume the Playback
Tap anywhere on the screen, and when the Playback speed slider disappears, tap the screen one more time. Now, tap the Play icon from the bottom to resume the video playback.
Play Video in Slow Motion on iPhone with VLC
Step 1: Pause the Playback
Assuming that you have already added the video to the VLC library by connecting it to iTunes, launch the app on your iOS device (iPhone 13 Pro Max is used here for illustrations). Tap the video that you want to play in slow motion, and then tap the Pause icon from the bottom.
Step 2: Reduce the Playback Speed
Tap anywhere on the screen, and tap the Clock icon from the lower-left corner. Next, drag the Playback speed slider to the left to reduce the playback speed.
Step 3: Resume the Playback
Right after decreasing the speed, tap the Play icon from the bottom to resume the playback. If the controllers disappear, you can tap anywhere on the screen again, and then tap the Play icon.
Part 4: How to Set up the Default Playback Speed on VLC?
The processes of setting up default playback speed on different platforms and devices vary. For your convenience, all of them are explained below:
Set up Default Playback Speed in VLC on Windows
- Go to Tools > Preferences in VLC media player, and then click the All button from the Show settings section at the bottom.
- Select Input / Codecs from the left pane of the Advanced Preferences box, and then specify your preferred speed in the Playback speed field that is present under the Playback control section on the right window
- Click Save to save the changes
Set up Default Playback Speed in VLC on Mac
- Launch VLC, and go to VLC media player from the menu bar, and then click Preferences; and then click Show All from the bottom of the Preferences box to display all preferences setting options;
- Click the Input / Codecs from the left pane, and then define your preferred speed in the Playback speed field under the Playback control section in the right window, and then click Save to save the changes.
How to Change VLC Media Player Default Speed on Android
Note: At the time of this writing, the Android version of VLC doesn’t allow you to set a global default playback speed. However, you can set it on a per video basis. This means that every time that video is played, the playback speed will remain what you set for it. You must do this for each video in your VLC library individually.
- Launch VLC, and then tap More from the bottom-right corner; next, tap SETTINGS from the upper-left area;
- Tap Video from the Extra settings section, and then check the Save Playback Speed box
How to Change VLC Media Player Default Speed on iOS and iPhone
- Tap Settings from the Home screen, and then scroll down and tap VLC
- Tap Default playback speed from the GENERIC section, and then tap to select a playback speed from the available list to set it as the default.
Conclusion
It is pretty convenient to reduce the playback speed in VLC media player regardless of the platform or device you are using. While the processes of getting the job might be different, the principle behind it remains the same. When on Windows, the playback speed can be decreased to 0.02x and can be increased to more than 100x. This facility is not available on Mac, iOS, or Android platforms. Also, if you want, you can set the default playback speed for the videos so that every time a clip is played, the pace remains what you specified as default.
Social Media Design Essentials: Aspect Ratios and Image Dimensions
An Up-to-date Guide to Social Media Aspect Ratio
An easy yet powerful editor
Numerous effects to choose from
Detailed tutorials provided by the official channel
These days, people are relying on social media to grab the attention of their audience but this is not possible without the correct creation of the videos. That’s how we will start on talking about Social Media Aspect Ratio.
In this article
01 [Which Platform Do You Want to Optimize Your Video For? Will It Be YouTube, Facebook or Instagram?](#Part 1)
02 [Why is It Important to Get Social Media Video Sizes Right?](#Part 2)
03 [What Aspect Ratio Should Be Selected for Different Application Scenario?](#Part 3)
04 [5 Tips for Creating Better Vertical Videos for Social Media](#Part 4)
Part 1 Which Platform Do You Want to Optimize Your Video For? Will It Be YouTube, Facebook or Instagram?
Videos have become the great tool nowadays in order to get your brand’s conversion higher. The reason behind this is people feel more connected and engaged in the videos rather than text content. Moreover, it is more important to know that videos get about 135% more reach on Facebook and Instagram. On Twitter these video contents get 6 times more retweeted. However, specs and Social Media Aspect Ratio get a constant change. So, it is important to keep changing the sizes and video aspects as per the demands. No matter the videos are on YouTube, Facebook or Instagram, if they will not stand out on all the guidelines then they will lose the reach.

Part 2 Why is It Important to Get Social Media Video Sizes Right?
When you are creating video content to promote your brand, then it becomes necessary that you manage the things to be right. There are so many things that needed to be considered and here are some of them:
● You will need to make sure that the images and the videos you are using do not have pixilation issues. It may cause them look awkwardly stretching.
● If the size of the images and videos will not be correct then it can cut down some or important message that you want to convey.
● Being familiar with the correct size of videos and images makes you capable of uploading them on any social media channel. This can help boost the engagement of the audience.
● Correct sizing can also help you at the long run as this makes you ready for any network on which you will need to post the images and videos.
Part 3 What Aspect Ratio Should Be Selected for Different Application Scenario?
It is vital to select the best aspect ratio for social mediaplatforms to make the videos get a more reach and engagement. Here are the some important factors that are essential to select for different applications:
01Instagram
Instagram videos get a special reach so it is worth to say that these videos are a must invest.
● Recommended size: The most recommended sizes of Instagram videos are 1080 by 1080p and 1080 by 1920 p.
● Minimum width: The minimum width must be around 600 by 600p.
● Supported aspect ratios: You can upload videos of aspect ratios from 16:9 to 9:16.
● Recommended specs: The videos must be in MOV or MP4 format. The maximum and minimum file sizes are 4 GB and 30 MB respectively. Also your video must not exceed 60 seconds in length and the frame rate should be 30fps.

02Facebook
Videos on Facebook appear in several formats. All the formats do have almost similar requirements but at some times it may vary.
● Recommended size: The most recommended size for posting videos on Facebook is 1280 by 720p. You can post feed videos, in-stream ad videos, etc. in the recommended size. Carousel videos are posted in the size of 1080 by 1080p.
● Minimum width: It must be minimum 600p.
● Supported aspect ratios: Here you can post your video of aspect ratio varying from 4:5, 2:3, 9:16 and 1:1.
● Recommended specs: The file size on Facebook should not exceed 4GB. The formats that can be used are MOV and MP4 with the frame rate of 30fps. Also the length of videos should be maximum 240 minutes or less.

03YouTube
YouTube is a larger platform than Facebook and Instagram. This is the reason it allows a number of video sizes to upload in.
● Recommended size: The most recommended size to upload videos on YouTube is 1920 by 1080p but it also allows uploading videos in 2560 by 1440p and 3840 by 2160p.
● Minimum width: YouTube allows a minimum width of 426 by 240p.
● Supported aspect ratios: On YouTube the supported aspect ratios are 16:9 and 4:3.
● Recommended specs: The maximum length of the video must be 12 hours long and the file size must not exceed 128 GB. The formats that can be used are MOV, MP4, AVI, MPEG4, FLV, etc.

04LinkedIn
● Recommended size: The most recommended size for LinkedIn videos is 1920 by 1080p.
● Minimum width: The minimum width accepted for LinkedIn videos is 360p.
● Recommended specs: The maximum length of LinkedIn videos must be less than 10 minutes. The file size should not exceed 5 GB with a maximum frame rate of 60fps.

05Snapchat
● Recommended size: You should upload videos on Snapchat having a size of 1080 by 1920p. This is recommended for all the video types that are being uploaded on Snapchat.
● Supported aspect ratios: Snapchat supports aspect ratios of 9:16 and 16:9.
● Recommended specs: For video ads the maximum file size should be 32 MB and for regular videos, the size could be increased to 1GB. The file formats that are accepted include MOV, MP4 or encoded.

06Twitter
Twitter allows horizontal and vertical videos. Here are the required assets for them:
● Recommended size: recommended size for vertical videos is 1200 by 1900p and for horizontal videos, this becomes 1280 by 1024p.
● Minimum width: It must be 32 by 32 pixels.
● Supported aspect ratios: Twitter supports aspect ratio ranging from 1:2.39 to 2.39:1.
● Recommended specs: Maximum length of the videos should be 140 seconds. The file size should be less than 512 MB with a frame rate of 40fps.

07Pinterest
● Recommended size: The sizes for square videos are recommended to be 600 by 600p and for vertical; it should be 600 by 900p.
● Minimum width: It should be not more than 240p.
● Supported aspect ratios: Pinterest supports aspect ratios of 1:1 in square mode and 9:16 in vertical modes.
● Recommended specs: The file formats to be added are MOV and MP4 with a frame rate of 25fps. The maximum length and file size can be 30 minutes and 2 GB respectively.

08TikTok
TikTok made the creation and editing of videos easy. On this platform you can also easily share your created videos.
● Recommended size: The recommended size of the TikTok videos is 1080 by 1920p.
● Minimum width: It must be 540 by 960 or 960 by 540 pixels approximately.
● Supported aspect ratios: TikTok supports the aspect ratio of 9:16, 16:9 and 1:1.
● Recommended specs: The recommended file formats are MOV and MP4 with a maximum file size of 500 MB. The maximum length of the videos could be 60 seconds but it is recommended to keep it 15 seconds.

Part 4 5 Tips for Creating Better Vertical Videos for Social Media
Days are gone when vertical video were said to be shameful content. These days vertical videos are widely used and they also have a market on social media. But before you are creating these videos vertically, you need to be very careful about the things. Here are some tips that can make your vertical videos even better:
Aspect ratios: The Aspect ratio for social mediaplays a major role in the success of the videos. This is the reason why aspect ratios are must to understand. As far as vertical videos are concerned it can be said that the aspect ratio can be anything just greater than 1:The most recommended aspect ratio for vertical video is 9:16 as it covers the whole screen and also it is more immersive.
Stay closer to the subjects: When you are shooting your videos in a vertical frame then it can make easier for you to stay closer to your subjects. As people will be scrolling through the application then your video will be at the center. Sometimes, these videos are cut awkwardly. If you shoot the video properly then you can keep yourself away from such issues.
Grab the attention: users on social media spend no time to switch to another content or other version of the particular content. This is why it becomes so important to catch the attention of your viewers immediately. Try to keep the first couple of moments exceptionally engaging. This will boost the attention of the audience and also make them stay on your video.
Rule of third can benefit you: If you are wishing to follow this rule then it is important to know the reason behind this rule. This rule means that you should not keep the subject or object directly in front of the frame. This can look ugly and will not suit every time. Instead of this, you can make the use of imaginary vertical and horizontal lines to create better and interesting composition. This will make you frame divided into thirds. Your subject can be placed on these lines or in between the lines where they are meeting. You can get the feature of using the grid as a guide in most of the cameras and phones.
Using the tools: In order To grab the viewer’s attention it is essential that you are using the right tools. No matter of the kind of the video you are creating you can use the latest tools from wondershare. Wondershare Filmora Video Editor is the two tools that are highly in demand these days due to their exceptional features. Here are some of them:
For Win 7 or later (64-bit)
For macOS 10.12 or later
● **Filmora:**This is a fun to use tool that has so many exceptionally amazing features. It simplifies its features so that you can save your effort and time. It is completely efficient so you can create videos effortlessly and with breakthrough. You may also get creative titles, filters, transitions, etc. Color grading and speed control also make the tool worth using. You can enjoy other features like social import, tilt shifting, audio mixer, screen recording, auto crop and much more.
● **Filmora pro:**This one is for the professional personthat is not completely easy to use but you can enjoy the latest and advanced features. Being highly customizable this gives you several features through which you can get a better control on your videos.
Key Takeaways from This Episode
● In the present scenario there is no such person who is unaware of importance of social media. Social media platforms are widely used for various purposes and one of them is marketing the brands and products.
● Apart from the text content, video content is liked by the users and customers more. This is the reason why marketers go for visual content. Also it is essential to have a special focus on all the important aspects of making a video.
● Various things of making a perfect video include of dimensions, sizes, quality of the visualization and aspect ratios. It is important to know that Social media video aspect ratiosmay vary from different platforms. You can use latest tools to make your videos more interesting and engaging.
These days, people are relying on social media to grab the attention of their audience but this is not possible without the correct creation of the videos. That’s how we will start on talking about Social Media Aspect Ratio.
In this article
01 [Which Platform Do You Want to Optimize Your Video For? Will It Be YouTube, Facebook or Instagram?](#Part 1)
02 [Why is It Important to Get Social Media Video Sizes Right?](#Part 2)
03 [What Aspect Ratio Should Be Selected for Different Application Scenario?](#Part 3)
04 [5 Tips for Creating Better Vertical Videos for Social Media](#Part 4)
Part 1 Which Platform Do You Want to Optimize Your Video For? Will It Be YouTube, Facebook or Instagram?
Videos have become the great tool nowadays in order to get your brand’s conversion higher. The reason behind this is people feel more connected and engaged in the videos rather than text content. Moreover, it is more important to know that videos get about 135% more reach on Facebook and Instagram. On Twitter these video contents get 6 times more retweeted. However, specs and Social Media Aspect Ratio get a constant change. So, it is important to keep changing the sizes and video aspects as per the demands. No matter the videos are on YouTube, Facebook or Instagram, if they will not stand out on all the guidelines then they will lose the reach.
Part 2 Why is It Important to Get Social Media Video Sizes Right?
When you are creating video content to promote your brand, then it becomes necessary that you manage the things to be right. There are so many things that needed to be considered and here are some of them:
● You will need to make sure that the images and the videos you are using do not have pixilation issues. It may cause them look awkwardly stretching.
● If the size of the images and videos will not be correct then it can cut down some or important message that you want to convey.
● Being familiar with the correct size of videos and images makes you capable of uploading them on any social media channel. This can help boost the engagement of the audience.
● Correct sizing can also help you at the long run as this makes you ready for any network on which you will need to post the images and videos.
Part 3 What Aspect Ratio Should Be Selected for Different Application Scenario?
It is vital to select the best aspect ratio for social mediaplatforms to make the videos get a more reach and engagement. Here are the some important factors that are essential to select for different applications:
01Instagram
Instagram videos get a special reach so it is worth to say that these videos are a must invest.
● Recommended size: The most recommended sizes of Instagram videos are 1080 by 1080p and 1080 by 1920 p.
● Minimum width: The minimum width must be around 600 by 600p.
● Supported aspect ratios: You can upload videos of aspect ratios from 16:9 to 9:16.
● Recommended specs: The videos must be in MOV or MP4 format. The maximum and minimum file sizes are 4 GB and 30 MB respectively. Also your video must not exceed 60 seconds in length and the frame rate should be 30fps.
02Facebook
Videos on Facebook appear in several formats. All the formats do have almost similar requirements but at some times it may vary.
● Recommended size: The most recommended size for posting videos on Facebook is 1280 by 720p. You can post feed videos, in-stream ad videos, etc. in the recommended size. Carousel videos are posted in the size of 1080 by 1080p.
● Minimum width: It must be minimum 600p.
● Supported aspect ratios: Here you can post your video of aspect ratio varying from 4:5, 2:3, 9:16 and 1:1.
● Recommended specs: The file size on Facebook should not exceed 4GB. The formats that can be used are MOV and MP4 with the frame rate of 30fps. Also the length of videos should be maximum 240 minutes or less.
03YouTube
YouTube is a larger platform than Facebook and Instagram. This is the reason it allows a number of video sizes to upload in.
● Recommended size: The most recommended size to upload videos on YouTube is 1920 by 1080p but it also allows uploading videos in 2560 by 1440p and 3840 by 2160p.
● Minimum width: YouTube allows a minimum width of 426 by 240p.
● Supported aspect ratios: On YouTube the supported aspect ratios are 16:9 and 4:3.
● Recommended specs: The maximum length of the video must be 12 hours long and the file size must not exceed 128 GB. The formats that can be used are MOV, MP4, AVI, MPEG4, FLV, etc.
04LinkedIn
● Recommended size: The most recommended size for LinkedIn videos is 1920 by 1080p.
● Minimum width: The minimum width accepted for LinkedIn videos is 360p.
● Recommended specs: The maximum length of LinkedIn videos must be less than 10 minutes. The file size should not exceed 5 GB with a maximum frame rate of 60fps.
05Snapchat
● Recommended size: You should upload videos on Snapchat having a size of 1080 by 1920p. This is recommended for all the video types that are being uploaded on Snapchat.
● Supported aspect ratios: Snapchat supports aspect ratios of 9:16 and 16:9.
● Recommended specs: For video ads the maximum file size should be 32 MB and for regular videos, the size could be increased to 1GB. The file formats that are accepted include MOV, MP4 or encoded.
06Twitter
Twitter allows horizontal and vertical videos. Here are the required assets for them:
● Recommended size: recommended size for vertical videos is 1200 by 1900p and for horizontal videos, this becomes 1280 by 1024p.
● Minimum width: It must be 32 by 32 pixels.
● Supported aspect ratios: Twitter supports aspect ratio ranging from 1:2.39 to 2.39:1.
● Recommended specs: Maximum length of the videos should be 140 seconds. The file size should be less than 512 MB with a frame rate of 40fps.
07Pinterest
● Recommended size: The sizes for square videos are recommended to be 600 by 600p and for vertical; it should be 600 by 900p.
● Minimum width: It should be not more than 240p.
● Supported aspect ratios: Pinterest supports aspect ratios of 1:1 in square mode and 9:16 in vertical modes.
● Recommended specs: The file formats to be added are MOV and MP4 with a frame rate of 25fps. The maximum length and file size can be 30 minutes and 2 GB respectively.
08TikTok
TikTok made the creation and editing of videos easy. On this platform you can also easily share your created videos.
● Recommended size: The recommended size of the TikTok videos is 1080 by 1920p.
● Minimum width: It must be 540 by 960 or 960 by 540 pixels approximately.
● Supported aspect ratios: TikTok supports the aspect ratio of 9:16, 16:9 and 1:1.
● Recommended specs: The recommended file formats are MOV and MP4 with a maximum file size of 500 MB. The maximum length of the videos could be 60 seconds but it is recommended to keep it 15 seconds.
Part 4 5 Tips for Creating Better Vertical Videos for Social Media
Days are gone when vertical video were said to be shameful content. These days vertical videos are widely used and they also have a market on social media. But before you are creating these videos vertically, you need to be very careful about the things. Here are some tips that can make your vertical videos even better:
Aspect ratios: The Aspect ratio for social mediaplays a major role in the success of the videos. This is the reason why aspect ratios are must to understand. As far as vertical videos are concerned it can be said that the aspect ratio can be anything just greater than 1:The most recommended aspect ratio for vertical video is 9:16 as it covers the whole screen and also it is more immersive.
Stay closer to the subjects: When you are shooting your videos in a vertical frame then it can make easier for you to stay closer to your subjects. As people will be scrolling through the application then your video will be at the center. Sometimes, these videos are cut awkwardly. If you shoot the video properly then you can keep yourself away from such issues.
Grab the attention: users on social media spend no time to switch to another content or other version of the particular content. This is why it becomes so important to catch the attention of your viewers immediately. Try to keep the first couple of moments exceptionally engaging. This will boost the attention of the audience and also make them stay on your video.
Rule of third can benefit you: If you are wishing to follow this rule then it is important to know the reason behind this rule. This rule means that you should not keep the subject or object directly in front of the frame. This can look ugly and will not suit every time. Instead of this, you can make the use of imaginary vertical and horizontal lines to create better and interesting composition. This will make you frame divided into thirds. Your subject can be placed on these lines or in between the lines where they are meeting. You can get the feature of using the grid as a guide in most of the cameras and phones.
Using the tools: In order To grab the viewer’s attention it is essential that you are using the right tools. No matter of the kind of the video you are creating you can use the latest tools from wondershare. Wondershare Filmora Video Editor is the two tools that are highly in demand these days due to their exceptional features. Here are some of them:
For Win 7 or later (64-bit)
For macOS 10.12 or later
● **Filmora:**This is a fun to use tool that has so many exceptionally amazing features. It simplifies its features so that you can save your effort and time. It is completely efficient so you can create videos effortlessly and with breakthrough. You may also get creative titles, filters, transitions, etc. Color grading and speed control also make the tool worth using. You can enjoy other features like social import, tilt shifting, audio mixer, screen recording, auto crop and much more.
● **Filmora pro:**This one is for the professional personthat is not completely easy to use but you can enjoy the latest and advanced features. Being highly customizable this gives you several features through which you can get a better control on your videos.
Key Takeaways from This Episode
● In the present scenario there is no such person who is unaware of importance of social media. Social media platforms are widely used for various purposes and one of them is marketing the brands and products.
● Apart from the text content, video content is liked by the users and customers more. This is the reason why marketers go for visual content. Also it is essential to have a special focus on all the important aspects of making a video.
● Various things of making a perfect video include of dimensions, sizes, quality of the visualization and aspect ratios. It is important to know that Social media video aspect ratiosmay vary from different platforms. You can use latest tools to make your videos more interesting and engaging.
Also read:
- Updated Bring Your Ideas to Life Best 3D Animation Apps for Mobile (Free)
- Unlock Cinematic Magic Free Slow Motion Video Editing with Filmora
- Updated FCPX Not Your Cup of Tea? Discover These 10 Alternatives
- From Jittery to Smooth Video Stabilization in Premiere Pro Made Easy
- Cutting Through the Noise Final Cut Pro vs LumaFusion Comparison
- New Best Free Online Video Editors for Merging Clips
- Virtualdub Alternatives Which One Is Right for You ?
- Master Final Cut Pro X 40 Essential Keyboard Shortcuts
- The Ultimate Guide to Downloading Instagram MP3s
- 2024 Approved Add Wow to Your Videos Best Animated Text Apps for Phone
- Updated Best Movie Trailer Editing Tools for Windows and macOS
- Updated From Still to Motion Mastering Time Lapse Video Creation with Software
- From Boring to Brilliant Best Apps for WhatsApp Status Videos
- Upgrading Your Edit Why Final Cut Pro Outshines Final Cut Express
- From Novice to Pro The Definitive Wav Converter Handbook
- New Bring Your Ideas to Life Top 7 Animation Drawing Tools
- Revolutionize Your Videos Top 10 Free Green Screen Apps for Mobile
- 2024 Approved Filmora Coupon Hunters Guide Uncover the Latest Deals and Discounts
- Updated Looking for a Free Video Editor without a Watermark on an Android Device? In This Article, I Will Introduce some of the Best Free Video Editing Apps for Android without Watermark, Keep Reading
- New Unleash Your Creativity The Best Free and Paid Android Video Editors
- Get VN Video Editor for Mac or Get Alternatives to Edit on Mac
- 2024 Approved From Footage to Film Mastering the Art of Cinematic Editing in Final Cut Pro X
- Jaycut Essentials Learn How to Use Free Online Video Editing Software Like a Pro
- The Ultimate Guide Best Android Video Editor Apps for Chromebook
- Create Epic Gaming Intros Best Tools for Windows and macOS
- New 6 Top-Notch Audio Converters for Seamless File Conversion
- Updated Calculate Image Dimensions with Ease A Ratio Finder
- 2024 Approved Free Vs. Paid The Best 3D Animation Software for Creators
- Updated 8 Video Editing Software That Wont Slow You Down
- 8 Quick Fixes Unfortunately, Snapchat has Stopped on ZTE Blade A73 5G | Dr.fone
- Is GSM Flasher ADB Legit? Full Review To Bypass Your OnePlus 12FRP Lock
- MP4 won't play on my Motorola Razr 40
- Can I Bypass a Forgotten Phone Password Of Itel S23+?
- In 2024, Here Are Some Reliable Ways to Get Pokemon Go Friend Codes For Realme 11 5G | Dr.fone
- Fix App Not Available in Your Country Play Store Problem on Samsung Galaxy S23 Ultra | Dr.fone
- Top 10 Fixes for Phone Keep Disconnecting from Wi-Fi On Oppo Find N3 Flip | Dr.fone
- The Easiest Methods to Hard Reset Samsung Galaxy A14 5G | Dr.fone
- In 2024, 4 Feasible Ways to Fake Location on Facebook For your Realme C33 2023 | Dr.fone
- How to Upgrade Apple iPhone 6s to the Latest iOS Version? | Dr.fone
- How To Remove Passcode From Apple iPhone 11? Complete Guide | Dr.fone
- In 2024, How to Remove a Previously Synced Google Account from Your Infinix Note 30 VIP
- How to Transfer Text Messages from Nokia G310 to New Phone | Dr.fone
- How to unlock a disable iPhone 7 using macOS finder
- How to Change/Fake Your Lava Blaze 2 5G Location on Viber | Dr.fone
- 3 Facts You Need to Know about Screen Mirroring Infinix Smart 8 Plus | Dr.fone
- In 2024, How to Unlock Samsung Galaxy S24 Ultra Phone without Google Account?
- Overview of the Best Infinix Smart 8 Pro Screen Mirroring App | Dr.fone
- Oppo A38 ADB Format Tool for PC vs. Other Unlocking Tools Which One is the Best?
- In 2024, Top 5 Viral Video Marketing Techniques For Big Sellers
- How to Use Phone Clone to Migrate Your Nokia 150 (2023) Data? | Dr.fone
- In 2024, 3 Effective Ways to Unlock iCloud Account Without Password On iPhone 15
- Title: 2024 Approved Elevate Your Brand 20 Professional Adobe Premiere Title Templates Free to Download
- Author: Giselle
- Created at : 2024-04-25 07:34:53
- Updated at : 2024-04-26 07:34:53
- Link: https://ai-vdieo-software.techidaily.com/2024-approved-elevate-your-brand-20-professional-adobe-premiere-title-templates-free-to-download/
- License: This work is licensed under CC BY-NC-SA 4.0.
